She Makes and Bakes
  • Home
  • About
  • Ramblings
  • Recipe Index
  • What We're Eating
  • High-Altitude Baking

Lemon Graham Cracker Bars

9/23/2012

 
Picture
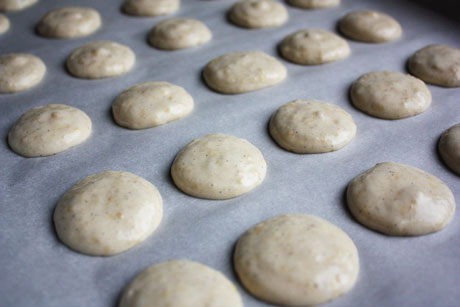
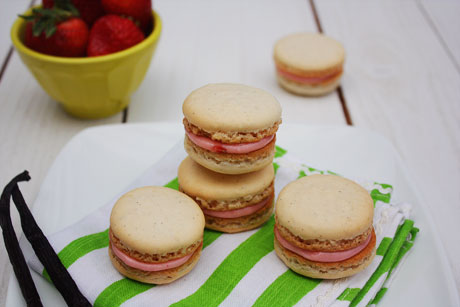
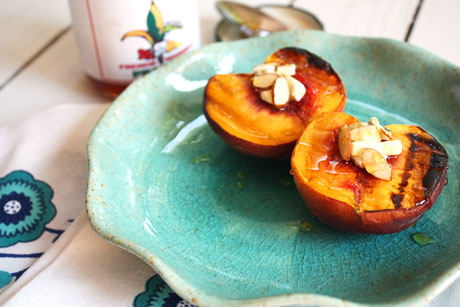
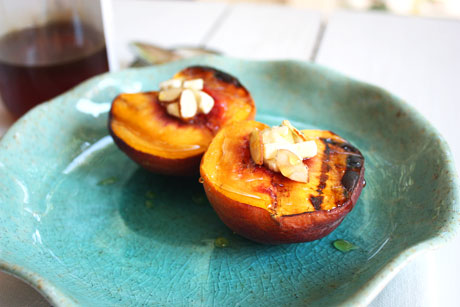
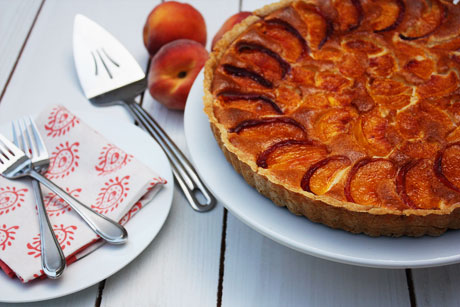
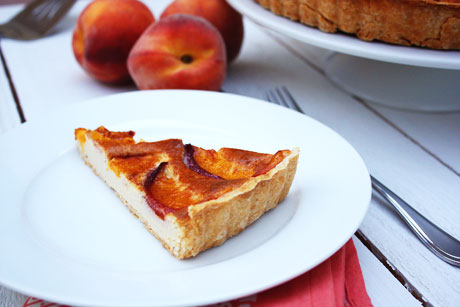
Whew! What a weekend. In two weeks, I'll be flying across the Atlantic Ocean for the second time this year to spend two weeks in France. I cannot wait to go to the Mecca of the food world (as far as I'm concerned), but I have a lot of things to do until then. Including getting a lot of blog posts done so you guys have something to read while I'm there. Anyway...

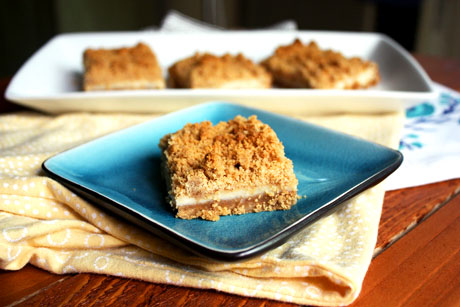
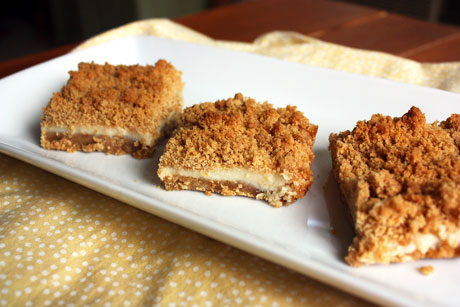
This is a perfect dessert when you're super busy but you want something really tasty. Think lemon pie with graham cracker crust in bar form that you can make in less than 15 minutes. I don't even like lemon and I really liked these bars. Plus, I think you could substitute key lime juice for the lemon juice and have key lime graham cracker bars. That sounds amazing...I'm off to try the variation!  

Lemon Graham Cracker Bars Recipe
Makes a 9x9 pan
Print this recipe

14 ounces sweetened condensed milk
1/2 cup lemon juice
1 1/2 cups graham cracker crumbs
3/4 cup all purpose flour
1/3 cup packed brown sugar
1/2 teaspoon baking powder
Pinch of salt
1/2 cup butter melted

Preheat your oven to 375 degrees.

In a small bowl, mix together the milk and lemon juice.

In a large bowl, combine together the graham cracker crumbs, flour, brown sugar, baking powder, and salt. Add the melted butter and stir until the mixture is wet and crumbly.

Press half of the graham cracker mixture into a greased 9x9 pan. Pour the lemon mixture over the crust, and scatter the remaining crumbs on top. Bake for 20-25 minutes until lightly browned. Cool before slicing. Store in fridge.  

Source: Taste of Home Fall Baking Cookbook
Picture

Caramel Apple Cupcakes

9/18/2012

 
Picture
So while I'm not excited about fall temperatures and shorter days, I am excited for fall baking. It's one of my favorite times of the year to be in the kitchen. And last weekend was no exception. I got to make one of my favorite cupcakes: caramel apple cupcakes.

These have an apple spice cake, caramel buttercream, and caramel drizzled on top. I happen to think they're beautiful and tasty. The cake recipe below is for high altitude. If you don't live at high altitude, I recommend you use a spice cake recipe or your favorite vanilla cake recipe and then doctor it up. You also can use a boxed spice or vanilla cake mix. If you use vanilla cake, be sure to add the apples and spices. If you're using a spice cake, add in the apples. The caramel buttercream is perfect for all altitudes, as is the caramel drizzle. Also note that the recipe below is for 12 cupcakes. If you use a recipe or a box mix that makes 24 cupcakes, double the apples/spices that you add. It sounds kinda complicated, but I promise it's not. I usually make the cupcakes one day and make the frosting and decorate the next day to split it up a bit. These are well worth the effort and the time spent in your kitchen!  
Picture
Caramel Apple Cupcakes Recipe
Makes 12 cupcakes
Print this recipe

Note: This cake recipe is for high altitude. If you're at regular altitude, use your favorite vanilla cake recipe and add in the apples and spices or your favorite spice cake recipe and add in the apples. If the recipe or box mix makes 24 cupcakes, double the apple/spice amounts indicated below.

For the cupcakes (highaltitude):
1/2 cup butter
3/4 cup sugar
2 eggs
1 1/4 teaspoons baking powder
1/4 teaspoon salt
1 teaspoon cinnamon
1/8 teaspoon nutmeg
1/8 teaspoon allspice
3/4 cup milk
1 1/2 cup cake flour
1/2 green apple, peeled and diced

For the frosting (any altitude):
1/2 cup butter
8 ounces brown sugar (about 1 cup + 2 tablespoons packed)
1/4 cup milk
1/8 teaspoon baking soda
1/2 tablespoon light corn syrup
2 cups powdered sugar

For the caramel sauce (any altitude):
Caramel sauce for ice cream or
5 caramel candies
1-2 tablespoons cream

To make the cupcakes, preheat your oven to 375 degrees and line a muffin pan with 12 liners.

In a mixing bowl, cream together the butter and sugar until light and fluffy. Add in the eggs until incorporated. Mix in the baking powder, salt, cinnamon, nutmeg, and allspice. In two additions, add in the flour alternating with the milk. Mix until just incorporated and then fold in the diced apples.

Fill the cupcake liners with about 1/4 cup of batter or about 3/4 of the way full. Bake for 15 minutes or until a toothpick comes out clean. Let cool.

While the cupcakes are baking and cooling, make the frosting. In a medium saucepan, melt the butter over medium heat. Add in the brown sugar and bring to a boil while stirring. Stir in the milk, baking soda, and corn syrup and bring to a boil again. Remove from heat and cool completely (about an hour). Transfer to a mixing bowl, add the powdered sugar, and mix on medium speed until it's creamy and smooth.

Transfer the frosting to a piping bag and pipe onto the cupcakes. Drizzle on the premade caramel sauce or make your own by microwaving the caramel candies with cream until melted and smooth.

Frosting recipe from Big Book of Cupcakes
Picture
You may also like:
Loading...

Apple Cake with Browned Butter Rum Sauce

9/16/2012

 
Picture
Oh boy. So this apple cake is pretty awesome, but what really takes the...er...cake is the sauce. But first, we'll talk about the cake. It's a simple cake made with shredded apples and pecans. It's moist and flavorful with a lot of cinnamon and a little almond extract. It's fall in a cake, and it's really easy to make. No mixer required.  

But the sauce...oh the sauce. It's browned butter, which if you've never had, is amazing. It's nutty and awesome. In addition to the browned butter are vanilla and rum extracts. It's a warm, friendly, comforting sauce. I wouldn't mind curling up with a book and this sauce. I realize that sounds super weird, but it's that good. Paired together, it's the perfect easy fall cake. And, since the sauce uses rum extract instead of rum, it's a cake you can serve to everyone.

I halved the recipe and ended up with thinner slices, but it was perfect. If you're serving more people, I would make the full recipe so you have a taller cake.
Picture
Apple Cake with Browned Butter Rum Sauce Recipe
Makes a 9x9 pan
Print this recipe

For the cake:
4 cups shredded apples
2 cups sugar
2 eggs
1/2 cup canola oil
1 teaspoon almond extract
2 cups all purpose flour
2 teaspoons baking powder
1 teaspoon salt
1 teaspoon cinnamon
1/2 cup chopped pecans

For the sauce:
1/2 cup butter
1 cup sugar
2 tablespoons all purpose flour
1/8 teaspoon salt
1 cup water
2 teaspoons vanilla extract
1/2 teaspoon rum extract

Preheat your oven to 350 degrees.

To make the cake, in a large bowl combine the shredded apples and the sugar. (I shredded mine using a cheese grater, but you also could chop them finely.) Let sit for 5-10 minutes. In a small bowl, whisk together the eggs, canola oil, and almond extract. Add to the apple mixture and stir to combine. Combine the flour, baking powder, salt, and cinnamon. Pour into the apple mixture and stir until combined. Add in the pecans and stir.

Spray a 9x9 pan with cooking spray. Pour the batter into the pan and bake for 35-40 minutes or until a toothpick comes out clean.

To make the sauce, in a medium saucepan melt the butter. Stir and watch as it gets foamy and then starts to turn brown. When it turns into a dark honey color and smells nutty, quickly stir in the sugar, flour, and salt. Gradually add the water. Bring to a boil and cook and stir for 2 minutes. Remove from heat and add in the extracts. Serve warm.  

Source: Taste of Home Fall Baking Cookbook
Picture

Apple Cinnamon Treats

9/12/2012

 
Picture
Even though I'm not excited about summer being over, I am excited about fall baking. Cinnamon is one of my favorite spices, and I love pumpkin and apples. So to start off the fall baking season, I decided to make something simple and classic...with a fall twist. I love rice krispies treats, so I decided to take the concept and spin it around a bit. I used apple cinnamon cheerios instead of rice krispies and added some more apples and cinnamon to beef up the flavors. I also did something new to the apples...I shredded them with my cheese grater and then squeezed the juice out of them. I wanted to apple flavor without all the moisture. Success. When I was cooking the treats, the hubs said it smelled like apple jacks. It tempted him so much that he had a treat after dinner...pretty unusual for him! These are such a great and quick dessert or snack to celebrate the start of fall...or mourn the end of summer if you're like me.

Apple Cinnamon Treats Recipe
Makes one 9x9 pan
Print this recipe

1 apple, peeled and cored
1 (10 ounce) bag of marshmallows
1/2 cup butter
1/2 teaspoon cinnamon
8 cups Apple Cinnamon Cheerios

Spray a 9x9 pan with cooking spray.

Shred your peeled and cored apple using the large holes on a cheese grater. Gather up your shredded apple and squeeze the juice out of it.

In a large saucepan over medium heat, combine the shredded apples, marshmallows, butter, and cinnamon. Stir until the marshmallows have completely melted. Add in the cereal in batches until incorporated. Spoon into the greased pan and use wet hands to push the cereal into place. Let cool completely before cutting into squares.
Picture

Vanilla Bean Strawberry Macarons

9/5/2012

 
Picture
Macarons, the lovely little French cookie. Honestly, I had never even heard of these until a few years ago. And, I had never had one until I made chocolate macarons myself. In fact, I wasn't even sure that I made them correctly until I went to New Orleans a few months later and tried a variety of flavors there. Turns out, I made them correctly. Phew. Macarons are crisp, light, delicate cookies that lend themselves to so many colors and flavors. The combinations are endless. 

A lot of people are going to scare you and tell you how hard they are to make. Or they're going to assume they're hard to make. Well, they're not. Just because bakeries charge $3 per cookie does not mean you can't make them at home. In fact, you should make them at home because they charge so much! You do have to have a scale though because the measurements must be precise (hence the reason that the recipe is all by weight below instead of volume). So, I beg of you...try to make these yourself. They're not as daunting as they seem, and even if they may not look the prettiest on your first try, they'll still taste good. Practice makes perfect, which gives you a great excuse to make and eat more cookies! 

To help you with your journey, I took a few pictures of the process. If you read this and are still scratching your head (hopefully that's not many of you), I found this post helpful, too.  

Vanilla Bean Strawberry Macarons Recipe
Makes about two dozen sandwiches
Print this recipe

*Note: If you're like me and don't always plan ahead, you can microwave your egg whites to age them. Just place them in a microwave safe bowl and microwave on high for 10 seconds.

For the macarons:
110 grams almonds (blanched or slivered)
200 grams powdered sugar
100 grams egg whites (about 3 egg whites), aged at room temperature for 12-24 hours*
1 vanilla bean, split lengthwise
1/4 teaspoon vanilla extract (optional)
50 grams granulated sugar

For the strawberry filling:
2 tablespoons butter
1/2 teaspoon vanilla
Pinch salt
3 strawberries, hulled
1 cup powdered sugar

To make the macarons, line two large sheet trays with parchment paper or a silicone baking pad.

Next, combine the almonds and powdered sugar in a food processor and pulse until finely ground and blended.
Picture
In the bowl of a stand mixer, add the egg whites and whisk on medium high speed until foamy (this incorporates air into the egg whites). Scrape the seeds out of the vanilla bean pod and add them to the egg whites along with the vanilla extract if using. Increase the mixer to high and slowly add the granulated sugar while mixing until the whites are smooth and shiny and stiff peaks form.  
Picture
Gently add the ground almond mixture into the mixing bowl with the whites.
Picture
Using a wide rubber spatula, gently but quickly fold the almond mixture into the egg whites. You want to be gentle so that you don't deflate the egg whites. There should be no streaks in the batter, and it should be thick and flow from the spatula when you lift it. Transfer the batter to a piping bag fitted with a coupler and a plain round tip (like a Wilton #12). Carefully pipe the batter into small circles on the prepared sheet pans. You want them to be about 1 to 1.5 inches in diameter and spaced an inch apart from each other. The more you practice this piping, the easier it'll get and the better the rounds will look. Let them sit at room temperature for one hour until a hard shell forms (don't skip this step).
Picture
Preheat your oven to 300 degrees. After the macarons have sat for an hour, bake them for 12-18 minutes. You'll know that they're done when they develop the "feet" on the bottom and you can easily pick them up off the tray. If they stick to the tray, crack on the tray, or do not remain intact, put them back in the oven for another couple of minutes. Once you can lift one off the tray, transfer the entire tray to a wire rack to cool before removing the rest of the cookies. 

To make the filling, add the butter, vanilla, salt, and strawberries in a food processor. Pulse until everything is combined. Add in the powdered sugar and pulse until mixed and thick enough to pipe onto cookies. If needed, add more powdered sugar.  

To assemble the cookies, match the cookie shells together based on shape and size. Place the frosting in a piping bag fitted with a round tip. Pipe a dollop of the strawberry filling on the flat side of one cookie and press the other cookie on top until the filling shows on the edges. 

Store cookies in a covered container.  

Cookie recipe from Annie's Eats
Filling a She Makes and Bakes recipe 
Picture

Peaches Castellano

8/30/2012

 
Picture
It's the last day of August, but I had to share one more peach recipe with you. I clipped this recipe out of a Harry & David magazine at least one or two years ago but I had never made it until last weekend. Why oh why. First of all, the peaches are grilled, which intensifies the flavor. Then you add blue cheese and almonds, which gives it a savory and earthy flair and crunch. And then last but certainly not least, they are topped with a drizzle of honey, which brings the sweetness home. These are a simple dessert but oh so good. I highly recommend you make them before peach season is over. Quick! 

Peaches Castellano Recipe
Makes 6 servings
Print this recipe

Note: You can easily scale this recipe down by just putting a few pinches of the blue cheese and almonds on each peach half and drizzling with honey. I know I don't need 12 of these peach halves tempting me!

6 peaches, halved and pitted
12 tablespoons blue cheese, room temperature
12 tablespoons almonds, chopped or sliced
Honey

Preheat your grill to medium high. Grill the peaches cut side down until marked and lightly cooked. Arrange the peaches cut side up and fill each center with the blue cheese and almonds. Drizzle honey on top and serve immediately.

Source: Harry & David
Picture

Roasted Peach Scones

8/23/2012

 
Picture
After making strawberry scones and greatly enjoying them, I figured they were adaptable to other fruits as well. Since I've been loving peach season this year, I wanted to include them in scones. Peaches have a lot of juice in them, so I decided to roast them first to intensify the flavor and dispel some of the juice. Best. Decision. Ever. These scones are just as good as the strawberry ones, and I'm very happy to have another scone variation to try. I was never a big scone person, but I'm quickly becoming one!

This is a wet dough, so don't worry when you make it. If you aren't going to eat all of these right away, I recommend you let them cool, wrap the uneaten ones in plastic wrap, and place them in a freezer bag in the freezer. When you want a scone, take one out of the freezer and defrost it. It'll still have a little crunch to the outside and will have a better texture than if it sits on the counter in a bag.

Roasted Peach Scones Recipe
Makes 8 wedges
Print this recipe

To roast the peach:
1 medium peach, peeled
2 tablespoons sugar
2 tablespoons hot water

For the scones:
2 cups all-purpose flour
1 tablespoon baking powder
3 tablespoons sugar
1/2 teaspoon salt
5 tablespoons cold butter
1 cup heavy cream

Preheat your oven to 400 degrees. 

Cut the peeled peach into bite-size chunks and place in a single layer on a small sheet pan. Combine the sugar and hot water and pour over the peaches. Place in the oven and roast for about 15 minutes or until the juices are dissolved. Let cool.  

Increase the oven temperature to 425 degrees.

Combine the flour, baking powder, sugar, and salt into a large bowl. Cut your cold butter into small pieces and then mix with a pastry blender or two forks until it resembles coarse crumbs. Gently fold in the roasted peaches. Add in the cold cream and shape the dough into a ball. Form it into a flat circle about one inch thick on your counter. Cut into 8 wedges. Place the wedges on a greased baking sheet. Brush them with an egg wash (1 egg mixed with 1 tablespoon water), melted butter, or cream; sprinkle with turbinado sugar; and bake for 12-15 minutes until light brown. Let cool on a wire rack for about 10 minutes before serving.
 
Adapted from A Cozy Kitchen
Picture

Peach Almond Muffins

8/21/2012

 
Picture
A few weeks ago, I noticed that there were no muffin recipes on the blog. I'm not a big muffin person, but I wanted to have at least a couple! Then I got a great birthday present: the Best-Ever Book of Cupcakes & Muffins. It's a great cookbook with beautiful pictures of every recipe and great variety. I can't wait to work my way through the book. Another beauty of the book is that it's from the UK, so it has international measurements. Score for my international friends! Since I am loving peach season in Colorado right now, I decided to make the peach almond muffins.

These are great muffins. They rise nicely, they're moist (sorry if you hate that word), have a great crumb that's dense without being too dense, and they're just sweet enough. The pops of juicy peach throughout the muffin give great texture and flavor, as do the almonds. This truly is a muffin--not a cupcake without frosting that we'll call a muffin to make it legit to eat it at breakfast (but no one actually does that, right?). I was a little worried while I was making them because the batter was extremely thick, but they came out wonderfully. I'll definitely be adding these to the rotation. If you're at high altitude, see the note below. The only change is to decrease the baking powder.

By the way, the recipe says it makes 8 muffins. I got 11 out of it. I'm not sure if the baking cups in the UK are bigger than US muffin tins. If you're in the UK, you may only get 8 muffins.

Peach Almond Muffins Recipe
Makes 10-11 muffins
Print this recipe

*Note: If you live at high altitude, decrease the baking powder to 2 1/4 teaspoons and keep everything else the same.

2 large ripe peaches
2 cups (225 g) all purpose flour
1 tablespoon (15 ml) baking powder*
1/2 cup + 3 tablespoons (150 g) sugar
1/4 cup + 4 teaspoons (40 g) ground almonds
2 eggs
6 tablespoons (75 g) butter, melted and cooled
1/4 cup (50 ml) canola oil
4 teaspoons (20 ml) sour cream
1 tablespoon (15 ml) sliced almonds (for the garnish)

Preheat your oven to 350 degrees.

Cut one peach into small pieces for inside the muffins. Cut the other peach into crescent slices for the top and set aside.

In a large bowl, stir together the flour, baking powder, sugar, and ground almonds. In a separate bowl, mix together the eggs, melted and cooled butter, oil, and sour cream. Pour the wet ingredients into the bowl with the dry ingredients. Partly fold in, add the chopped peaches, and continue to fold in until just combined. 

Spoon the batter into a paper-lined muffin tin until the cups are 3/4 full (I put four tablespoons of batter into each cup). Arrange the peach slices on top of the muffins and sprinkle the sliced almonds on top. Bake for 27-29 minutes or until a toothpick comes out clean. Let stand in the pan for a few minutes and then remove to cool. 

Source: Best Ever Book of Cupcakes & Muffins by Carol Pastor 
Picture

PPQ: Peach Kolache

8/11/2012

 
Picture
It's my turn to host Project Pastry Queen this week, and I chose to make peach kolache. Kolache was the kick-off project back in 2010 and something I've always wanted to make. From what I can tell, kolache are sweet, soft Czech or Danish pastries. They're very popular in Texas; I had never heard of them. I knew something was wrong when I made them because the dough is supposed to be sticky and wet. Mine was not. Not even close. My dough was tough and tacky, so I knew something was off. I figured it was a humidity/altitude thing until I was typing this recipe out and saw that I definitely did not add in the warm water. Well, that'll explain the tough dough part. When you make this, make sure you add in all the ingredients. Generally that helps make the recipe good. Other than being a little tough/dry, they were great. They have a really great flavor. I'll definitely be making these again, and this time I'll be sure to add in everything.

Another great thing about this recipe is how versatile it is. You can have sweet or savory variations. I'm looking forward to a peach/strawberry combo as well as a sausage/egg combo. I can tell this is going to be a great recipe!

Peach Kolache Recipe
Yield: 16-18 buns
Print this recipe

For the dough:
2 cups milk
2 1/4 teaspoons active dry yeast
1/2 cup lukewarm water
1/2 cup butter
2 eggs
1 1/4 cups sugar
2 teaspoons salt
8 1/2 cups all purpose flour

For the peach filling:
2 cups pitted and chopped peaches
1 cup peach jam

For the streusel topping:
1/2 cup all purpose flour
1/2 cup sugar
3 tablespoons butter, cut into small pieces and chilled

To make the dough, warm the milk in a medium saucepan set over medium heat until the milk starts to steam and forms a skin. Don't let it boil. Cool for 10-15 minutes until it's 110 to 115 degrees or warm to the touch. Dissolve the yeast in the warm water and let it sit until foamy (5 minutes). Melt the butter and let cool for about 5 minutes.

In a large bowl, combine the eggs, sugar, salt, and butter. Add in the cooled milk and the warm water/yeast. Add in the flour, two cups at a time, mixing in between. Use a wooden spoon or your hands to mix the dough until all the flour is fully incorporated. Don't overwork the dough or it'll be tough. It's going to be a sticky, light dough. Grease a large bowl lightly, and place the dough in the bowl. Cover with plastic, and let it rise until doubled in size (about 1-2 hours). Deflate the dough by pressing on it a couple of times, recover it with plastic wrap, and refrigerate at least four hours or overnight.

To make the filling, combine the chopped peaches with the peach jam.

Grease a 12x17 baking sheet with cooking spray or butter. Shape the dough into 2 1/2 inch diameter balls (they'll be the size of small limes). Arrange the balls on the baking sheet, three across and six down. Using your thumb, press down in the middle of each ball to form a well for the peach filling. Mound one tablespoons or so of the peaches in the middle of the ball. Cover them loosely with plastic wrap and let them rise in a warm place for about 1 hour until doubled.

Preheat your oven to 375 degrees.

To make the streusel topping, mix the flour, sugar, and butter together until crumbly. You can use your hands, two knives, or a pastry cutter to mix the butter. Scatter this over the kolaches before baking.

Bake them for 25-30 minutes until lightly browned on top. Cool for 20 minutes before serving.

Source: The Pastry Queen
Picture

PPQ: Cream Cheese Peach Tart

8/6/2012

 
Picture
I had every intention of posting this recipe on Sunday, but I just couldn't gather the wherewithal to do it after participating in my second triathlon. I was so tired yesterday, and today I'm so incredibly sore. I'm waddling around at work today. Yikes!

Therefore, this week's Project Pastry Queen post is late, but it's still good. We're down to the final four weeks, and I'm excited about these last recipes. This tart was picked by Emily of A Gilt Nutmeg. I have to say that it's not my personal favorite, but the hubs liked it, which was surprising. I took it to work today and had some rave reviews from coworkers. I was expecting a little more of a cheesecake-like filling, and it's more firm than that. It does has great flavor with the cream cheese, mascarpone, peaches, and cinnamon, and it's really pretty. Plus it's not super sweet (which could explain why I didn't like it as much and my husband liked it a lot). I made a few changes to the original recipe:
1. I used a different tart crust recipe (which wasn't that great so I'm not going to share it) because I have an eleven-inch tart pan.
2. Instead of using 5-6 peaches cut in half and scored, I used three peaches cut into slices. 
3. I left the peels on the peaches because I'm lazy.
 
Otherwise I made the recipe exactly as is. If I make it again, I would play around with the filling to make it a little less dense. Maybe one less egg or substitute it out for an actual cheesecake? Now that would be over the top! I realize I haven't exactly sold this recipe, but let me stress that other people absolutely loved it. Be sure to check out Emily's page for the full recipe and the Project Pastry Queen website for everyone's take on it. Next week I'm dishing up some peach kolache (on time)...and let me tell you, it's pretty tasty! Peach season is here friends!    
Picture
<<Previous
Forward>>

     Welcome!

    Cooking is fun and easy at high altitude, but baking can be frustrating. About 90% of my recipes work everywhere, but some are adjusted so us mountain dwellers can enjoy baked goods from scratch. I hope you find great recipes on here for your family, and I'll let you know if any are adjusted for high altitude. 

    Stay Updated!

    Add to your Reader:

    Get new posts delivered to your inbox:

    Enter your email address:

    Delivered by FeedBurner

    Categories

    All
    Appetizers
    Bars
    Beef
    Bread
    Breakfast
    Brownies
    Cake
    Cheese
    Chicken
    Chocolate
    Cinnamon
    Cookies
    Crackers
    Cupcakes
    Dessert
    Do It Yourself
    Drinks
    Fruit
    Ground Beef
    High Altitude
    How To
    Ice Cream
    Italian
    Main Courses
    Mexican
    Muffins
    Oatmeal
    Pasta
    Pastry
    Pie
    Pizza
    Pork
    Project Pastry Queen
    Pumpkin
    Salad
    Sauces
    Side Dishes
    Snacks
    Soup
    Sourdough
    Steak
    Vegetables

    My featured recipes on NoshOnIt

    Some Good Reads!

    Annie's Eats
    Bake at 350
    Climbing Grier Mountain
    Confections of a Foodie Bride
    How Sweet It Is
    I Am Baker
    Macaroni and Chesecake
    Pinch of Yum
    Pink Parsley
    Smells Like Home
    Smitten Kitchen
    Sunny Side Up
    The Curvy Carrot
    The Marvelous Misadventures of a Foodie
    The Pioneer Woman Cooks
All content copyright 2012-2013 She Makes and Bakes.