She Makes and Bakes
  • Home
  • About
  • Ramblings
  • Recipe Index
  • What We're Eating
  • High-Altitude Baking

Chicken Parmesan Sandwiches

2/21/2013

 
Picture
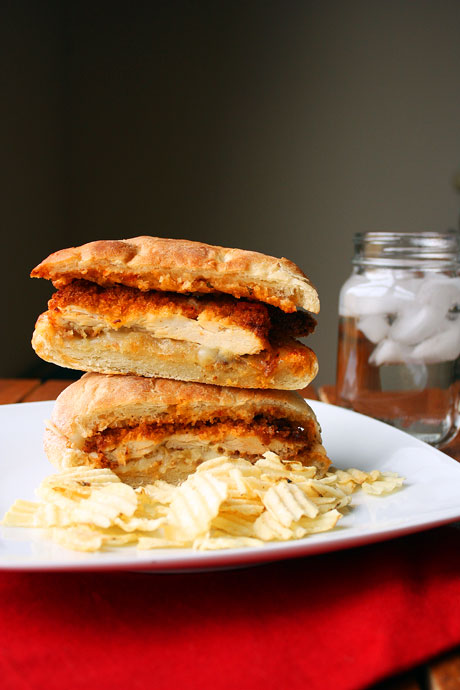
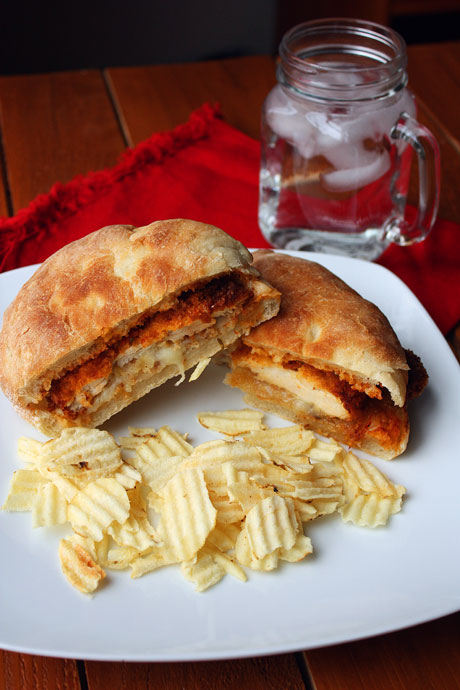
I don't know if you ever read the What We're Eating page, but I had these sandwiches listed on there for about 3 weeks in a row. Not because we loved them that much (although we did) but because I never could get around to making them. So when I finally did, I was so happy. They were amazing! As I've mentioned many times before, my husband hates pasta, so I can never get away with chicken parmesan and spaghetti. So just like I fill my meatball craving with meatball sandwiches, I can now fill my chicken parm craving with these sandwiches. It's a win win (especially because I love bread!).

I pan fried these but you could just as easily bake them (and they'd be healthier, too). That's what I'll probably do next time, but I was in the mood to use some hot oil. I pounded a large chicken breast out pretty thin, and that was enough for 2 large sandwiches...and we both only ate half of our sandwich. Next time, I'll just make one sandwich that we can split with a side or salad. I also highly recommend you make these with homemade ciabatta. It really took it over the top! 

Chicken Parmesan Sandwiches Recipe
Makes two sandwiches
Print this recipe

1 large chicken breast
1/4 cup all purpose flour
Salt and pepper
1 egg, beaten
1 cup panko breadcrumbs
1/4 teaspoon garlic powder
1/4 teaspoon onion powder
Vegetable oil

For the sandwiches:
Mozzarella cheese slices
1/2 cup marinara sauce
Sandwich bread or homemade ciabatta
1/4 cup butter, softened
1/4 teaspoon garlic powder

Pound the chicken breast out until it is a uniform thickness, about 1/4 inch thick. Cut the chicken in half so you have two pieces. Mix together the flour, salt, and pepper, and spread it out on a plate. Place the beaten egg in a large wide bowl. Mix together the panko, garlic powder, and onion powder. Place those in a large wide bowl or on a plate. Dredge each chicken breast through the flour so it's coated on both sides, then through the egg, and then through the seasoned panko. Make sure the panko covers the entire breast. Place on a plate.

If you want to fry the chicken: Pour enough oil in the skillet to cover about 1/2 inch. Heat it over medium heat until the oil is almost smoking. If you drop a breadcrumb in the oil to test it, it should sizzle. Once your oil is hot, use tongs to place the chicken breasts in the pan. If they don't fit side by side, do them one at a time. Let them cook for about 3-4 minutes until they're golden brown. Carefully flip the chicken over and cook for another 2-3 minutes until golden brown. The chicken should be 165 degrees on the inside (but check them temperature when it's not in the pan). Take the chicken breast out of the oil and place on a paper towel to drain any grease.
 
If you want to bake the chicken: Preheat your oven to 400 degrees. Place the breaded chicken on a sheet pan and bake for 20 minutes until a thermometer inserted into the chicken reads 165 degrees.

Meanwhile, spread the softened butter on the bread, sprinkle with garlic powder, and place it butter side down on a pan over medium heat until golden brown and toasted, about 1-2 minutes.

Place the cheese on top of the bottom piece of bread, place the chicken on top of it, pour 1/4 cup of hot marinara on top of the chicken, and top it with the second piece of bread. Serve immediately.
Picture
You may also like:
Loading...

Ciabatta

2/19/2013

 
Picture
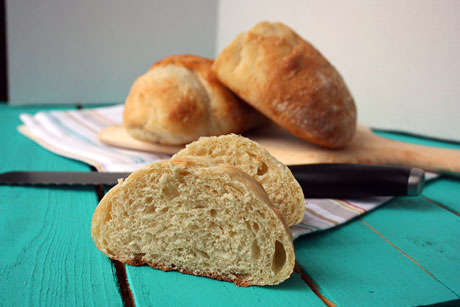
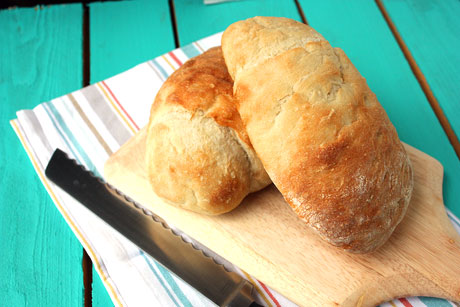
Let me start by saying that this ciabatta tastes like no other ciabatta I've ever had. The ciabattas that I've had are tough and chewy. This ciabatta is soft and incredible. It's not that I don't like those other ciabattas, but it's just that I love this bread. It's probably one of my favorites, and that's coming from a girl who eats a lot of bread. Oodles and oodles of bread.

The only reason I don't eat this bread every week is because it takes a little bit of planning. You have to make a biga ahead of time. What is a biga you ask? A biga is a per-ferment that is similar to a sourdough (but it's not sour). It gives great flavor and texture to the bread and helps it last longer (yay!). A biga is just four simple ingredients that you have to mix together using a spoon (no mixer required) and then place in your fridge overnight. It's really simple, but you have to think about it. That, generally, is my downfall. I wish I was better at thinking ahead of time because this bread is so worth it.

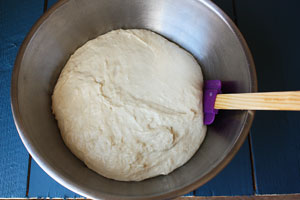
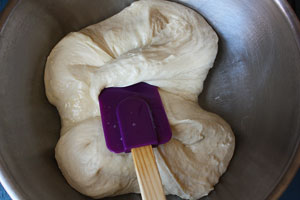
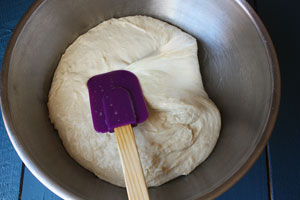
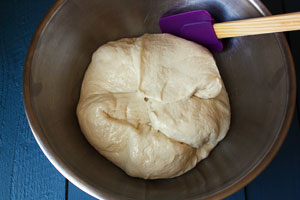
Just a note that this is a very wet and sticky dough. While it's rising, you are going to have to spray a spatula with cooking spray and stretch and fold the dough. Stay with me. It's easier than it sounds. All you do is put the spatula under the dough and then lift and fold the dough on that side in toward the middle. Then you rotate the bowl 90 degrees and do it again. You'll want to do this a total of 8 times. The reason you'll do this is to help strengthen that sticky and stretchy dough so it's a bit easier to work.
Picture
Picture
Picture
Picture
Essentially this seems like a hard bread, but it's really not. And it's worth every bit of effort as soon as you take a bite. Making bread is easy; let's do it!

Ciabatta Recipe
Makes 4 loaves
Print this recipe

Make the biga a day before you make the ciabatta.

For the biga:
1/4 teaspoon active dry yeast
1/4 cup warm water
1 3/4 cups (8.7 ounces) bread flour
1/2 cup + 2 teaspoons cool water

For the ciabatta:
2 teaspoons active dry yeast
1 1/4 cup plus 1 tablespoon (10.5 ounces) warm water
3 cups plus 2 tablespoons (14 ounces) bread flour
2 1/2 teaspoons salt
1 biga recipe

To make the biga, dissolve the yeast in warm water in a small bowl. Let it sit for about five minutes until it's creamy. Measure the flour into a large bowl and make a well in the center of the flour. Add the yeast mixture as well as the cool water and stir it together with a large wooden spoon. Mix until sticky and well combined. Cover tightly and place in the fridge overnight.

To make the ciabatta, add the yeast and warm water in the bowl of your mixer. Let sit for five minutes until it's foamy and then add in the biga and flour and mix on low speed with the paddle attachment until well blended. Let sit for another five minutes and then add the salt. Switch to the dough hook and mix until a smooth and soft dough forms. It will be sticky. Place the dough in an oiled bowl, cover, and let rise for about an hour until doubled.

After an hour, spray a rubber spatula with cooking spray. Place the spatula under the dough in the bowl, lift it on one side and fold the dough over itself toward the middle. Turn the bowl 90 degrees and repeat. Do this 8 times. Cover the bowl and let rise for 30 minutes. After 30 minutes, repeat the lift and fold technique for 8 more turns. Cover and let rise for 30 more minutes.

Preheat your oven to 500 degrees. Cover two sheet pans with parchment paper and generously dust with flour.

Generously dust your counter with flour and place the dough on the counter gently. Be careful to not completely deflate the dough. Flour the top of the dough and divide in quarters. Take one piece of dough and place the long cut side up. Press it into a 6x3 inch rectangle (it doesn't have to be perfect). Fold the shorter sides of the dough toward the center like you were folding a business letter (in thirds). Gently transfer the folded dough to the dusted sheet pan, seam side down. Repeat with the other three pieces of dough. Place two loaves on each sheet pan. Use your finger tips to gently press down into the dough and dimple it (like you were pushing down on piano keys or a keyboard). Let rise for 30 minutes and dimple it again.

Spray the loaves lightly with water from a spray bottle and place the cookie sheet into the oven. Bake for 5 minutes, spraying the loaves with water twice more in the first 5 minutes. Reduce the heat to 475 degrees and bake for another 10-15 minutes until the loaves are golden brown and sound hollow when tapped. Cool loaves to room temperature before slicing and serving.

Source: Cook Street School of Culinary Arts 
Picture
You may also like:
Loading...

Pesto Tortellini Soup

1/7/2013

 
Picture
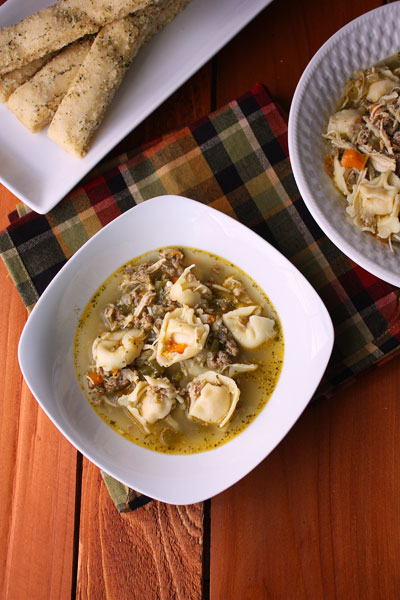
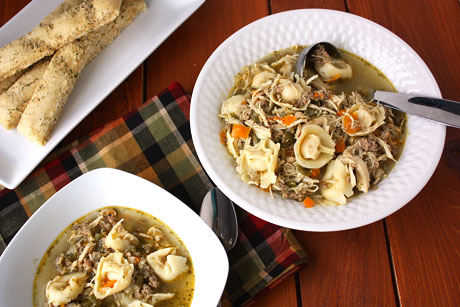
When I told my husband what we were having for dinner, he squished up his face and said, "I don't think I'm going to like that." Being the nice wife that I am, I told him he needed to try it anyway. And guess what, he liked it. I think his exact words were, "It's good; I'm just not in a soup mood." I'm taking that as a win. And it also means that I'll be serving it around these parts again. Ain't married life grand?

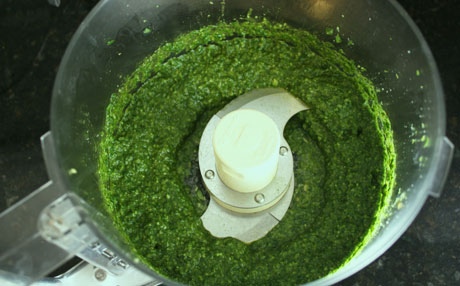
So here's the deal with this soup. I took one of my favorite pasta dishes and adapted it. There's Italian sausage, chicken, bell peppers, onions, and pesto. Oh, and tortellini...one of the best things about this soup. I adore tortellini. This soup is not overly anything (for those of you who may not love pesto). It's a perfect marriage of flavors and a spectacular alternative to your classic chicken noodle soup. It really doesn't take long to prep, and you could make it in your Crock Pot after you did a little prep work, too. Otherwise it takes about 2 hours or so to get on the table. That's a win in my book.

Another win? Here's the best kitchen tip *ever* if you have a stand mixer. Use the paddle attachment to shred your chicken on low speed. It only takes about a minute and is 100 times easier than using two forks.
Picture
Pesto Tortellini Soup
Print this recipe

1 small yellow onion
1 small green bell pepper
1 small red or orange bell pepper
8 ounces Italian sausage
1 large chicken breast
2 cups chicken broth
4 cups water
2 tablespoons pesto
2 cups fresh refrigerated tortellini

In a large pot, cook the Italian sausage, onion, and peppers over medium heat until the veggies are softened and the sausage is browned. Add the whole chicken breast, broth, and water. Cook over medium-low heat for about 1 1/2 hours. Remove the chicken breast and shred it. Skim the grease off the top of the soup using a large spoon and return the shredded chicken to the pot. Stir in the pesto and keep on low heat. About 15 minutes before you're ready to eat, increase the heat to medium and wait for it to boil. Add the pasta and cook for 6-8 minutes until tender. Serve hot.

A She Makes and Bakes original
Picture
You may also like:
Loading...

Italian Stew

1/3/2013

 
Picture
We got a new computer this week, and it's great except for one thing. It has Windows 8 on it, and it is the most confusing operating system ever. Ever. I had to google how to restart it because I could not find it anywhere. How ridiculous is that?? That handy start button that's been on every Windows computer since the beginning of time (not really) is missing. I'm sure I'll figure it out eventually, but I've spent the past three days feeling like a complete idiot.

Here's where I could say that when I feel like an idiot I like to make stew. Well, that's not really true. When I feel like an idiot, I like to curl up in bed and watch tv. Which doesn't equal stew being made because my dogs can't cook and my husband works during the day. Sigh.

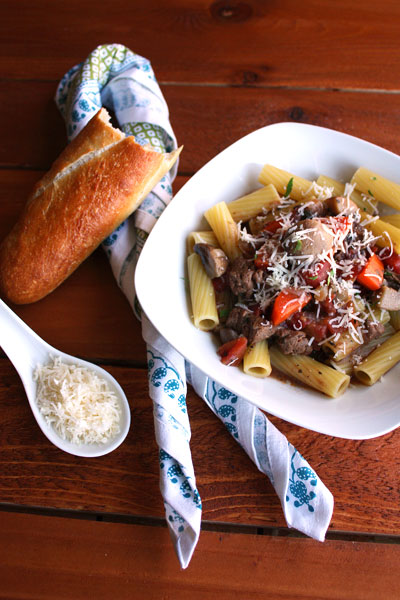
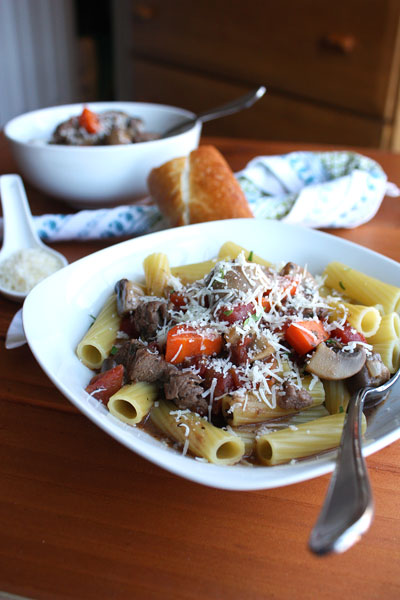
However, I've been eating this stew since I was little, and it's one of my favorites. Perhaps it's because you serve it over rigatoni and that's one of my favorite pastas. Or maybe it's because it's a simple stew with carrots, tomatoes, mushrooms, beef, and Italian seasonings that has amazing flavor and depth. It's pretty easy to make, and you could do the prep the night before and put it in the Crock Pot to cook while you're at work. It's also a great weekend meal...I've even made it on a night when I didn't have a lot of extra time but it sounded really good. I just put in extra liquid and boiled it on medium high heat with the lid off until everything was tender. So it can be made in a rush if you're desperate. Or if you feel like an idiot and want to redeem yourself.

Italian Stew Recipe
Print this recipe

Notes: I prefer tenderized stew meat because it speeds up the cooking process quite a bit. If you can't find tenderized meat, ask the butcher/meat counter to tenderize it for you. Or you can beat it with the pointy edge of a mallet (but this doesn't work as well). If you don't have or don't like red wine, just use more beef broth.

1 tablespoon butter
1 small yellow onion, diced
3 cloves garlic, minced
1 pound tenderized stew meat, cut into smaller bite-size pieces
1 tablespoon olive oil
1/4 cup flour
salt and pepper
1/4 teaspoon paprika
2 1/2 cups beef broth
1/4 cup red wine
8 ounces mushrooms, stems removed and quartered
1 1/4 cups carrots, cut into bite-size chunks
1 14.5-ounce can diced tomatoes
2 bay leaves
1 1/2 teaspoon dried parsley
1 teaspoon dried basil
salt and pepper to taste

1 pound rigatoni cooked al dente
Parmesan cheese

In a large pot, melt the butter over medium heat. Add the diced onion and cook until soft and translucent, about 5 minutes. Add the minced garlic and cook until fragrant, about 30 seconds. Remove to a bowl.

Combine the flour, salt, pepper, and paprika in a zip-top bag. Add in the chunks of stew meat and shake until the flour mixture is covering the meat.

Over medium high heat in the same pot, add the one tablespoon of olive oil. When the oil is almost smoking, dump in the bag of meat and flour. Let brown on all sides. When the meat is browned, pour in the red wine and scrape up the brown bits on the bottom of the pan. (At this point, you could move this to a Crock Pot and add everything else in the Crock Pot and cook on low for 6-8 hours.) Add the beef broth into the pot and reduce the heat to medium. Stir in the mushrooms, carrots, tomatoes, bay leaves, parsley, and basil. Bring to a simmer and reduce the heat to medium-low. Place the lid on, but leave it open a crack, and let it simmer for about 2 hours, stirring every so often. The stew is done when the carrots and beef are tender. Discard the bay leaves, season with salt and pepper to taste, and serve over rigatoni. Garnish with Parmesan cheese.
Picture
You may also like:
Loading...

Italian Gravy

1/1/2013

 
Picture
And we're back! Happy New Year! I hope you all had a great holiday season. My in-laws were visiting us for the past week, and we had a lot of fun. It was nice to be away from the computer for a bit. I love you all, but it's nice to be around "real" people, too. Is anyone else completely confused about what day it is? All day Tuesday I was thinking it was Sunday. My internal calendar is pretty messed up right now. 

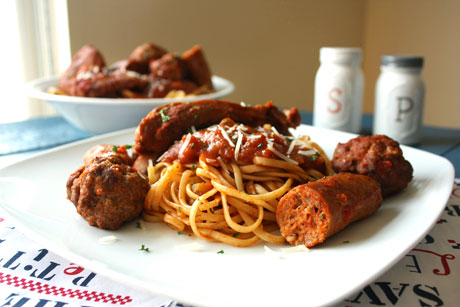
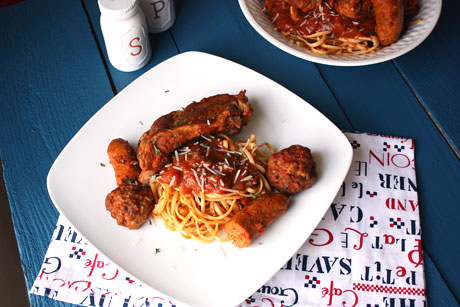
This meal was planned for Christmas Eve, but I had to change plans for the weather. My husband plows snow, and we had a white Christmas. I didn't want him to miss this meal, so I made it last Saturday instead. This is the second time I've made this (the last time was Christmas Eve 2011), and it's pretty awesome. There's Italian sausage, meatballs, and ribs that are cooked in a hearty sauce. The sauce itself is pretty simple with only a few ingredients but has amazing flavor after you cook all the meat in it.

This is one of those recipes where you brown the meat, add the sauce ingredients, and then finish cooking it in the oven for a few hours until the ribs are tender. In 2011 when I made this, I didn't have a pan that I could put in the oven so I did the whole thing on the stove. Low and slow with pretty frequent stirring. It worked really well. This year I did it as the recipe is written in the oven. I've never tried it, but I think you could do this in a Crock Pot, too. You'd have to brown the meat on the stove and make the sauce on the stove, too. Then you could transfer the meat to the Crock Pot and pour the sauce on top. If you wanted this when you got home from work, I think you could do all the prep work the night before and cook it on low during the day while you're at work. 

Even though I've talked about making this on Christmas Eve twice, it's a great meal for any time of the year. Even on a random weekday when you just want a comforting and hearty meal.

Italian Gravy Recipe
Serves 8-10
Print this recipe

For the sauce:
2 tablespoons olive oil
1 rack baby back ribs cut into 2-rib sections
Salt and pepper
1 pound Italian sausage links
2 onions, diced (about 2 cups)
1 1/4 teaspoons dried oregano
3 tablespoons tomato paste
4 garlic cloves, minced
2 (28 ounce) cans crushed tomatoes
2/3 cup beef broth
1/4 cup chopped fresh basil leaves

For the meatballs:
1/3 cup Italian bread crumbs
1 tablespoon dried parsley
Pinch red pepper flakes
3 garlic cloves, minced
1/4 teaspoon onion powder
1 egg
2 tablespoons ketchup
2/3 cup grated Parmesan cheese
Salt and pepper
1 pound ground beef

1 1/2 pounds linguine or spaghetti

Adjust your oven rack to the lower third of the oven and preheat to 325 degrees.

Heat oil in a large Dutch oven over medium-high heat until just smoking. Pat the ribs dry with a paper towel, season with salt and pepper, and place in the pan (do this in two batches). Brown all sides of the ribs, about 5-7 minutes total. Remove to a plate and repeat with the remaining ribs. Brown the sausages on all sides and remove to the plate with the ribs.

Reduce the heat to medium, add the onions and oregano and cook until the onions are starting to brown, about 5 minutes. Add the tomato paste and cook while stirring until it's very dark, about 3 minutes. Stir in the garlic and cook until fragrant, about 30 seconds. Add in the cans of tomatoes and the beef broth and scrape up the browned bits on the bottom of the pan. Place the ribs and sausage in the sauce and bring to a simmer. Cover and place the pan in the oven for about 2.5 hours or until the ribs are tender.

To make the meatballs, get a large bowl. Mix together the bread crumbs, parsley, red pepper flakes, garlic, onion powder, egg, ketchup, Parmesan cheese, salt, and pepper. Once incorporated, mix in the ground beef. Form the mixture into 10 balls and place on a small parchment- or foil-lined baking sheet. Cover with plastic wrap and refrigerate until ready to use.

About 30 minutes before the sauce is done, place the meatballs in the oven next to the sauce (not in the sauce) and bake for 15 minutes. After 15 minutes, transfer them into the sauce and let them finish cooking for about 15 more minutes until cooked through.

Meanwhile, boil your pasta until al dente. When everything is finished cooking, mix one cup of the sauce with the drained pasta. Place the pasta on a platter with the meat and serve the extra sauce in a bowl. Garnish with Parmesan cheese.

Adapted from Cook's Illustrated
Picture
You may also like:
Loading...

Lasagna Rollups

12/9/2012

 
Picture
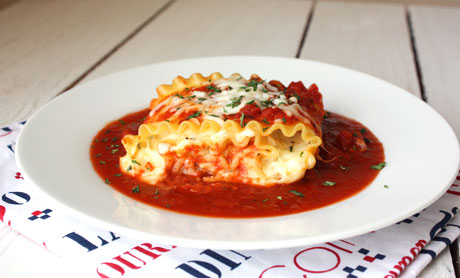
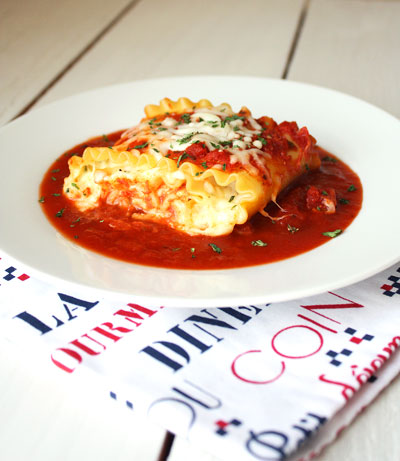
One of the few pasta dishes I can get away with at home is lasagna. While my husband won't eat any other type of pasta, he will eat lasagna. However, when there are only two people eating it, it gets pretty tiresome. Enter these rollups. I make four of them, and they're the perfect size for dinner with minimal or no leftovers. I love that I don't have to eat lasagna for an entire week when I make these. These are really easy to make, and I've made them easier by using jarred sauce. You can certainly make your own or use your favorite brand. I was going for as easy as possible here. To make these, you lay a cooked noodle flat (you can't use the no boil noodles here), spread the cheese mixture on top of it, and roll it up. Then place it in the pan, cover it with some sauce and voila. Dinner!

By the way, I'm not normally a huge pepper fan. Like at all. I'm never one to get it on my salad or put it on everything. However, I do love some fresh cracked pepper in my cheese mixture. It really adds something, so I don't recommend skipping it. I also use cottage cheese in my lasagna, but I puree it in the food processor first so I can get rid of the clumps. I like the texture/creaminess better than using ricotta, but you can certainly use either one.

Lasagna Rollups
Makes four
Print this recipe

4 lasagna noodles, cooked al dente (don't use no boil noodles)
1 egg
1/2 cup cottage cheese or ricotta
1/4 cup grated parmesan, plus more for sprinkling
1/2 cup mozzarella, plus more for sprinkling
1 teaspoon garlic powder
1 teaspoon dried parsley
1/4 teaspoon fresh cracked pepper
2 cups spaghetti sauce

Preheat your oven to 350 degrees.

If you're using cottage cheese, process it in a food processor or blender until the clumps are gone. In a medium size bowl, mix together the egg, cheeses, garlic powder, parsley, and pepper.

In a small baking dish, spread enough of the spaghetti sauce to cover the bottom of the dish.

Lay the noodles flat and dry them off with a paper towel if wet. Spread one quarter of the cheese mixture on top of one noodle, leaving one inch at the end with no cheese. Start with the other end and roll up the noodle. 

Lay the noodle flat in the baking dish. Repeat with the other noodles. Pour the rest of the spaghetti sauce on top of the noodles. Cover with aluminum foil and bake for 20 minutes.

Uncover the dish, sprinkle the additional cheese on top, and place back in the oven for 15-20 minutes until heated through (leave it uncovered).
Picture

Baked Caprese

9/4/2012

 
Picture
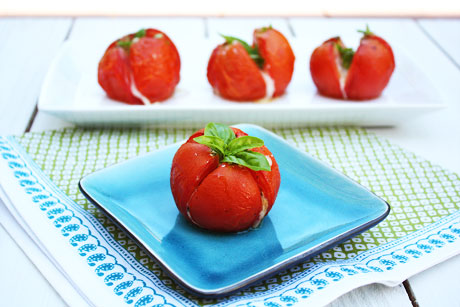
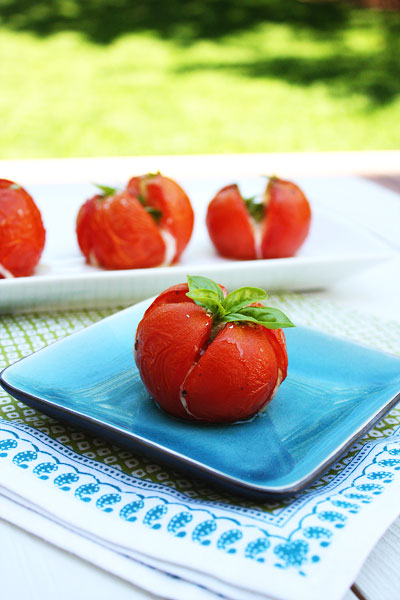
In the last year, I have come to absolutely love all things caprese. Even though I'm not a big fan of raw tomatoes, when you pair them with fresh basil, I could eat them all day long. When I saw this recipe in the Easy Summer Food cookbook, I wanted to try it asap. You score tomatoes, stuff mozzarella in them, and then bake them until they're warm and soft and the cheese is melted. Then you top it off with basil, olive oil, and balsamic vinegar. I love these. Baking the tomatoes tones down the fresh tomato flavor just a touch, and of course you can't go wrong with the caprese combination. I truly believe that fresh basil makes almost anything taste better. I highly recommend you make these before your basil plant dies and tomato season is over. Your mouth will thank you.

Baked Caprese Recipe
Print this recipe

Note: This recipe makes 10 tomatoes, but you can easily make it using as many tomatoes as you want. I made it with four tomatoes and scaled everything way day. It's not so much of a measuring recipe as it is a guide.

10 ripe tomatoes (I used vine-ripened tomatoes)
4 ounces mozzarella cheese, cut into 10 pieces
1/4 cup olive oil
2 tablespoons balsamic vinegar
Bunch of fresh basil leaves, torn
Salt and pepper

Preheat your oven to 325 degrees and spray a baking tray with cooking spray.

In each tomato, cut a deep X about halfway through the tomato. Push a piece of mozzarella into each X. Place the tomatoes on the tray and sprinkle with salt and pepper.

Bake in the oven for 25 minutes until the tomatoes start to soften and open. Remove from the oven, drizzle the olive oil and balsamic vinegar on top and serve.

Source: Easy Summer Food Cookbook
Picture

Pappa al Pomodoro Soup

8/29/2012

 
Picture
It all started with me going to the library, which happens about every couple of weeks. I love to browse the cookbook section and see what catches my eye. Last week, it was a Easy Summer Food cookbook that looked too good to resist. Mainly because I am not even remotely close to being ready for fall. Yes, I am a little sick of the 62 days and counting of 90+ degree weather in Colorado, but it's going to be snowing before I know it. And I am definitely not ready for that! So Easy Summer Food sounded fantastic.

We have three large tomato plants growing in the garden, but last week we had only red cherry tomatoes and a whole lot of green Roma and regular tomatoes. I saw this soup recipe and hightailed it to the store to buy tomatoes on the vine, two pounds of them to be exact. It's not really that much unless you get distracted by a friend and misread the scale and buy almost six pounds of tomatoes. Um, what? Six pounds. I paid almost $15 for those bad boys, and now I have a ton waiting to be picked. Fail. So I made this soup, I made salsa, I made baked caprese tomatoes. And now I have to come up with more recipes to use up the tomatoes in the garden. Major problems, I know.  

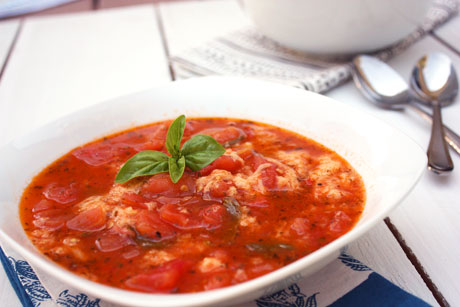
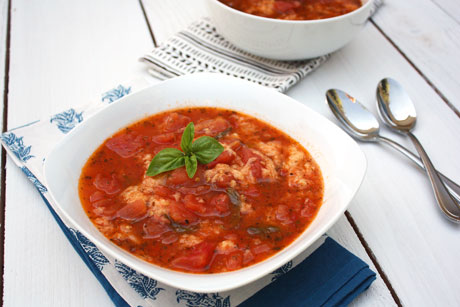
So this Tuscan soup really is a great summer dish. You can serve it hot or cold (I prefer hot), it takes less than an hour, uses fresh herbs, and has amazing fresh flavors. It screams I came out of your garden. Even my I-hate-soup-when-it's-hot-outside husband loved it. The wonderfully unique thing about this soup is the dried, grilled bread that gets mashed into the soup, giving it more texture and flavor. I recommend you try this before tomato season is over!

Pappa al Pomodoro Soup Recipe
Serves 4
Print this recipe

Notes: This recipe calls for dried bread. If you only have fresh bread, bake the bread at 300 degrees for about 10-15 minutes until it's dried. I actually used French bread because that's what I had, but sandwich bread would work great, too.

2 pounds tomatoes, peeled and chopped
1 1/4 cups vegetable stock
1 teaspoon sugar
1/3 cup extra virgin olive oil
4 spring oregano
4 sprigs basil
4 slices dried bread, crusts removed
2 garlic cloves cut in half
Kosher salt and freshly ground black pepper
Grated parmesan cheese to serve

Place your peeled and chopped tomatoes in a saucepan and add the stock, sugar, 2 tablespoons of the olive oil, and the leaves from the oregano and basil. Add salt and pepper and heat slowly to a boil. Reduce the heat, cover, and simmer for 30 minutes.

Meanwhile, toast the bread over a grill or grill pan until it has grill marks, and rub the garlic on the bread. Place it on a plate, drizzle the remaining oil over it and mash it with a fork until it's in small bits.

After the soup has simmer for 30 minutes, add the bread and stir over low heat for about 5 minutes until it has slightly thickened. Add more salt and pepper to taste and top with grated parmesan cheese if desired.

Source: Easy Summer Food Cookbook
Picture

Garlic Cheese Bread

8/22/2012

 
Picture
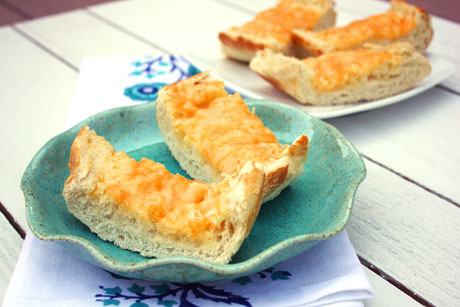
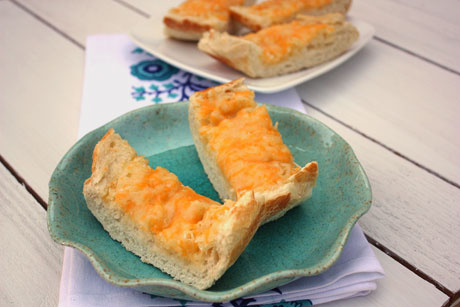
When I was younger, I took piano lessons. I was not good, and my favorite part of them was my teacher, Candi, who also was my friend. When I turned 16, my mom told me that she wasn't going to pay for me to take lessons anymore because I wasn't practicing. She wasn't going to pay for me to hang out with Candi. Looking back, I don't blame her. So, ever since I turned 16 I've been going to dinner at Candi's, Angie's, and Danielle's house on Monday nights. Which means that I've been eating this garlic cheese bread for the past 13 years. Yikes. 

Monday nights are special nights for me. We don't get together every Monday anymore, but Monday nights will always hold special memories for me. We make dinner, watch some TV, talk, and laugh. One of my favorite meals over there is spaghetti. We make a box of pasta, a jar of sauce, and this garlic cheese bread. It's simple and so comforting, and truthfully it hits the spot in a way that homemade sauce just can't. I'm a foodie, but I love some childhood comfort food! While I'm usually a proponent of grating your own cheese, this bread works best with packaged cheese. It also works great with fake butter if you like that kind of thing! I normally just spread and sprinkle on until it looks good, but I measured this time if you're a recipe follower. Over time, you'll learn what works best for you. We've found that this bread works best if you bake it instead of broiling. This way, all of it gets nice and warm and melty instead of just the top. Also, we think that the prepackaged Mexican four cheese blend (cheddar, monterey jack, asadero, and queso blanco) works best. It's melty and stringy without being rubbery.

Garlic Cheese Bread Recipe
Print this recipe

1 loaf French bread
1/2 cup butter, softened
1 teaspoon garlic powder
2 cups Mexican four cheese blend

Preheat your oven to 350 degrees.

Split the loaf of French bread lengthwise. Spread the butter on both halves. Sprinkle the garlic powder on top (if you don't like a lot of garlic, use less than one teaspoon). Sprinkle the cheese on top until covered everywhere. 

Bake for 8-10 minutes until the cheese is thoroughly melted. 

To cut it without burning your hands, use a fork to hold the bread still while you cut with a serrated knife.  
Picture

Simple n Light Pasta

7/29/2012

 
Picture
First of all, I'm loving the Olympics. I love watching everyone compete, and I love the sports. However, I think it's funny that the Olympics inspires people to sit on their couches and watch TV. I guess that I went for a bike ride this morning and stood in the kitchen all day, so that can justify me sitting around, drinking wine, and watching gymnasts and swimming tonight, right? By the way, what's up with the female gymnasts wearing scruncies circa 1995? Can't they do something else to give their hair some flair?

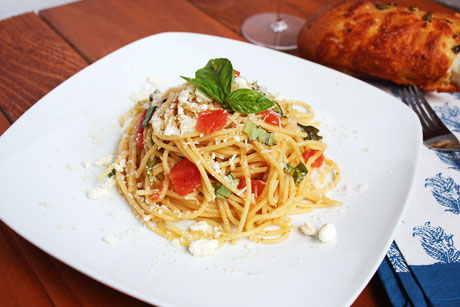
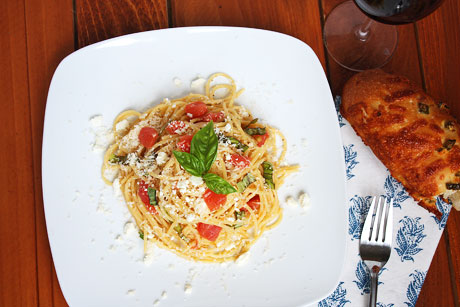
Anyway, this pasta has nothing to do with the Olympics other than I might eat this to carbo load before my triathlon next weekend...which still has nothing to do with the Olympics, but I'm excited about it. Almost ten years ago, I spent a lot of time in Grand Cayman. There was (is?) a restaurant on Seven Mile Beach called Cimboco that had great pizza and pasta. Consequently we ate there a lot. They had this great pasta dish called simple n light, and this is my attempt at recreating it. Spaghetti, olive oil, tomatoes, basil, garlic, feta, and parmesan. Like the name says, it's simple and light. And awesome. Maybe they should rename it.

Simple n Light Pasta 
Serves 4
Print this recipe

8 ounces spaghetti or angel hair pasta
1 tablespoon olive oil
1 tablespoon butter
1 large tomato, diced
5-10 basil leaves, diced
2 garlic cloves, minced
Salt and pepper, to taste
2 tablespoons feta
2 tablespoons freshly grated parmesan

Boil your pasta in salted water to al dente. Drain and set aside. Using the same pan, melt the butter over medium heat and add the olive oil. Put the diced tomato in and cook for about a minute until softened. Add in the garlic cloves and basil and cook for about 30 seconds until fragrant. Put the pasta back in the pan and toss until coated. Add salt and pepper to taste. Plate the pasta and sprinkle on the feta and parmesan before serving.  

Dish from Cimboco in Grand Cayman
Picture
<<Previous

     Welcome!

    Cooking is fun and easy at high altitude, but baking can be frustrating. About 90% of my recipes work everywhere, but some are adjusted so us mountain dwellers can enjoy baked goods from scratch. I hope you find great recipes on here for your family, and I'll let you know if any are adjusted for high altitude. 

    Stay Updated!

    Add to your Reader:

    Get new posts delivered to your inbox:

    Enter your email address:

    Delivered by FeedBurner

    Categories

    All
    Appetizers
    Bars
    Beef
    Bread
    Breakfast
    Brownies
    Cake
    Cheese
    Chicken
    Chocolate
    Cinnamon
    Cookies
    Crackers
    Cupcakes
    Dessert
    Do It Yourself
    Drinks
    Fruit
    Ground Beef
    High Altitude
    How To
    Ice Cream
    Italian
    Main Courses
    Mexican
    Muffins
    Oatmeal
    Pasta
    Pastry
    Pie
    Pizza
    Pork
    Project Pastry Queen
    Pumpkin
    Salad
    Sauces
    Side Dishes
    Snacks
    Soup
    Sourdough
    Steak
    Vegetables

    My featured recipes on NoshOnIt

    Some Good Reads!

    Annie's Eats
    Bake at 350
    Climbing Grier Mountain
    Confections of a Foodie Bride
    How Sweet It Is
    I Am Baker
    Macaroni and Chesecake
    Pinch of Yum
    Pink Parsley
    Smells Like Home
    Smitten Kitchen
    Sunny Side Up
    The Curvy Carrot
    The Marvelous Misadventures of a Foodie
    The Pioneer Woman Cooks
All content copyright 2012-2013 She Makes and Bakes.