She Makes and Bakes
  • Home
  • About
  • Ramblings
  • Recipe Index
  • What We're Eating
  • High-Altitude Baking

Pork Green Chili

11/15/2012

 
Picture
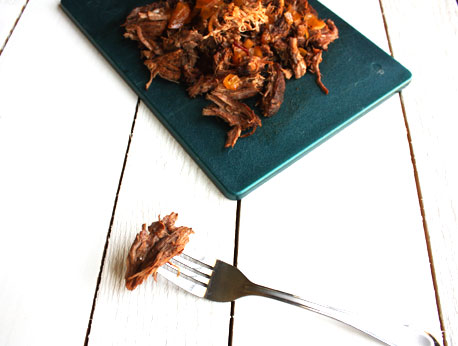
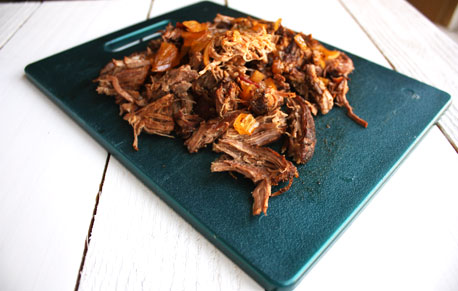
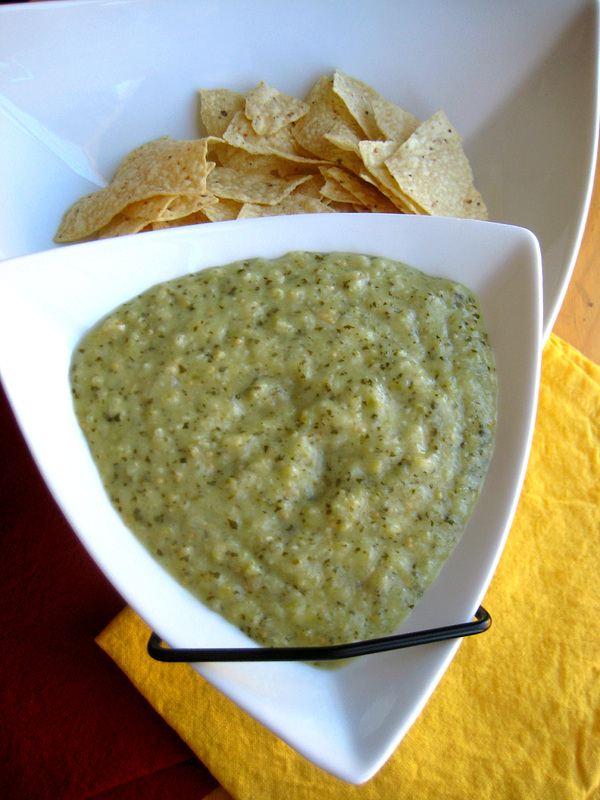
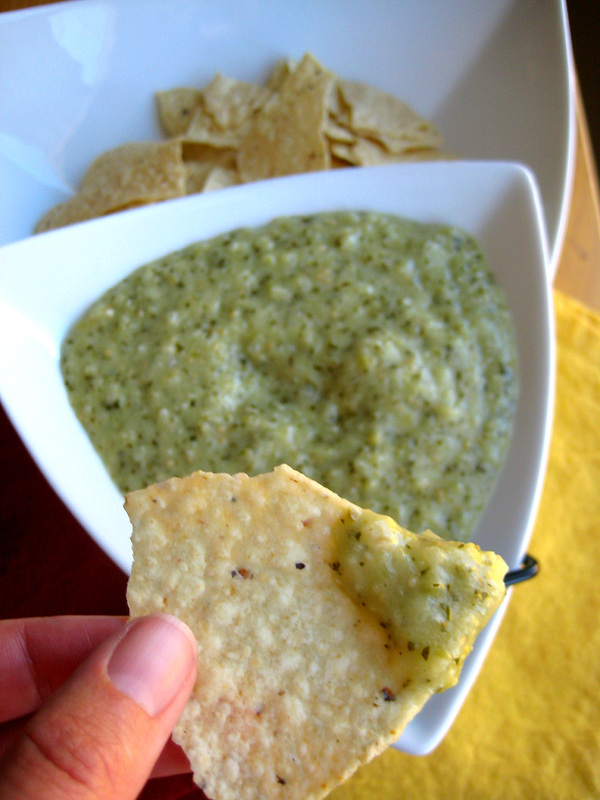
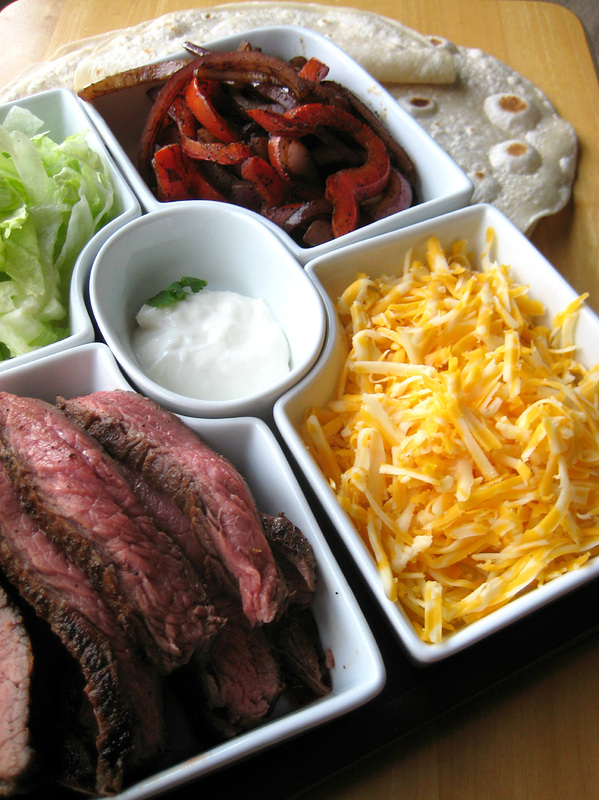
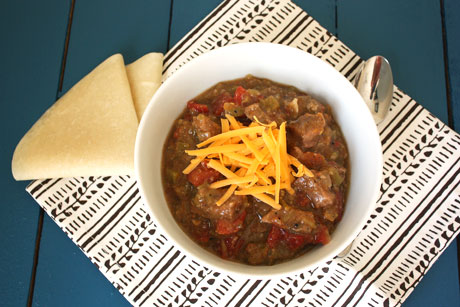
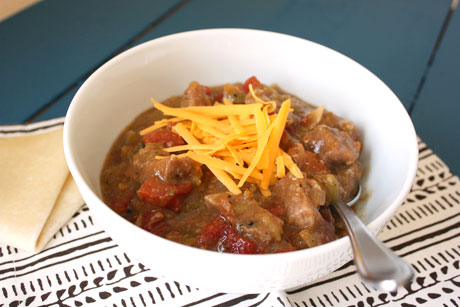
My grandma was an awesome cook. Unfortunately, for most of my childhood, I was a punk kid who didn't eat anything she made. Unless it was mac and cheese. She knew I was an extremely picky eater, and she made me mac and cheese every time we went to her house for dinner. I swear the woman was a saint in that regard. Or maybe she just didn't want to hear me whine. That is a definite possibility because I was a great whiner! The year before she died, we had a Mexican feast, and she served this pork green chili. I hemmed and hawed and finally tried it...and I fell in love. Oh boy is this good. So I immediately asked her for the recipe and have been making it ever since. The main thing I love about this is that it's not a sauce. It's a chili. You can eat it with some cheese and sour cream along with a tortilla. You certainly can put it on top of a burrito or enchilada, but it's great in a bowl by itself.

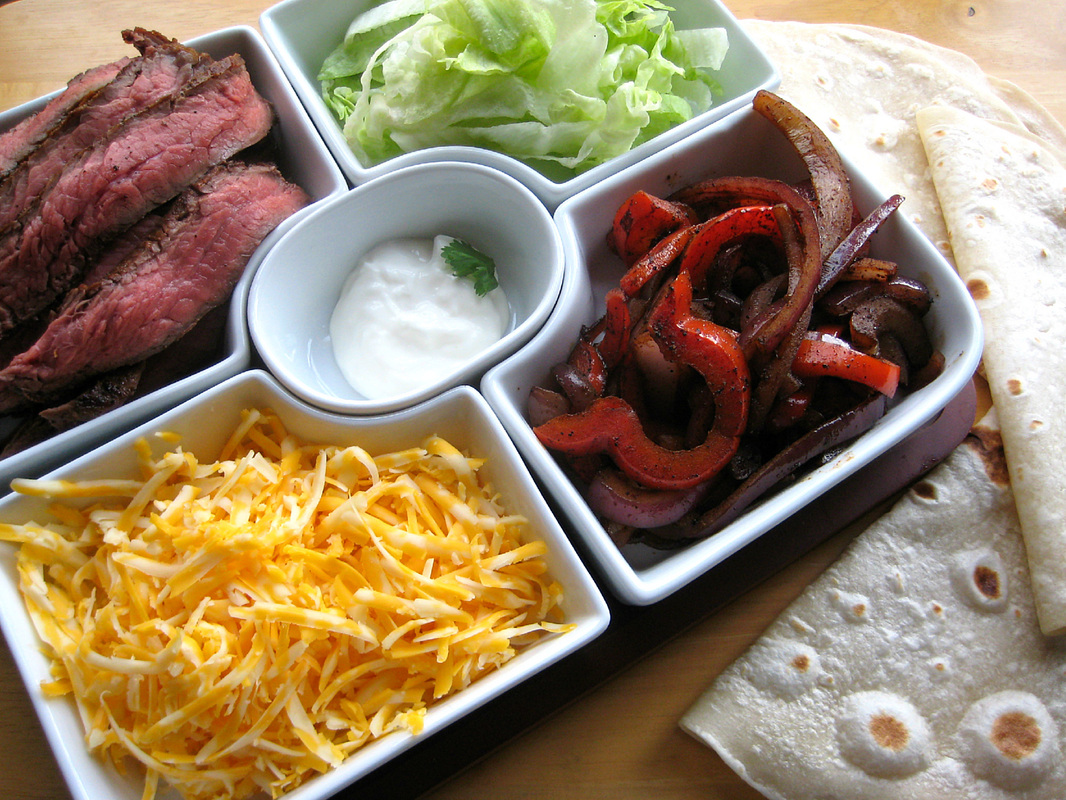
My aunt makes this too (although I'm not sure if it's the same recipe). She grew up in southwest Colorado and is a great cook, especially of Mexican foods. She told me that if you cook your onions first and then remove them from the pot while you brown the meat, you'll get greater flavor out of your onions. So now I do that with any recipe where I have to soften an onion. I use canned mild chilis in this, and I think it can get pretty spicy so you may want to be careful about how many red pepper flakes you use if you're not immune to spicy foods. I've also used a huge bag of frozen diced green chilis in this recipe, too. You definitely can adjust the seasonings in this to make it how you like. The other beauty of this is you can make it and have it on the table in a couple of hours. It's a perfect weekend dinner in my opinion...plus, it makes for great leftover lunches all week!

Pork Green Chili Recipe
Serves 4
Print this recipe

Notes from my grandma: You can use pork chops, pork shoulder roast, or any other lean pork. It also works well in the slow cooker. After you've simmered it for an hour, if it's too thin, you can dissolve some cornstarch in water and add to the pot. Bring to a boil. Fresh roasted chilis are great, too.

1 pound pork, cubed
2 tablespoons butter, divided
Small white onion, diced
1/4 cup all purpose flour
1/2 teaspoon salt
1/2 teaspoon pepper
2 cups chicken broth
2 cans (7 ounces each) mild diced green chilis
1 can (14.5 ounces) diced tomatoes
Dash cumin
Salt and pepper to taste
Dash red pepper flakes (optional)
1/2 teaspoon chili powder
1 tablespoon dried oregano

Combine the 1/2 teaspoons of salt and pepper with the 1/4 cup flour. Dredge the cubed pork through the seasoned flour. 
 
In a large saucepan, melt one tablespoon of butter over medium heat. Place the diced onion in the pan and cook for 8-10 minutes until soft. Remove the onion to a bowl. Melt the other tablespoon of butter and add the flour-covered pork to the pan. Let sit for three minutes to brown. Stir and let brown for another 2-3 minutes. Stir in the garlic and cook for about 30 seconds until fragrant. Add in the chicken broth and scrape the bottom of the pot. Add rest of the ingredients and let simmer for one hour. Adjust the seasonings to your preference.

Serve warm with cheddar cheese, sour cream, and tortillas.

Source: My lovely grandma
Picture

Shredded Beef Quesochangas

10/18/2012

 
Picture
There's a Mexican restaurant in Colorado called Hacienda, and they make some pretty awesome food in my opinion. The thing that I always want to order (but don't do as often as I'd like) is a quesochanga. It's a chimichanga that has married some queso. There's queso on the inside and the outside, and for a queso-loving girl like myself, it's essentially perfection. I always thought it was really hard to make a chimichanga because there was hot oil involved. As it turns out, you don't have to deep fry these bad boys. You can shallow fry them in a pan, and it takes less than a minute. Easy peasy, and it's not scary. I promise. You just have to be careful.

We're using the shredded beef that I told you about months ago. I love this stuff. I make a huge batch, and then I freeze what we don't eat into individual portions. That way, I can make these or quesadillas or shredded beef tacos. One easy crock pot day and I have a lot of dinner variations! To make this recipe, all you need is that beef, queso, tortillas, and oil. Seriously, it's one of the easiest meals to make, and it's incredibly delicious!

Shredded Beef Quesochangas Recipe
Makes two
Print this recipe

Note: You want the meat and the queso to be hot because it's not in the oil long enough to heat it up. Unless you like eating cold food, I highly recommend it's hot when you place it in the tortilla. The tortilla will be easier to roll if it's warm, too. 
 
2 tortillas
1/2 cup Mexican shredded beef
1/4 cup queso
Vegetable oil

Pour enough vegetable oil to cover the bottom of a large skillet about 1/8-1/4 of an inch. Heat it on medium until it starts smoking.
 
While the oil is heating, divide the meat between the two tortillas. Pour half of the queso on top of the meat in each tortilla. Tuck the sides of the tortilla in, and then roll the tortilla up. It should look like a burrito, and there should be no gaps where the filling could ooze out of it. When the oil is smoking, carefully place the quesochanga into the oil using tongs, seam side down. Let it sit for about one minute or less until golden brown, and use the tongs to carefully flip it. After another minute or less when it's golden brown, remove from the oil and place on a paper towel to drain. Repeat with the remaining quesochanga (or you could do both at the same time if you're up for it).  Serve with additional queso on top and/or on the side.

Source: She Makes and Bakes
Picture

Homemade Queso

10/11/2012

 
Picture
Queso is my kryptonite. I will go off a diet so fast if queso is put in front of me. And I'm not super picky about my queso, either. Velveeta and rotel? Sure. I can eat the crap out of that stuff. But I wanted to be a good food blogger and create my own. I tried another homemade queso recipe about a year ago, but I wasn't overly thrilled with it. While it was good, it was missing something. So I decided to experiment with it. Thankfully it only took one try so my hips didn't get too big! This makes a good size batch, but if you're having it at a party, I'd double or triple it. It reheats nicely thanks to the no roux part, and it freezes well. That's how I kept myself from devouring it. I hid it in the depths of my freezer. Next week, I'll show you an amazing meal to make with this stuff: quesochangas!

Homemade Queso Recipe
Print this recipe

*Note: Please do not use individually wrapped American cheese slices. Go to the deli and ask for a chunk of American cheese. If it's a chunk, you can grate it. If it's already sliced, you can tear it into pieces so it will melt faster. If you like spicier food, leave some of the seeds in the jalapeno.

1 tablespoon butter
Half of a white onion, chopped
1 jalapeno, chopped and seeds removed
1 garlic clove, minced
1 large Roma tomato, chopped
About 10 ounces yellow American cheese, shredded*
1 cup Monterey jack, shredded
1/2-3/4 cup milk

In a medium saucepan over medium heat, melt the butter and cook the onion, jalapeno, and garlic until soft, about 5-10 minutes.

Add in one quarter of the American cheese and 1/4 cup milk. Stir until the cheese has melted. Add in half of the Monterey jack and stir until melted. Keep adding the cheese and milk until incorporated and melted. Use as much milk as desired for consistency. If you want your queso thick, you'll need about 1/2 cup of milk. If you like it thinner, you'll want about 3/4 cup of milk. Add in the chopped tomato and salt to taste. Serve immediately, and reheat on the stove or in the microwave.

Source: A She Makes and Bakes creation
Picture
You may also like:
Loading...

Everyday Salsa

8/1/2012

 
Picture
I absolutely love salsa, but I have a hard time finding a good brand at the grocery store. I'm not really a fan of beans or peaches or corn or other "strange" ingredients in my salsa. I want some straight up basic but good salsa. The only store brand I've found that's great was at Harris Teeter. If you live near a Harris Teeter, check out their salsa in jars. Pretty dang good...in fact, we brought some home to Colorado with us. Just not enough of it.

Anyway, since I can't find a good salsa, I usually make my own. It's super simple, hardly takes any time, and you can make as much or as little as you need. I make a lot because even as just two people, we go through a lot of it. This is year-round salsa that uses canned tomatoes. My tomatoes still are green, so I haven't had the chance to make this with ours yet this year. It's very easy to substitute fresh tomatoes in the summer. Just know that instead of your salsa being red, it'll be pink. I usually don't measure the ingredients for this--I just add and taste and adjust. So go that route if you're comfortable with it or use my measurements below.

Everyday Salsa Recipe
Yields approximately 3 cups
Print this recipe

Note: If you want to use fresh tomatoes instead of canned, peel approximately 4-6 large tomatoes or up to 10 Roma tomatoes. Cut them into chunks and add them to your food processor or blender. Also, I briefly cook my onion to get rid of the raw onion taste. If you don't have the time or the taste buds, just chop your onion into chunks and throw it into the food processor/blender.

1/2 small white onion
1 tablespoon butter
28 ounce can of diced peeled tomatoes
3 garlic cloves
1 jalapeno, seeded
1/4-1/2 cup cilantro
2 tablespoons lime juice
Salt, to taste

Dice the onion. In a small skillet, melt the butter over medium heat. Add the onion and cook until soft, about 3-5 minutes. Remove from heat. 

Add the tomatoes, garlic, jalapeno, cilantro, cooked onion, and lime juice to the bowl of a food processor or a blender. Pulse until smooth. If you like chunky salsa, don't process it as long. 

Taste the salsa with a chip and add salt as needed. Store in the refrigerator. 

A She Makes and Bakes recipe.   
Picture

Mexican Shredded Beef

6/27/2012

 
Picture
I love, love, love this shredded beef. I've been making this for about a year now, and it's very versatile. Generally, we make queso chimichangas with this meat, but I also use it for tacos, quesadillas, and empenadas. Since there's only two of us, and this makes a lot of meat, I freeze the rest of it in freezer bags, portioned out for each meal. It makes for some very easy lunches and dinners.

This takes a little bit of prep time but then you can throw it in your crock pot and cook it all day. Your house will smell amazing with all those strong Mexican scents. Eventually I'll put up the recipe for the queso chimichangas because they are really easy to make and quite delicious!
Picture
Mexican Shredded Beef Recipe
Print this recipe

4-6 tablespoons olive oil, divided
2 pounds boneless chuck roast
1 teaspoon chili powder
1/2 teaspoon cumin
1/2 teaspoon smoked paprika
1 cup beef broth
1 tablespoon tomato paste
2-3 chipotle peppers in adobo sauce, minced
1/2 large sweet onion, diced
5 cloves garlic, minced

Combine all the spices in a bowl and rub all over the meat.

Heat a large skillet over high heat with 1-2 tablespoons of the olive oil until shimmering. Using tongs, sear the meat on each side (about 1 minute on each side). Place the seared meat on the bottom of a crock pot. Keep the skillet over high heat and deglaze the pan with the beef broth. Scrape up any brown bits, and stir in the tomato paste and chipotle peppers. Once the sauce boils, reduce to a simmer and cook for a few minutes until thickened. 

Add the onions and garlic on top of the meat in the crock pot, and pour the sauce on top. Cover and cook on low for 6-8 hours. Once the meat is tender, remove and shred with two forks. Pour some of the sauce, including the onions, on top of the shredded meat. 

To make the quesadillas:   
Heat a large skillet over medium heat and place one tortilla flat on the skillet. Spread about 1/4 cup of cheddar cheese on top of the tortilla, about 1/2 cup of meat on top of that, and another 1/4 cup of cheese on top of the meat. Place another tortilla on top of the cheese. After a few minutes, once the cheese has started to melt, flip the quesadilla over. Cook until the tortilla is lightly browned and all the cheese has melted. Continue for as many quesadillas as you'd like. Usually one full one serves one adult. Cut into wedges for serving, and serve with sour cream, lettuce, pico de gallo, and guacamole.

Source: Pennies on a Platter
Picture
You may also like:
Loading...

Stovetop Chicken Tacos

6/22/2012

 
Picture
I'm in Ireland right now, and if you're interested in reading about our trip/seeing pictures, check out the Ramblings page. It's a great country, and we're having a great time so far. Thanks to everyone for your great comments and well wishes!

Back to the food...We love Mexican food at our house, and while we have tacos frequently, they're usually of the beef persuasion. My hubby loves him some beef. In fact, whenever I ask him what he wants for dinner, he says steak. Every. Time. Anyway, it's nice to have a change of pace, so I love these chicken tacos. They take no longer than the ground beef ones, and they have a different flavor profile that's fresh and spicy...bound to please even those beef lovers.

Instead of the typical cumin and chili powder found in ground beef tacos, these are cooked in an orange juice/adobo/cilantro sauce, with a tiny bit of yellow mustard added at the end. If you don't like spice, you can cut down on the chipotle peppers. These tacos cook up in about 20 minutes, and you're on your way to an easy, wonderful, and fairly healthy dinner. We don't eat these nearly often enough, but I'm planning to put them in the rotation a lot more often.    
Picture
Stovetop Chicken Tacos Recipe
Serves 2-4 (depending on how hungry you are)
Print this recipe

3 tablespoons butter
4 garlic cloves, minced
2 tablespoons minced chipotle in adobo sauce
3/4 cup cilantro
1/2 cup orange juice
1 tablespoon Worcestershire
1 1/2 pounds boneless, skinless chicken breasts (about 2-3)
1 teaspoon yellow mustard
Salt and pepper

In a skillet, melt the butter, add garlic and chipotle and cook for about 30 seconds until fragrant. Stir in 1/2 cup of the cilantro, orange juice, and Worcestershire and bring to a boil. Add the chicken and simmer covered for 10-15 minutes, flipping the chicken halfway through the time. Once the chicken is cooked through, transfer it to a plate and cover with foil.

Increase the heat and cook until the liquid is reduced to about 1/4 cup. Stir in the mustard. Shred the chicken into pieces, add to the skillet with the remaining cilantro and toss until combined. Serve while hot with tortillas, cheese, tomatoes, sour cream, and anything else you love on your tacos.

Source: Cook's Illustrated
Picture

Tomatillo Salsa

5/9/2012

 
Picture
For many years (read almost my whole life), I have preferred Pace Picante mild salsa. I obviously had a very refined palate. A few years ago, I would have turned my nose up at this green salsa, and then unknowingly I would have deeply regretted it. This takes your basic salsa to a whole new level.

The tomatillos, onion, garlic, and jalapeno get roasted in the oven until they're brown and soft. This makes your house smell incredible, an added bonus. Once they're done roasting, you add a few more ingredients to your food processor and puree. It's super simple. The hardest part is letting the whole thing cool, although I tried it warm, and it was good. Too good. Had to hide the chips good. It's best to make it the night before you need it so it can spend the night in the fridge and all those lovely ingredients can spend the night holding hands or making out or doing whatever they do to become better friends and make a crazy good salsa.

Tomatillo Salsa
Makes about 3 cups
Print this recipe

1 1/2 pounds tomatillos, husks removed
1/2 large yellow onion, sliced
1 jalapeno, halved
6 garlic cloves, peeled
1/4 cup plus 2 tablespoons olive oil, divided
1/2 teaspoon kosher salt
1/2 bunch fresh cilantro
1 lime, juiced

Preheat your oven to 375 degrees.

Rinse your tomatillos under cold water until they are no longer sticky. If you like your salsa very mild (we're talking no heat), remove the seeds from your jalapeno. Place the tomatillos, the sliced onion, garlic cloves, and the jalapeno on a baking sheet and drizzle with 2 tablespoons olive oil. Roast in the oven for 15-18 minutes until the tomatillos have softened and are slightly charred. Every 5 minutes, using an oven mitt, reach in and shake the pan to move everything around. When the time is up, remove the pan from the oven and let cool for a few minutes. 

Place the olive oil, salt, cilantro, and lime juice into your food processor. Add in the roasted veggies and puree until everything is smooth. Taste with a chip and add additional salt if needed. Transfer to a container with a lid and store in the refrigerator.  

Source: From Valerie's Kitchen
Picture

Baked Chicken Taquitos

5/3/2012

 
Picture
These baked chicken taquitos have been going around the blog world for awhile, and there's good reason. They are delicious and easy. I saw these on Annie's Eats for the first time a year ago, and I made them within a couple of weeks. The filling is creamy and cheesy and has the right amount and mix of spices. It's also really easy to substitute or change the quantities of the ingredients. Want more cheese? Add more. Want to make them vegetarian and sub black beans and corn for the chicken? Done. Don't like cilantro? Leave it out. Want them more spicy? Add some hot sauce. Want to make them bigger? Use a bigger tortilla and add more filling (I do this one).

Regarding the chicken, I used to buy a rotisserie chicken and cut that into pieces. Now I boil a chicken breast and finely chop it. You can do whatever works best for you. The other wonderful thing about this recipe is that it freezes great and makes for a very easy weeknight meal. When you're done filling the taquitos, place them in a freezer bag, and stick them in the freezer (before baking). On a day when you get home from work and wonder what the heck you're going to make for dinner, don't sweat it. You can bake these right from the freezer. Just spray a little cooking oil on top, sprinkle on some kosher salt (don't skip this step...it's truly great), and bake for a few extra minutes than normal. You will know when these bad boys are done. They will be sizzling. I do recommend to let them cool a little before eating because these get insanely hot! When I make this recipe now, I do a double batch so I have a few dinners ready for those nights when I want something easy.  

If you're looking for other ideas for Cinco de Mayo food, check out the Recipe Index page...there's a Mexican section with some of my favorites.

Baked Chicken Taquitos
Makes about 12
Print this recipe

3 ounces cream cheese, softened
1/4 cup salsa
1 tablespoon lime juice
1 teaspoon chili powder
1/2 teaspoon cumin
1/2 teaspoon onion powder
2 cloves garlic, minced
3 tablespoons cilantro, chopped
1-2 green onions, chopped
2 cups cooked chicken, chopped or shredded
1 cup Mexican cheese (I also use cheddar or Colby Jack)
10-12 6-inch tortillas
Cooking spray
Kosher salt

Preheat your oven to 425 degrees.

In a large bowl, combine first 11 ingredients and mix together. Warm up your tortillas so you they will be easier to work with and spread 2-3 tablespoons down the middle of each tortilla. Roll up the tortilla and place seam side down on a greased baking sheet. Spray the tortillas with cooking spray and sprinkle a little kosher salt on top.
 
Bake for 15-20 minutes or until sizzling and golden brown.

Source: Annie's Eats, originally from Our Best Bites
Picture

Steak Fajitas

4/19/2012

 
Picture
I've never been a person who orders fajitas at restaurants. They intrigue me with all that sizzlin', but I usually choose pasta or queso...lots and lots of queso (depending on the type of restaurant of course). We tried to make fajitas at home once, and it was a fail. Big huge fail. They were saucy, and fajitas shouldn't be saucy. At least in my opinion. They should have great flavor though.

After that experience, we put fajitas on the back burner so to speak until I came across this fajita recipe in my Cook's Illustrated cookbook. I love Cook's Illustrated because they test everything multiple times until they come up with the perfect recipe. I have had a few not so great recipes from them, but this was a definite winner. It's easy, you make it on the stove, and they are very tasty. Also, there's no marinating involved, so you don't have to plan ahead. You can get this dinner on the table from start to finish in about 30 minutes. I cut this recipe in half since there's only two of us and the hubs doesn't care for leftover steak. One note, make sure you have the fan over your stove on when you start cooking the meat because it gets very smoky! Or at least it does in my house.

Steak Fajitas
Print this recipe
1 1/2 pounds flank steak, trimmed
Salt and pepper
2 tablespoons vegetable oil
2 tablespoons lime juice
2 red bell peppers, stemmed, seeded, and sliced thin
1 red onion, halved and sliced thin
2 tablespoons water
1 teaspoon chili powder
1 teaspoon Tabasco
1/2 teaspoon cumin
12 flour tortillas (6 inches)

Pat the steak dry with paper towels and season with salt and pepper. In a large skillet, heat 1 tablespoon of oil over medium-high heat until just smoking. Brown the steak on the first side, about 5 minutes. Flip the steak and continue cooking (about 3 minutes for medium rare up to 6 minutes). Move the meat to a plate, drizzle with the lime juice, and tent with foil. Let it rest for 10 minutes.  

While the meat is resting, add the other tablespoon of oil to the skillet and heat until shimmering. Add the bell peppers, onion, water, chili powder, Tabasco, and cumin. Cook, scraping the bottom of the pan, for about 5 minutes or until the onion is softened. Remove from heat.

Slice the steak very thin against the grain and serve with the peppers/onions, tortillas, and any other toppings (cheese, lettuce, salsa, sour cream, etc.).

From Cook's Illustrated
Picture

Taco Pie

4/18/2012

 
Picture
This is it. This is the good stuff. It's super easy, delicious, and a wonderful change up to standard beef tacos. It involves a crescent rolls crust, taco meat, cheese, sour cream, chips, more cheese, plus any add-ons you want. Yum. Essentially it's tacos and then you get nachos on top too! We had this last week, and I told my husband that I thought the best thing about the recipe was the hint of sweetness from the crust. The hubs said the best thing about the recipe is the recipe. He's right.

I got this recipe from a cookbook that my mother in-law sent to me: The Grapevine House Bed and Breakfast Cookbook, which is in Ohio. The cookbook has recipes in it from people who have been to the B&B, and this one is from Peggy Burner. I think my husband would say she's a genius!

Taco Pie
Print this recipe

1 can of crescent rolls (I use reduced fat, and they taste great)
1 pound hamburger
2 tablespoons taco seasoning
1/3 cup water
2 cups cheddar cheese
16 ounces sour cream
Tortilla chips
Garnishes: pico de gallo, lettuce, black olives, tomatoes, onions

Preheat your oven to 350 degrees.

Press the crescent rolls into an ungreased pie plate. You may have to tear the corners off some rolls and press them into the sides. You also could use two cans, but I can make it fit just barely with one can. Place the pie plate in the oven and bake for 10 minutes. 

Meanwhile, brown the hamburger and drain the grease. Add in 1/3 cup water and sprinkle 2 tablespoons of taco seasoning on top. Cook for 5-10 minutes until the water is gone and the meat tastes great. OR...make your own taco meat how you normally make it. Pour the meat into the pie plate and even it out over the crust. Sprinkle 1-1 1/2 cups of cheese on top of the meat, covering it completely. Pop this back in the oven and bake for about 5 minutes or until the cheese has melted. 

Out of the oven, spread the sour cream on top of the cheese and place tortilla chips on the top of the pie. You can crush the chips into bite size pieces to make it easier to eat. Sprinkle the rest of the cheese on top of the chips, and bake for another 5-10 minutes until the cheese has melted and the crust is golden brown.

Note: If you aren't going to eat the entire pie for that meal, I recommend sprinkling chips only over what you'll eat. Otherwise the chips get soggy, and that's no good for anyone. When you reheat the leftovers, just add the chips and cheese on top before you bake or microwave it.
 
Serve with anything you like on your tacos: pico de gallo, tomatoes, lettuce, olives, onions, etc.  

Source: Peggy Burner in The Grapevine House Bed and Breakfast Cookbook
Picture
<<Previous

     Welcome!

    Cooking is fun and easy at high altitude, but baking can be frustrating. About 90% of my recipes work everywhere, but some are adjusted so us mountain dwellers can enjoy baked goods from scratch. I hope you find great recipes on here for your family, and I'll let you know if any are adjusted for high altitude. 

    Stay Updated!

    Add to your Reader:

    Get new posts delivered to your inbox:

    Enter your email address:

    Delivered by FeedBurner

    Categories

    All
    Appetizers
    Bars
    Beef
    Bread
    Breakfast
    Brownies
    Cake
    Cheese
    Chicken
    Chocolate
    Cinnamon
    Cookies
    Crackers
    Cupcakes
    Dessert
    Do It Yourself
    Drinks
    Fruit
    Ground Beef
    High Altitude
    How To
    Ice Cream
    Italian
    Main Courses
    Mexican
    Muffins
    Oatmeal
    Pasta
    Pastry
    Pie
    Pizza
    Pork
    Project Pastry Queen
    Pumpkin
    Salad
    Sauces
    Side Dishes
    Snacks
    Soup
    Sourdough
    Steak
    Vegetables

    My featured recipes on NoshOnIt

    Some Good Reads!

    Annie's Eats
    Bake at 350
    Climbing Grier Mountain
    Confections of a Foodie Bride
    How Sweet It Is
    I Am Baker
    Macaroni and Chesecake
    Pinch of Yum
    Pink Parsley
    Smells Like Home
    Smitten Kitchen
    Sunny Side Up
    The Curvy Carrot
    The Marvelous Misadventures of a Foodie
    The Pioneer Woman Cooks
All content copyright 2012-2013 She Makes and Bakes.