She Makes and Bakes
  • Home
  • About
  • Ramblings
  • Recipe Index
  • What We're Eating
  • High-Altitude Baking

How to Make Pineapple Flowers

3/19/2013

 
Picture
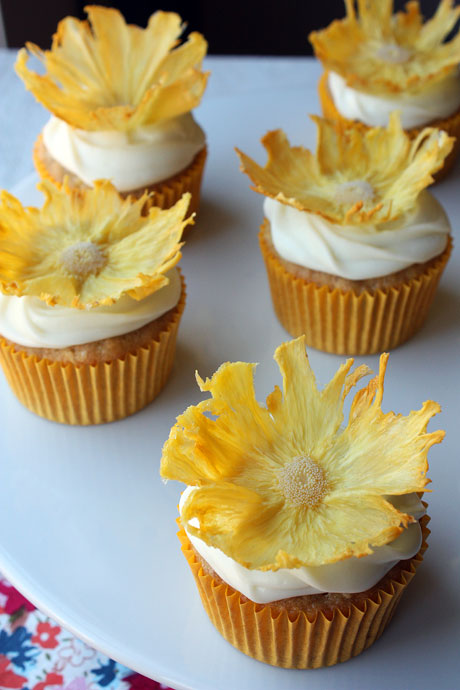
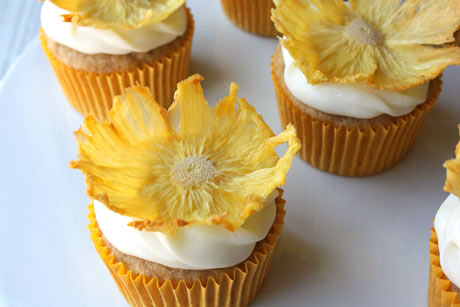
Have you seen anything prettier? These lovely little flowers are  amazing. All of that detail like the dots in the center and the lines around it happens naturally when you dry the flowers. I think they're stunning, and I love to put them on hummingbird cupcakes and carrot cupcakes. Apparently they taste really good, too, although I would never try them because I'm not a fan of pineapple. So picky!

I'm not going to lie and say pineapple flowers are the easiest thing to make. However, they are not the hardest either. They just require a sharp knife and some time. As is true with most things, the more you make them, the easier they get (and the better you get at making them). So here we go.
Picture
Here's what you need:
  • Pineapple
  • Sharp knife
  • Cutting board
  • Small measuring spoon, paring knife, or veggie peeler
  • Muffin tins
  • Sheet trays lined with a silicone baking mat or parchment paper
Picture
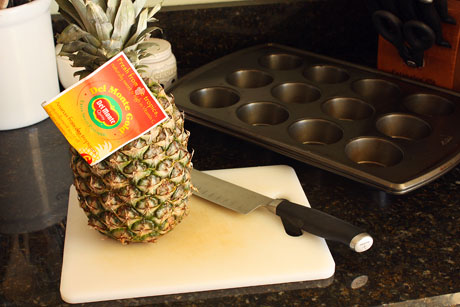
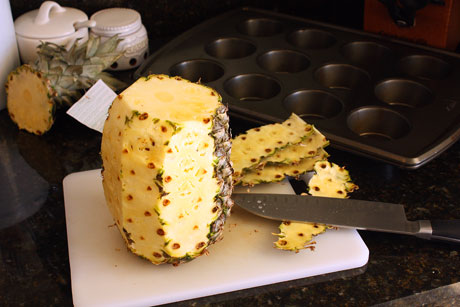
Cut the top off the pineapple and slice the rind off. The first time I did this, I sliced the rind off along with a lot of the pineapple. I highly recommend you don't do this. Instead of cutting straight down, follow the rind or you'll have some tiny flowers. You really don't want tiny flowers.
Picture
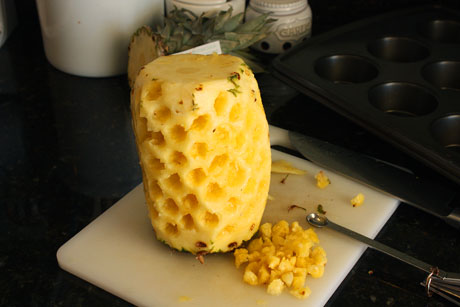
Use a small measuring spoon, small paring knife, or the point of a vegetable peeler to pop out the eyes/seeds on the pineapple.
Picture
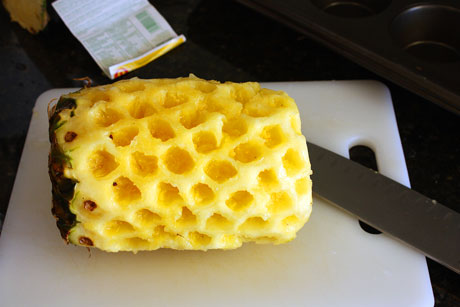
Lay the pineapple on its side, and get ready to cut with your sharp knife.
Picture
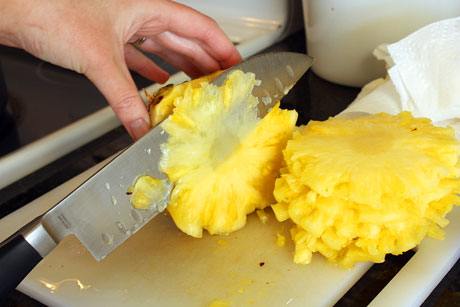
Make extremely thin cuts through the pineapple. You should be able to see your knife through the slice (which is why you want it to be extremely sharp). Don't worry about having mistakes. There are a lot of my slices that were too thick or I only got half a slice. The more you do it, the better you'll get. Even my slices at the beginning were too thick but then better at the end of the pineapple.
Picture
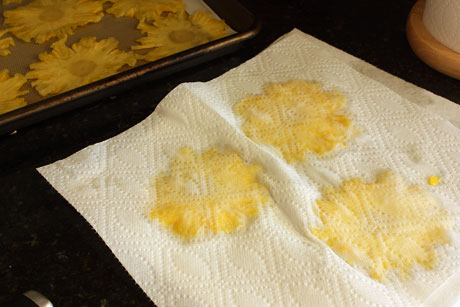
If your pineapple is really ripe and juicy, you'll want to press the slices between towels before you place them on the baking sheets. What we're doing is drying out the pineapple, so any moisture you can get rid of before you dry them in the oven will speed up the process.
Picture
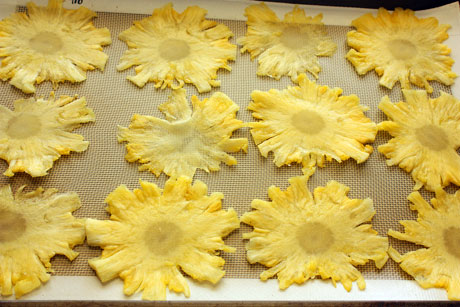
Place the slices on a baking sheet lined with a baking mat or parchment paper.

Bake them at 225 degrees to slowly dry them out. Baking times vary, but you'll want to start with 30 minutes, then flip the slices over, and then bake for another 30 minutes. The slices should shrink and be almost completely dry. The little dots in the middle of the flower happen naturally when they dry.

If they aren't dry after the hour, bake them for 5-10 minute increments and keep a close eye on them so they don't get too brown.
Picture
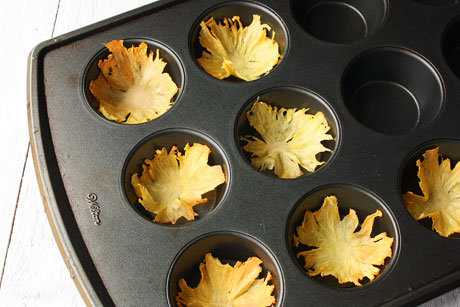
Place the flowers in muffin tins so they curve like a flower and let them dry overnight so they retain their shape.

Print this tutorial

Source: From Annie's Eats/Martha Stewart
You may also like:
Loading...

Hummingbird Cupcakes

3/17/2013

 
Picture
I had never heard of hummingbird cake until I saw a post on Annie's Eats a couple of years ago, and I was mainly intrigued by the beautiful pineapple flowers. Apparently, hummingbird cake is a very southern thing, which explains why I had never heard of it or tried it. Think banana nut bread meets coconut and pineapple. Sold yet? Surprisingly, I am. I am not a fan of either coconut or pineapple, but these are pretty dang good. I've made them a few times now, and everyone loves them. They have a great crumb, moisture factor, and texture. 

I like to pair these with a marshmallow cream cheese (amazing!) and when you top them with the pineapple flower, you can't go wrong. They're pretty and tasty. And, you can make them without a mixer. In one bowl. I love recipes like that. The other bonus is that this recipe works perfectly for me at high altitude. No adjustments needed!

Wondering about those pineapple flowers? The tutorial is coming this week! If you don't have the time or desire to make the flowers, these cupcakes are fantastic without them.

Hummingbird Cupcakes Recipe
Makes 24 cupcakes
Print this recipe

For the cupcakes:
12 tablespoons butter, melted and cooled
1 1/3 cups sugar
2 teaspoons vanilla
2 eggs
1 1/3 cups mashed ripe bananas
1/2 teaspoon baking soda
3/4 teaspoon salt
1/2 teaspoon cinnamon
2 cups all purpose flour
2/3 cup crushed pineapple, drained
2/3 cup walnuts, chopped (optional)
2/3 cup shredded coconut

For the frosting:
8 ounces cream cheese, softened
1/2 cup butter, softened
1 cup melted marshmallows or marshmallow cream
1 pound powdered sugar

Preheat your oven to 350 degrees and place cupcake liners in your muffin tins.

To make the cupcakes, in a large bowl combine the butter, sugar and vanilla and whisk until combined. Whisk in the eggs. Once incorporated, add in the mashed bananas and whisk in. Mix in the baking soda, salt, and cinnamon until combined. Whisk in the flour. With a rubber spatula, fold in the crushed pineapple, nuts (if using), and coconut. Once combined, fill the cupcake liners about 3/4 full (or about 1/4 cup of batter).

Bake for 20-22 minutes or until a toothpick comes out clean. Let them cool in the pans for 5-10 minutes and then remove to a wire rack to cool completely.

While the cupcakes are cooling, make the frosting. In a mixing bowl, cream together the cream cheese and butter. Add in the melted marshmallows or marshmallow cream until combined. Mix in the powdered sugar and mix until smooth and creamy. Pipe on top of the cupcakes. Add a pineapple flower on top (if using).

Cupcakes barely adapted from Annie's Eats, originally from Martha Stewart's Cupcakes
Frosting fromPaula Deen
Picture
You may also like:
Loading...

Blueberry Muffins with Crunchy Cinnamon Sugar

3/7/2013

 
Picture
Show of hands...who else feels like there are not enough hours in the day? I know I'm not the only person. In fact, I'm sure there are people out there who think I have it easy. All I know is that I was never this busy when I had the 9-5 (er...7:30-3:30) desk job. But I also wasn't this happy, and that's what really counts. However, being busy equals boring photos because I don't have the time to pull in various props and pretty colors. So hopefully the food can speak for itself.

So today I took the afternoon off. It was 65 degrees and sunny today, and I sat out on my front porch and read a book. It was sublime. I didn't sit inside on the computer (although I had plenty of work to justify that). I sat outside and took a moment to smell the roses. Or the melting snow and the crocus. It was exactly what I needed. Refreshing.

Sidebar...did you guys know that there's a TV show on now that has both Charles in Charge and Hanging with Mr. Cooper? My head exploded when I saw this. I have no idea if it's any good because I spent time reliving Charles, Buddy, Mark Cooper, Vanessa, and my golden years. Back when I thought life was complicated and busy. Ha!

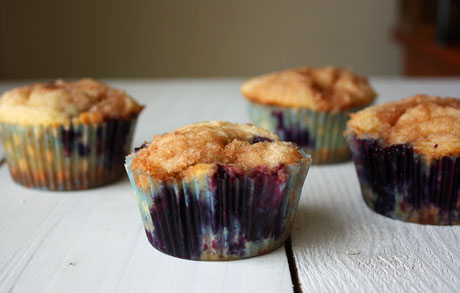
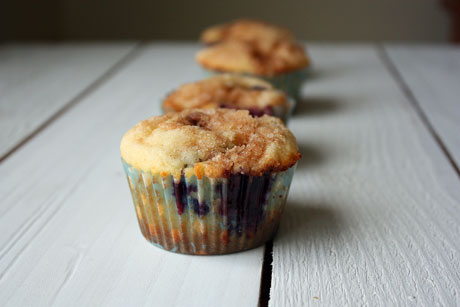
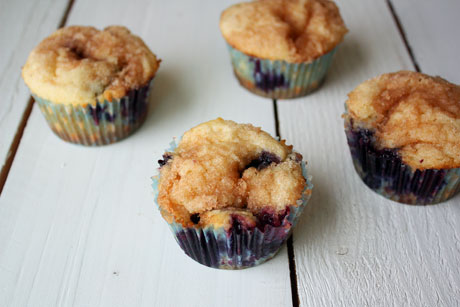
Oh...the muffins. They're incredible. They're juicy and full of blueberries. There's a crunchy topping of cinnamon sugar that somehow pulls everything together and makes it the perfect breakfast, lunch, snack, or dessert. I feel like I say a lot that things are perfect, but at least you guys know that I enjoy eating the recipes that are posted on here.
Picture
Blueberry Muffins with a Crunchy Cinnamon Sugar Topping
Makes 15-16
Print this recipe

Note: If you’re making these at high altitude, simply adjust the baking powder to use the * amount.

For the muffins:
1/4 cup butter, softened
3/4 cups + 2 tablespoons sugar
1 egg
1 teaspoon vanilla
2 teaspoons (*1 3/4 teaspoons*) baking powder
1/2 teaspoon salt
1 3/4 cup all purpose flour
3/4 cup milk
1 1/2 cup fresh or frozen blueberries

For the topping:
Heaping 1/4 cup sugar
1/4 teaspoon cinnamon
2 tablespoons cold butter

Preheat your oven to 375 degrees.

In the bowl of your mixer, cream together the butter and sugar using the paddle attachment until light and fluffy. Mix in the egg and scrape down the sides of the bowl. Add in the vanilla, baking powder, and salt and mix on low until combined. Mix in half of the flour with the mixer on low, pour in the milk and let it mix, and then add in the rest of the flour. Once combined, stop the mixer and fold in the blueberries by hand. If you're using frozen blueberries, do not thaw them first.

Separate the batter into muffin liners, placing about 1/4 cup batter in each cup. Make the topping by mixing together the sugar and cinnamon in a bowl. Cut in the cold butter using a fork until it resembles coarse crumbs. Sprinkle the topping over the muffins.

Bake for 15-17 minutes or until a toothpick comes out clean. Let cool in the pan for a few minutes and then remove from the pan to finish cooling.

Barely adapted from Taste of Home
Picture
You may also like:
Loading...

Strawberry Cinnamon Rolls

3/3/2013

 
Picture
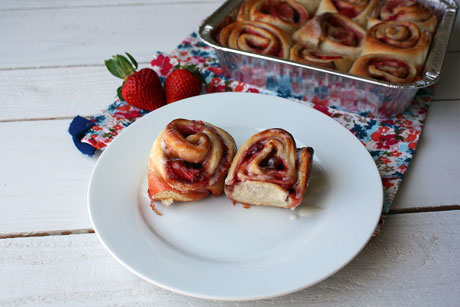
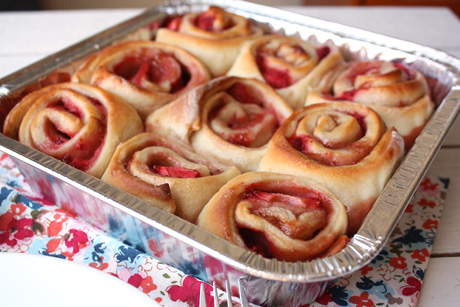
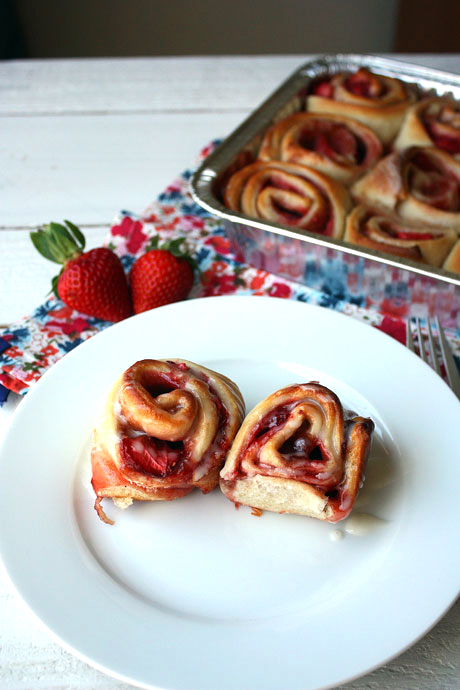
I never really thought I was a big fan of cinnamon rolls until I started making different varieties. And then I was hooked. I've done pumpkin cinnamon rolls, apple pie cinnamon rolls, and now these strawberry cinnamon rolls. These are perfect when you want something that's a little more light and refreshing. 

These are also pretty simple to make after you take care of the dough (which isn't hard to do). Just use a good quality jam for the filling and doctor it up a bit with some cinnamon. Sprinkle on some fresh strawberries, roll it up, slice and bake it, and viola! Perfect breakfast! I'll be adding these to my list of weekend breakfasts, that's for sure! 
Picture
Strawberry Cinnamon Rolls Recipe
Makes 18 rolls
Print this recipe

For the dough: 
6 1/4 cups all purpose flour (794 g/28 ounces)
2 teaspoons salt
6 tablespoons sugar
5 teaspoons instant yeast
2 cups + 2 tablespoons lukewarm milk
1/2 cup vegetable oil

For the filling: 
1 1/2 cup strawberry jam
1 teaspoon cinnamon
4 cups sliced strawberries

For the glaze:
1 cup powdered sugar
1 teaspoon almond extract
1/4 teaspoon cinnamon
2-3 tablespoons milk

To make the dough, mix the yeast with the sugar and warm milk and let sit for about 5 minutes. Measure the flour into the bowl of your mixer, add in the yeast mixture and oil, and mix with the paddle until everything is incorporated. Add in the salt, switch to the dough hook, and mix on low speed until a smooth, tacky ball of dough forms. Transfer the dough to a greased bowl, cover it, and let it rise until doubled, about 1-2 hours.   

When the dough is almost done rising, stir together the jam and cinnamon. 

Preheat your oven to 350 degrees. 

To assemble the rolls, divide the dough in half. Roll it out on a floured surface into a long rectangle, about 15x25 inches or so. The dough will be thin. Spread half of the jam mixture onto each rectangle.  Sprinkle the strawberries on top. The berries won't cover the entire rectangle, but you want to make sure they're evenly spaced. Roll the dough up from the long side and then cut it into 2-inch pieces. Place the slices into greased cake pans, cut side down. Let sit for about 15 minutes to rise. Bake for 25-30 minutes until browned on top and cooked through. 

After the rolls have finished baking, make the glaze by combining the powdered sugar, cinnamon, and almond extract. Add the milk, 1 tablespoon at a time, until the glaze is a pourable consistency. Pour over the cinnamon rolls and serve.  

Dough recipe from Peter Reinhart's Artisan Breads Every Day
Picture
You may also like:
Loading...

Strawberry Crumb Bars

2/10/2013

 
Picture
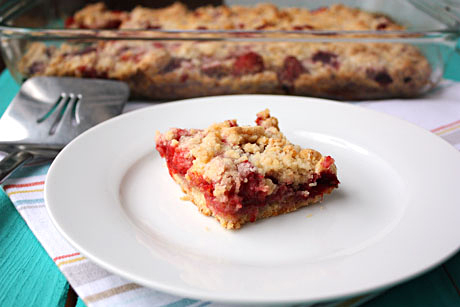
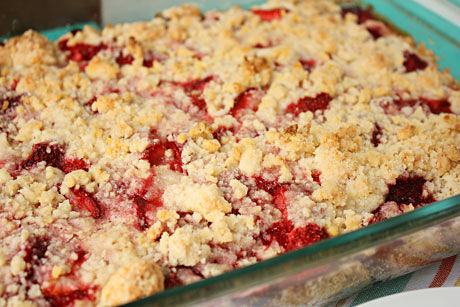
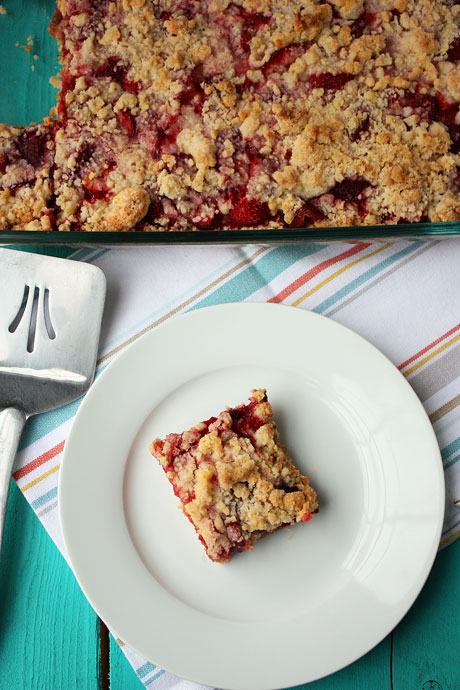
I don't know about you all, but I'm ready to start growing food in my garden. I've seen that some of you are lucky enough to do this, but in Colorado we can't plant anything outside until Mother's Day...three months away. Sigh. So until I can do that, I'm pretty excited about frozen fruit. I think it still has great flavor, and it's perfect in baked bars like these.

In fact, these bars are pretty perfect themselves. See that pan in the background? I took these to a Superbowl party last week. Nine adults devoured these during the game, and they were complaining about how they couldn't stay away from them. I don't make these very often because they are insanely addictive. The lovely crumb combined with the sweet but not-too-sweet strawberries along with a bit of almond extract in them just pushes them over the edge. I highly recommend you make these for your sweetie on Thursday. He or she will love you even more...and if you're worried about having a giant pan of these in the house tempting you, the recipe splits nicely in half and you can bake it in a 9x9 pan instead. I pretty much always have to do that modification because these go just a little too quickly at my house!
Picture
Strawberry Crumb Bars Recipe
Makes a 9x13 pan
Print this recipe

3 cups all purpose flour
1 1/2 cups sugar, divided
1 teaspoon baking powder
1/4 teaspoon salt
1/4 teaspoon cinnamon
1 cup shortening
2 eggs
1 teaspoon almond extract
1 tablespoon cornstarch
4 cups strawberries (fresh or frozen), cut in half

Preheat your oven to 375 degrees and grease a 9x13 baking dish.

In a large bowl, stir together the flour, 1 cup of the sugar, baking powder, salt, and cinnamon. Add in the shortening and mix with a pastry cutter, fork, or two knives until the mixture resembles coarse crumbs. Add the eggs and almond extract. Press 2/3 of the mixture into a greased 9x13 pan.

Note: If you're using frozen berries, don't thaw first.

In another bowl, combine the remaining 1/2 cup sugar and the cornstarch. Stir together. Add in the strawberries and gently stir until coated. Spoon these over the crust. Sprinkle the remaining crumbs over the strawberries. 

Bake for 40-50 minutes or until bubbly and golden brown. Remove from oven and let cool completely before serving.

Barely adapted from Taste of Home
Picture
You may also like:
Loading...

Sangria

1/24/2013

 
Picture
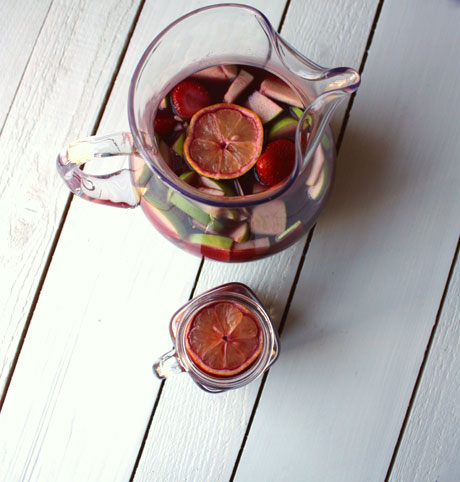
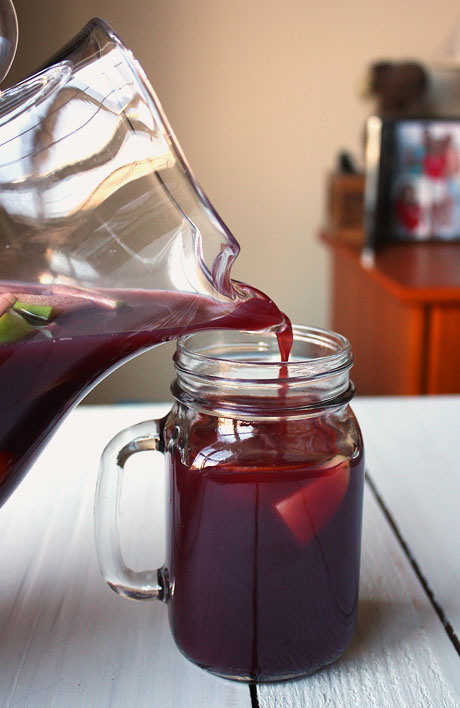
I spent eight hours on Thursday in a food safety class. While I was learning about proper food temperatures and how to keep a restaurant safe from terrorists (yes, really), I was thinking about this sangria. Nevermind that it was 10am, sangria was much more exciting than learning about the temperature danger zone. One of the most cringe worthy things about the class was that it said you should use precut and prepackaged items to minimize potential contamination. While I understand the premise behind that statement, I would never support that (and I think a lot of others would agree with me). It's much more expensive to buy prepackaged items, it kind of takes the fun out of cooking, and you give up a lot of the quality control to get it like that. Oh well.

The nice thing about this sangria is three fold. 1. It's easy. 2. You can add whatever kind of fruit to it that you'd like to flavor it. 3. It gets better with time, so you can prep it and let it sit and stew. One thing that I hate about sangria recipes is that they can be so ambiguous. I got sick of trying to figure it out each time, so I wrote it down a few times ago and haven't turned back since. I guarantee that if you make this for the Superbowl next weekend, people will be cheering for you, even if your last name isn't Harbaugh. 

Sangria Recipe
Print this recipe

Note: Use whichever fruits you prefer or what you have on hand. I always do an apple and strawberries (fresh or frozen) and then use whatever else I happen to have.

1 750 mL bottle Cabernet wine
2 cups orange juice
1/2 cup peach brandy
1/4 cup sugar
1 apple sliced
1 Meyer lemon sliced
1 cup frozen strawberries

In a large pitcher, stir together the wine, orange juice, brandy, and sugar. Add the fruit and let sit in the refrigerator for at least 4 hours but preferably overnight. Serve cold.
Picture
You may also like:
Loading...

Apricot Brie Crostini

1/2/2013

 
Picture
Did you guys make New Years resolutions? I admit that I didn't this year. With everything up in the air, I couldn't add another thing to my already overwhelmed life. Last year, my resolution was to try a new recipe or two every week. I did really well for a few months, then I started my blog, then I forgot about it. That's what happens, right? We eventually just forget about those pesky resolutions? By the way, how come every time I type resolutions I want to type resolutations? That's definitely not a word. Maybe my resolution can be typing better. Maybe.

When I was in high school, I was at church youth group, and we went around a circle and said our resolutions. I was slouched over like I normally sat and was listening to other people. When it was my turn, I said that mine was having better posture. Then I realized that my posture was completely terrible and I should probably get a better goal for the year. Something that I wouldn't break in 2.5 seconds.

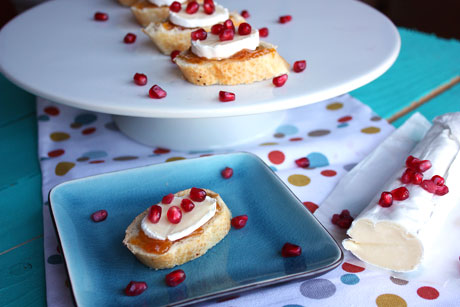
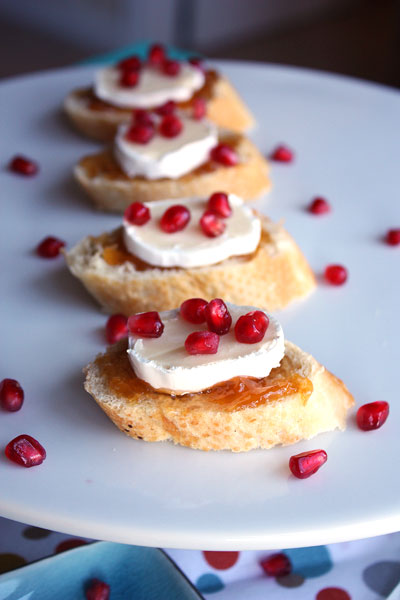
So I know many resolutions are centered on eating better/losing weight. While this crostini isn't going to throw you off your new diet, it's probably not extremely healthy. It's very tasty though, and I love it for a light lunch or appetizers at one of the bowl games. We need to girl those college football games up a little bit. I love how pretty it is, and I downed about 5 of these today because they are good. First, who doesn't love bread? Then you top it with some apricot jam, a slice of brie, and pomegranate seeds. Creamy, sweet, and tangy are all flavors we want right now. Right? Oh and I know that this isn't technically a crostini because the bread isn't toasted, but we can pretend, right? I really liked it with a crusty baguette and didn't feel the need to toast it, too.

Apricot Brie Crostini
Print this recipe
This is more of a method than a recipe, so make how much you want.

Baguette
Apricot jam
Brie log
Pomegranate seeds

Slice the baguette into pieces. Spread about one tablespoon of jam on each piece. Slice the brie log into thin slices and place on top of the jam. Sprinkle the pomegranate seeds on top and serve. You could make this ahead of time and store in the refrigerator, too.

Inspired by 5280 magazine
Picture
You may also like:
Loading...

Apple Streusel Pie

11/12/2012

 
Picture
The first time I ever made an apple pie, it didn't go so well. I think I cheated and used a pre-made crust, but I spent a lot of time peeling, coring, and slicing apples. I put it all together and was excited about how amazing it smelled. And then I cut into it and found that there was a pool inside my pie. All of the apple slices were hanging out in a crazy amount of delicious-smelling liquid. Mocking me. I hate kitchen failures, but I really hate baking failures. So I didn't give up but I did get smart and take a pie class at a local cooking school.

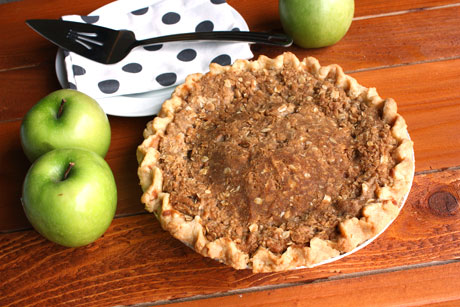
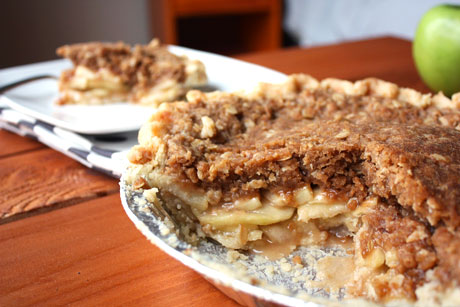
While the class was great and taught me a lot (and boy did I have a lot of questions for that poor instructor), the pie crust recipe never worked outside of the class. I hate that. However, I got the recipe for this amazing apple streusel pie, and this alone made the price of the class well worth it. If you like apple pie, brown sugar, and oatmeal cookies, you will love this pie. Like shove it in your face love it. Essentially it is a thick brown sugar oatmeal cookie on top of an apple pie. I swoon. I had to get this pie out of my house because I had resigned myself that I would eat the entire thing, fork by fork, until it was gone. I figured it would take me a week or so, but I knew I could and would do it. I had zero will power when it came to this pie. So when my parents called looking for a dessert, I happily told them they could eat the rest of my pie. Let them test their will power! I highly recommend you make this for Thanksgiving and Christmas and every other time of year when the calling for pie hits because this one is absolutely incredible.

Apple Streusel Pie Recipe
Print this recipe

1 9-inch pie crust, unbaked

For the filling:
3-4 cups Granny Smith apples, peeled, cored, and sliced (about 3 apples)
1/3 cup sugar
1 1/2 teaspoon cornstarch
1/2 teaspoon cinnamon
1 1/2 teaspoon lemon juice
1 tablespoon butter, melted

For the streusel topping:
1 cup flour
1/2 cup oats
1 cup brown sugar, packed
1 1/2 teaspoon cinnamon
Pinch of nutmeg
1/2 teaspoon salt
12 tablespoons butter, cold (1 1/2 sticks)

Press the pie crust into the pie plate and crimp the edges.

Preheat your oven to 350 degrees and move a rack to the lower third of your oven. This should keep the pie crust from browning too rapidly.

In a large bowl, stir together the sugar, cornstarch, and cinnamon. Add the apples and toss to coat. Drizzle the lemon juice and melted butter on top of the apples and stir until coated. Spoon into the prepared pie crust.
 
To make the streusel topping, mix together the flour, oats, brown sugar, cinnamon, nutmeg, and salt. Use a pastry blender or fork to cut the cold butter into the brown sugar mixture until it resembles coarse crumbs. Pour this mixture on top of the apples, making sure it goes all the way to the crust. It's a lot of topping, but you'll want to use all of it.  

Bake for 50-60 minutes or until the pie is bubbly around the edges. Check the pie halfway through to ensure the crust isn't getting too brown on the top. If it is, cover it loosely with foil. Let cool before serving.  

Recipe from Kitchen Table Cooking School
Picture

Apple Pie Cinnamon Rolls

10/7/2012

 
Picture
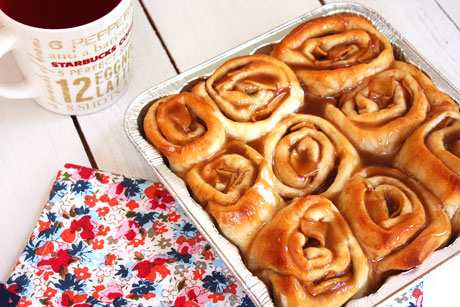
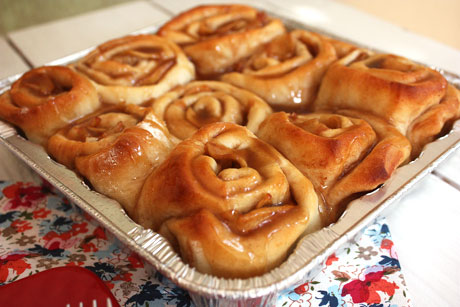
Hello best breakfast ever. I was trying to think of creative ways to use apples, and I came up with apple pie plus cinnamon roll. And then I wanted to use the sauce that I fell in love with because, well, because I want to put that sauce on everything. Even my mashed potatoes...well, maybe I wouldn't go that far. Maybe. So, you have apple pie cinnamon rolls with a brown butter cinnamon rum glaze. And I should stop talking there because if that hasn't convinced you, I don't know what will. Seriously people. You need these in your life.
Picture
I'm not going to lie, they do take a little bit of time to make. But, you can split things up. You could make the bread dough, the apples, and the glaze on one day and then you could assemble and bake the second day. If I wanted to devour these on a Sunday morning, I would make the bread dough on Saturday and stick it in the fridge to rise. On Saturday, I also would make the apples and then place them in the fridge to cool and stay put until I needed them. You could make the glaze on Saturday or while the rolls are baking on Sunday. So, there is some work, but it's manageable and soo worth the effort!
Picture
Because really, aren't you worth the work of apple pie + cinnamon rolls + brown butter + cinnamon rum? I think everyone is. By the way, if you don't drink or you have kids, it's not really rum. It's rum extract. It lends a warmth to the glaze without the buzz. So please, go make these. Like now.
Picture
Apple Pie Cinnamon Rolls Recipe
Makes about 24 cinnamon rolls
Print this recipe

For the dough:
6 1/4 cups all purpose flour (794 g/28 ounces)
2 teaspoons salt
6 tablespoons sugar
5 teaspoons instant yeast
2 cups + 2 tablespoons lukewarm milk
1/2 cup vegetable oil

For the apple filling:
4 Granny Smith apples, peeled, cored, and sliced
3/4 cup sugar
3 tablespoons cinnamon
1 tablespoon cornstarch
1 tablespoon lemon juice

For the brown butter glaze:
1/4 cup butter
1/2 cup sugar
1 tablespoon flour
Pinch of salt
1/4 cup water
1 teaspoon vanilla
1/4 teaspoon rum extract
1/8 teaspoon cinnamon

To make the dough, mix the yeast with the sugar and warm milk and let sit for about 5 minutes. Measure the flour into the bowl of your mixer, add in the yeast mixture and oil, and mix with the paddle until everything is incorporated. Add in the salt, switch to the dough hook, and mix on low speed until a smooth, tacky ball of dough forms. Transfer the dough to a greased bowl, cover it, and let it rise until doubled, about 1-2 hours.   

When the dough is almost done rising, make the filling. In a large saucepan, stir together the sugar, cinnamon, and cornstarch. Add in the sliced apples and lemon juice. Cook on medium heat for about 15 minutes until thickened and bubbly. Remove from heat and let cool for about 5 minutes.

Preheat your oven to 350 degrees.

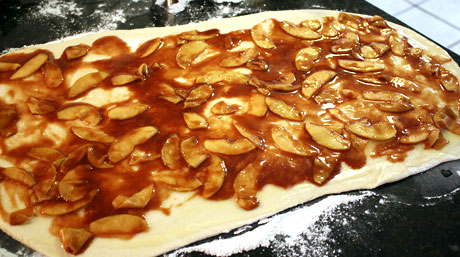
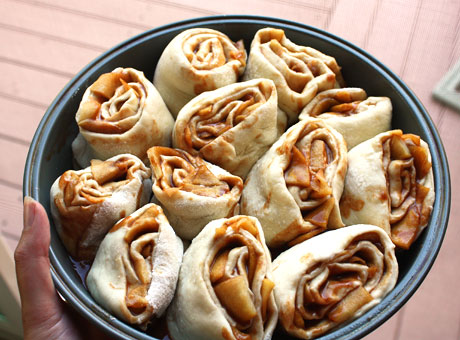
To assemble the rolls, divide the dough in half. Roll it out on a floured surface into a long rectangle, about 15x25 inches or so. The dough will be thin. Spread half of the apple filling onto each rectangle. The apples won't cover the entire rectangle, but you want to make sure they're evenly spaced and that the juice covers the rectangle. Roll the dough up from the long side and then cut it into 2-inch pieces. Place the slices into greased cake pans, cut side down. Let sit for about 15 minutes to rise. Bake for 25-30 minutes until browned on top and cooked through.

To make the glaze, in a medium saucepan melt the butter. Stir and watch as it gets foamy and then starts to turn brown. When it turns into a dark honey color and smells nutty, quickly stir in the sugar, flour, and salt. Gradually add the water. Bring to a boil and cook and stir for 2 minutes. Remove from heat and add in the extracts and cinnamon. Pour on top of the warm cinnamon rolls.

Dough recipe from Peter Reinhart's Artisan Breads Every Day
Glaze recipe adapted from Taste of Home Fall Baking Cookbook
Picture

Easy Baked Cinnamon Apples

9/30/2012

 
Picture
Do you ever have a late-night craving for dessert but don't want to ruin the healthy eating you've done during the day? This happens to me pretty frequently. My mom told me about this dessert years ago, and it's pretty perfect. Essentially it's apple pie filling so you lose the calories from pie crust, and you don't have to eat that stuff that comes from the can. Is that really even apples?

This really should be "baked" apples because it's done in the microwave. Hence the easy part. I indicated in the recipe to use one tablespoon of butter but you could easily halve that amount to save some calories. Another way to save calories is to use Splenda or another sweetener. But I know there are people out there who think that sweeteners are the devil more or less, so use what you prefer. The next time you have a dessert craving in a bad way, I highly recommend this.

Easy "Baked" Cinnamon Apples Recipe
Print this recipe

1 apple, peeled, cored, and sliced
1 tablespoon butter
1 packet of Splenda or 1 tablespoon sugar
1/2 teaspoon cinnamon

Microwave for 3-4 minutes, stirring halfway through, or until apples are tender.
Picture
<<Previous

     Welcome!

    Cooking is fun and easy at high altitude, but baking can be frustrating. About 90% of my recipes work everywhere, but some are adjusted so us mountain dwellers can enjoy baked goods from scratch. I hope you find great recipes on here for your family, and I'll let you know if any are adjusted for high altitude. 

    Stay Updated!

    Add to your Reader:

    Get new posts delivered to your inbox:

    Enter your email address:

    Delivered by FeedBurner

    Categories

    All
    Appetizers
    Bars
    Beef
    Bread
    Breakfast
    Brownies
    Cake
    Cheese
    Chicken
    Chocolate
    Cinnamon
    Cookies
    Crackers
    Cupcakes
    Dessert
    Do It Yourself
    Drinks
    Fruit
    Ground Beef
    High Altitude
    How To
    Ice Cream
    Italian
    Main Courses
    Mexican
    Muffins
    Oatmeal
    Pasta
    Pastry
    Pie
    Pizza
    Pork
    Project Pastry Queen
    Pumpkin
    Salad
    Sauces
    Side Dishes
    Snacks
    Soup
    Sourdough
    Steak
    Vegetables

    My featured recipes on NoshOnIt

    Some Good Reads!

    Annie's Eats
    Bake at 350
    Climbing Grier Mountain
    Confections of a Foodie Bride
    How Sweet It Is
    I Am Baker
    Macaroni and Chesecake
    Pinch of Yum
    Pink Parsley
    Smells Like Home
    Smitten Kitchen
    Sunny Side Up
    The Curvy Carrot
    The Marvelous Misadventures of a Foodie
    The Pioneer Woman Cooks
All content copyright 2012-2013 She Makes and Bakes.