She Makes and Bakes
  • Home
  • About
  • Ramblings
  • Recipe Index
  • What We're Eating
  • High-Altitude Baking

Vanilla Bean Salted Caramel Sauce

1/17/2013

 
Picture
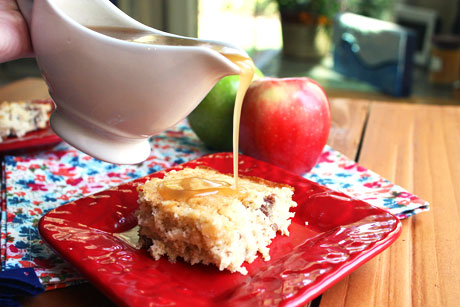
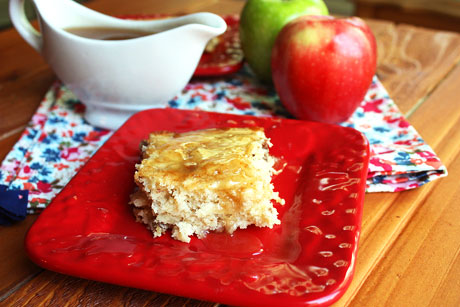
Can we get any better than vanilla beans, sea salt, and homemade caramel? I didn't think so. Let me just repeat that to be sure. Vanilla beans. Sea salt. Caramelized sugar. Got it? Good.

I tend to cheat when I make caramel by using brown sugar. It's easy to achieve the caramel color when you start with it, right? But the thing about using brown sugar is that the sugar doesn't caramelize, so it's not a true caramel. So this was the first time I've made a true caramel sauce, and it won't be the last.

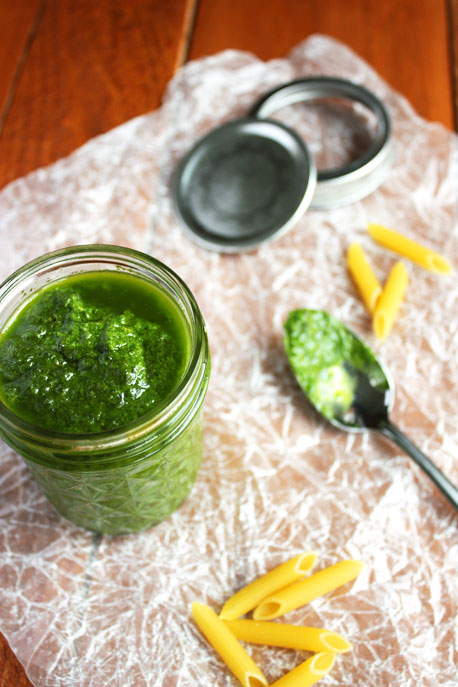
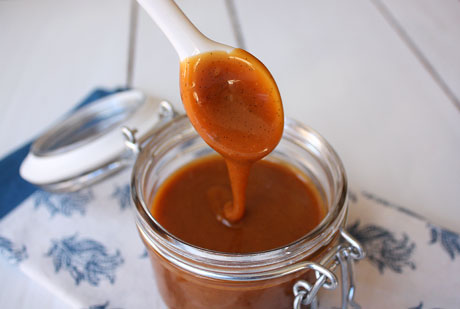
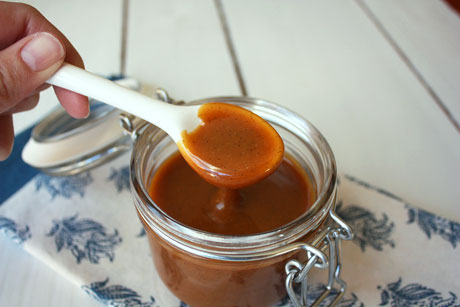
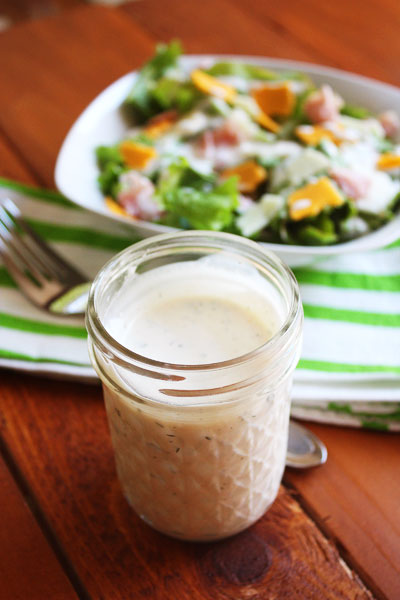
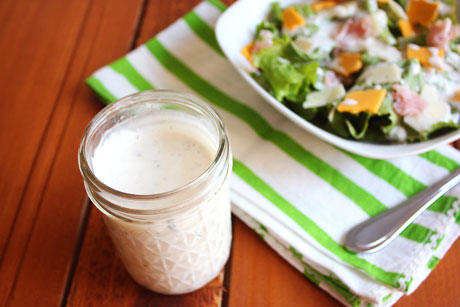
I'm not going to lie to you and say it can be done in 10 minutes. Well, maybe it can but it took me much longer. One of the annoying things about making caramel sauce is that when you add the cream, it lumps together and then you have this clumpy mess and you're left with this inedible sugar rock and cream floating around it. Or maybe that's just me. But....if you keep cooking it on low heat, the rock of sugar will melt again and it will get smooth and creamy like the picture above. Or below. You just have to patient (which is definitely not my virtue). However, this is so worth it. When you stick a spoon of it in your mouth, you will want to sit with the jar, devour the entire thing, and then wonder accusingly who ate all the caramel. Trust me.

This took me an hour to make but I know how to shorten that time. Use a large pan. Either a saucepan or a skillet. I used a 6-inch saucepan, and it took forever. If you have a bigger surface area to caramelize the sugar, it will happen quicker (duh!). So I highly recommend doing that because the sooner you can get this in your mouth, the better. Seriously.

Vanilla Bean Salted Caramel Sauce Recipe
Print this recipe

1 cup sugar
1 1/4 cups heavy cream
1 vanilla bean, split lengthwise (or 1 teaspoon vanilla extract in addition to the vanilla below)
1/4 teaspoon sea salt
1/2 teaspoon vanilla extract

In a large heavy bottom pan, spread the sugar in an even layer and turn the heat on medium low. Scrape the seeds out of the vanilla bean and add them to the cream. Heat the cream in the microwave for about 1 minute so it's not really cold.

Keep an eye on the sugar without stirring, and once the edges start to liquify, slowly stir the sugar together until it all melts and is liquid. If it starts to turn brown too quickly, turn the heat to medium. If it starts to clump, turn the heat to low and let it melt. Don't stir too often so it can liquify.

Once it's liquid and is a deep amber color (you can test a drop on a white plate if you need), slowly add the cream while whisking. Be careful because it will boil violently. If it clumps (good chance it will), return the pan to the burner on medium low and slowly whisk it until it melts. While you're stirring it, add in the sea salt and extract. Once the sauce is completely smooth, remove it from the heat and let it cool for a couple of minutes and then place it in a heat-proof container (like a mason jar). Store in the fridge for up to one month.

Source: Smells Like Home
Picture

Apple Cake with Browned Butter Rum Sauce

9/16/2012

 
Picture
Oh boy. So this apple cake is pretty awesome, but what really takes the...er...cake is the sauce. But first, we'll talk about the cake. It's a simple cake made with shredded apples and pecans. It's moist and flavorful with a lot of cinnamon and a little almond extract. It's fall in a cake, and it's really easy to make. No mixer required.  

But the sauce...oh the sauce. It's browned butter, which if you've never had, is amazing. It's nutty and awesome. In addition to the browned butter are vanilla and rum extracts. It's a warm, friendly, comforting sauce. I wouldn't mind curling up with a book and this sauce. I realize that sounds super weird, but it's that good. Paired together, it's the perfect easy fall cake. And, since the sauce uses rum extract instead of rum, it's a cake you can serve to everyone.

I halved the recipe and ended up with thinner slices, but it was perfect. If you're serving more people, I would make the full recipe so you have a taller cake.
Picture
Apple Cake with Browned Butter Rum Sauce Recipe
Makes a 9x9 pan
Print this recipe

For the cake:
4 cups shredded apples
2 cups sugar
2 eggs
1/2 cup canola oil
1 teaspoon almond extract
2 cups all purpose flour
2 teaspoons baking powder
1 teaspoon salt
1 teaspoon cinnamon
1/2 cup chopped pecans

For the sauce:
1/2 cup butter
1 cup sugar
2 tablespoons all purpose flour
1/8 teaspoon salt
1 cup water
2 teaspoons vanilla extract
1/2 teaspoon rum extract

Preheat your oven to 350 degrees.

To make the cake, in a large bowl combine the shredded apples and the sugar. (I shredded mine using a cheese grater, but you also could chop them finely.) Let sit for 5-10 minutes. In a small bowl, whisk together the eggs, canola oil, and almond extract. Add to the apple mixture and stir to combine. Combine the flour, baking powder, salt, and cinnamon. Pour into the apple mixture and stir until combined. Add in the pecans and stir.

Spray a 9x9 pan with cooking spray. Pour the batter into the pan and bake for 35-40 minutes or until a toothpick comes out clean.

To make the sauce, in a medium saucepan melt the butter. Stir and watch as it gets foamy and then starts to turn brown. When it turns into a dark honey color and smells nutty, quickly stir in the sugar, flour, and salt. Gradually add the water. Bring to a boil and cook and stir for 2 minutes. Remove from heat and add in the extracts. Serve warm.  

Source: Taste of Home Fall Baking Cookbook
Picture

Homemade Ranch Dressing

9/11/2012

 
Picture
Even though I make a lot of things from scratch, I had never made my own ranch dressing. In fact, I had never really made my own salad dressings, period. I think it's because even though it's kind of gross, it's nice how long the bottles last. I'm not really one who eats salads every night or wants the same dressing time after time. I don't dip everything possible in ranch, either. So I like to have a dressing that lasts awhile.

But I finally took the plunge and made my own ranch. It tastes great, and it's nice knowing exactly what's in it. The only downside is that it lasts for only four days. However, I took the leftover dressing and divided it into a mini muffin pan. I stuck that in the freezer and then popped the little dressings out when they were frozen, wrapped them in plastic wrap, and placed them back in the freezer. When I need some ranch, I can pull out a little cup of it, defrost it on the counter, and it's ready to go. It's so much better than having a bottle sit in my fridge for months (or maybe even a year-yikes). This is such a great recipe...the dressing tastes fresh and amazing. I love to add some cayenne pepper for a tiny kick, but that's up to you. 

Homemade Ranch Dressing Recipe
Yield: About 1 1/2 cups
Print this recipe

1/2 cup buttermilk
1/2 cup mayonnaise
6 tablespoons sour cream
1 tablespoon minced shallot
1 tablespoon minced fresh parsley
1 tablespoon minced fresh dill
1 garlic clove, minced
1 teaspoon lemon juice
Pinch sugar
1/2 teaspoon salt
1/4 teaspoon pepper
Pinch cayenne pepper (optional)

In a medium sized bowl, whisk together the mayonnaise, sour cream, shallot, parsley, dill, garlic, lemon juice, sugar, salt, pepper, and cayenne pepper (if using). Add the buttermilk slowly until it reaches your desired consistency (one half cup will yield a thin dressing). Store it covered for up to four days in the refrigerator; whisk it before using. 

Source: The America's Test Kitchen Family Cookbook 
Picture

Everyday Salsa

8/1/2012

 
Picture
I absolutely love salsa, but I have a hard time finding a good brand at the grocery store. I'm not really a fan of beans or peaches or corn or other "strange" ingredients in my salsa. I want some straight up basic but good salsa. The only store brand I've found that's great was at Harris Teeter. If you live near a Harris Teeter, check out their salsa in jars. Pretty dang good...in fact, we brought some home to Colorado with us. Just not enough of it.

Anyway, since I can't find a good salsa, I usually make my own. It's super simple, hardly takes any time, and you can make as much or as little as you need. I make a lot because even as just two people, we go through a lot of it. This is year-round salsa that uses canned tomatoes. My tomatoes still are green, so I haven't had the chance to make this with ours yet this year. It's very easy to substitute fresh tomatoes in the summer. Just know that instead of your salsa being red, it'll be pink. I usually don't measure the ingredients for this--I just add and taste and adjust. So go that route if you're comfortable with it or use my measurements below.

Everyday Salsa Recipe
Yields approximately 3 cups
Print this recipe

Note: If you want to use fresh tomatoes instead of canned, peel approximately 4-6 large tomatoes or up to 10 Roma tomatoes. Cut them into chunks and add them to your food processor or blender. Also, I briefly cook my onion to get rid of the raw onion taste. If you don't have the time or the taste buds, just chop your onion into chunks and throw it into the food processor/blender.

1/2 small white onion
1 tablespoon butter
28 ounce can of diced peeled tomatoes
3 garlic cloves
1 jalapeno, seeded
1/4-1/2 cup cilantro
2 tablespoons lime juice
Salt, to taste

Dice the onion. In a small skillet, melt the butter over medium heat. Add the onion and cook until soft, about 3-5 minutes. Remove from heat. 

Add the tomatoes, garlic, jalapeno, cilantro, cooked onion, and lime juice to the bowl of a food processor or a blender. Pulse until smooth. If you like chunky salsa, don't process it as long. 

Taste the salsa with a chip and add salt as needed. Store in the refrigerator. 

A She Makes and Bakes recipe.   
Picture

Pulled Pork with Homemade BBQ Sauce

7/26/2012

 
Picture
Pulled pork is such an easy meal, especially when you can throw it in the Crockpot and forget about it for hours. I've made this twice now, and it's a great recipe. The first time I made it, I did it with a three-pound bone-in pork shoulder. When I went to pull it out of the Crockpot after about 10 hours, it literally was falling off the bone. It was absolutely incredible, and we devoured it. The second time, I used a seven-pound boneless pork shoulder when I made it for the hub's 30th birthday party. I didn't have it in the Crockpot quite long enough so it wasn't as tender, but it still was fantastic. Everyone loved it. As a bonus, I made my own BBQ sauce in four different varieties. It was fun having everyone decide which one to slather on top of their meat. Out of regular, spicy, Jack Daniels, and apricot (because I was too lazy to buy peach preserves when I had apricot), the spicy and Jack Daniels variations were the favorites. One of the best things about the BBQ sauce is that it's no cook, so it takes about 5 minutes to whip up. 
Picture
Here was some of the birthday spread...pulled pork sandwiches, baked potato bar, corn on the cob, kale chips, buffalo chicken dip, cucumber blueberry salad, caprese puffs, peaches and cream cupcakes, slutty brownies, blueberry pie bars, and cookie cake. Everyone was well fed!

By the way, today I'm participating in Momma's Meals Featured Friday. She's baking my orange creamsicle cookies. I sure hope she likes them...I think they're the perfect summer cookie! Go check out Momma's Meals to see her take on them.

Pulled Pork Recipe (Crockpot)
Print these recipes

3-4 pound boneless pork shoulder
1/4 teaspoon ground pepper
1/4 teaspoon kosher salt
2 cups water
1 tablespoon hickory flavored liquid smoke

Rinse and pat dry the pork shoulder. Season it with salt and pepper all over and place it in the Crockpot. Pour the water and liquid smoke in the Crockpot and cook on low for 8-10 hours until very tender. Remove the meat from the Crockpot and shred with two forks. Serve with homemade BBQ sauce (below).

Homemade BBQ Sauce Recipe (no cook)
Makes about 3 cups

1 1/2 cups ketchup
1/2 cup molasses
2 tablespoons cider vinegar
3 tablespoons honey
1 1/2 teaspoons hot sauce
1/2 teaspoon liquid smoke
Salt and pepper, to taste

Combine all the ingredients in a large bowl and whisk to combine. Store covered in the refrigerator for several weeks.

Variations:
--Add a few tablespoons of peach or apricot jam for a fruity BBQ sauce
--Add extra hot sauce for a spicy kick
--Add a few tablespoons of Jack Daniels or another whiskey/bourbon for an adult version (just make sure to tell people that it's not cooked)

Pulled pork recipe from Mel's Kitchen Cafe
BBQ sauce recipe from Pink Parsley
Picture

Homemade Pesto

5/30/2012

 
Picture
Now that summer is here, I hope you are growing some basil. It is one of my favorite herbs to grow and use. However, I tend to plant a lot of it and then have too much, which is when I make some pesto. Pesto is incredibly easy to make, and it tastes 800 times better than the store-bought stuff. It requires a few simple ingredients, and you can put it in pasta, on pizza, mix it in with some tuna (more on that later), put it on your eggs...the possibilities are endless! 

I've never done this because I don't have ice cube trays, but you can pour the pesto into the trays and freeze. When frozen, pop them out and place them in a freezer bag. Just use one of two of them when needed. Great idea! 

I know that toasting the nuts and garlic adds to the work, but toasted nuts really brings out the flavor, and toasting the garlic will get rid of the harsh flavor. I definitely recommend you don't skip those steps!

Homemade Pesto Recipe
Print this recipe

3 garlic cloves, unpeeled
2 cups packed basil leaves
1/2 cup extra virgin olive oil
1/4 cup pine nuts, toasted
1/4 cup grated parmesan cheese
1/4 teaspoon salt

Preheat your oven to 350 degrees and toast the pine nuts in a single layer for 5-10 minutes until golden brown and fragrant.

Heat a small skillet on medium heat and toast the garlic in the peels for about 7 minutes until fragrant and spotty brown, flipping the garlic often. Let cool before peeling.

Peel the garlic cloves, add all the other ingredients to a blender or food processor and mix all the ingredients together till smooth. Store in the refrigerator or freezer.

Source: Cook's Illustrated
Picture

     Welcome!

    Cooking is fun and easy at high altitude, but baking can be frustrating. About 90% of my recipes work everywhere, but some are adjusted so us mountain dwellers can enjoy baked goods from scratch. I hope you find great recipes on here for your family, and I'll let you know if any are adjusted for high altitude. 

    Stay Updated!

    Add to your Reader:

    Get new posts delivered to your inbox:

    Enter your email address:

    Delivered by FeedBurner

    Categories

    All
    Appetizers
    Bars
    Beef
    Bread
    Breakfast
    Brownies
    Cake
    Cheese
    Chicken
    Chocolate
    Cinnamon
    Cookies
    Crackers
    Cupcakes
    Dessert
    Do It Yourself
    Drinks
    Fruit
    Ground Beef
    High Altitude
    How To
    Ice Cream
    Italian
    Main Courses
    Mexican
    Muffins
    Oatmeal
    Pasta
    Pastry
    Pie
    Pizza
    Pork
    Project Pastry Queen
    Pumpkin
    Salad
    Sauces
    Side Dishes
    Snacks
    Soup
    Sourdough
    Steak
    Vegetables

    My featured recipes on NoshOnIt

    Some Good Reads!

    Annie's Eats
    Bake at 350
    Climbing Grier Mountain
    Confections of a Foodie Bride
    How Sweet It Is
    I Am Baker
    Macaroni and Chesecake
    Pinch of Yum
    Pink Parsley
    Smells Like Home
    Smitten Kitchen
    Sunny Side Up
    The Curvy Carrot
    The Marvelous Misadventures of a Foodie
    The Pioneer Woman Cooks
All content copyright 2012-2013 She Makes and Bakes.