She Makes and Bakes
  • Home
  • About
  • Ramblings
  • Recipe Index
  • What We're Eating
  • High-Altitude Baking

Sangria

1/24/2013

 
Picture
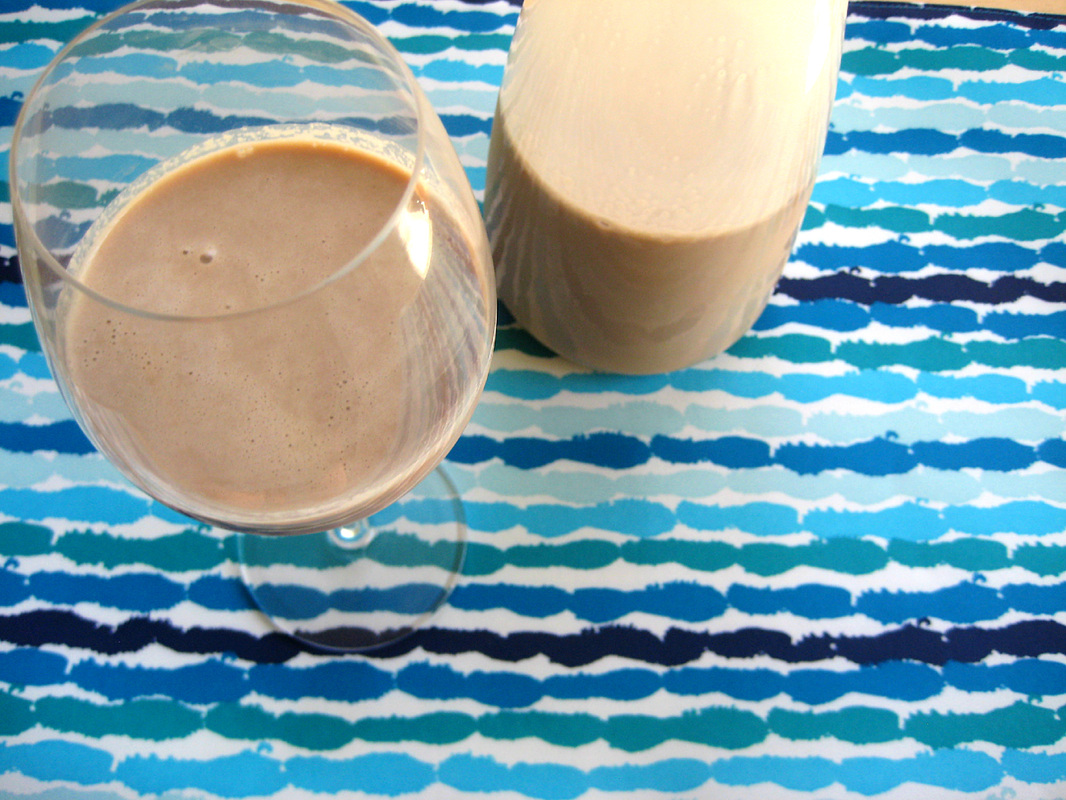
I spent eight hours on Thursday in a food safety class. While I was learning about proper food temperatures and how to keep a restaurant safe from terrorists (yes, really), I was thinking about this sangria. Nevermind that it was 10am, sangria was much more exciting than learning about the temperature danger zone. One of the most cringe worthy things about the class was that it said you should use precut and prepackaged items to minimize potential contamination. While I understand the premise behind that statement, I would never support that (and I think a lot of others would agree with me). It's much more expensive to buy prepackaged items, it kind of takes the fun out of cooking, and you give up a lot of the quality control to get it like that. Oh well.

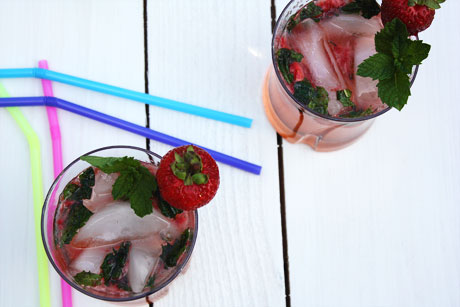
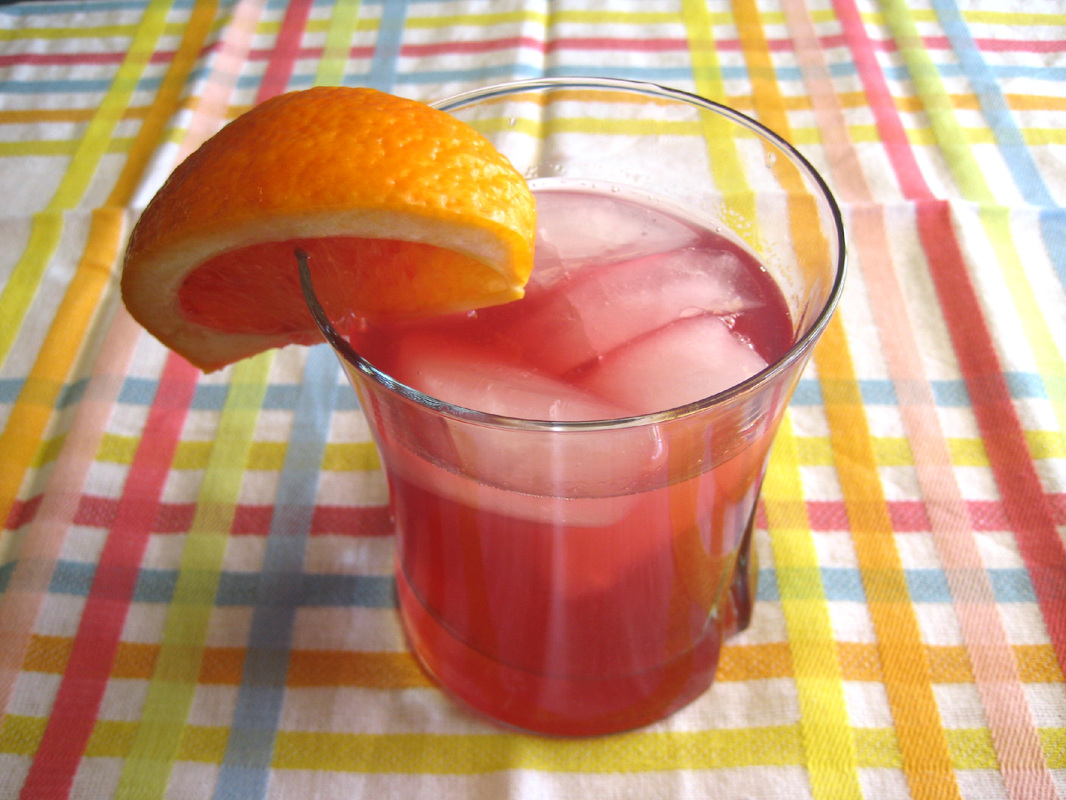
The nice thing about this sangria is three fold. 1. It's easy. 2. You can add whatever kind of fruit to it that you'd like to flavor it. 3. It gets better with time, so you can prep it and let it sit and stew. One thing that I hate about sangria recipes is that they can be so ambiguous. I got sick of trying to figure it out each time, so I wrote it down a few times ago and haven't turned back since. I guarantee that if you make this for the Superbowl next weekend, people will be cheering for you, even if your last name isn't Harbaugh. 

Sangria Recipe
Print this recipe

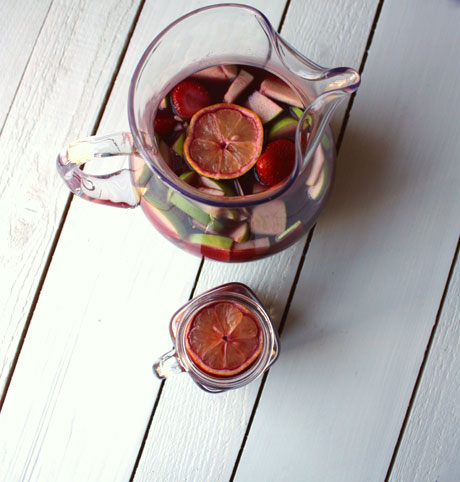
Note: Use whichever fruits you prefer or what you have on hand. I always do an apple and strawberries (fresh or frozen) and then use whatever else I happen to have.

1 750 mL bottle Cabernet wine
2 cups orange juice
1/2 cup peach brandy
1/4 cup sugar
1 apple sliced
1 Meyer lemon sliced
1 cup frozen strawberries

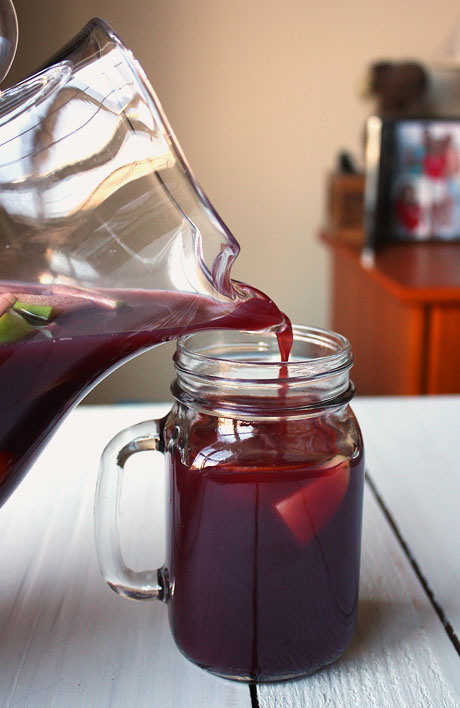
In a large pitcher, stir together the wine, orange juice, brandy, and sugar. Add the fruit and let sit in the refrigerator for at least 4 hours but preferably overnight. Serve cold.
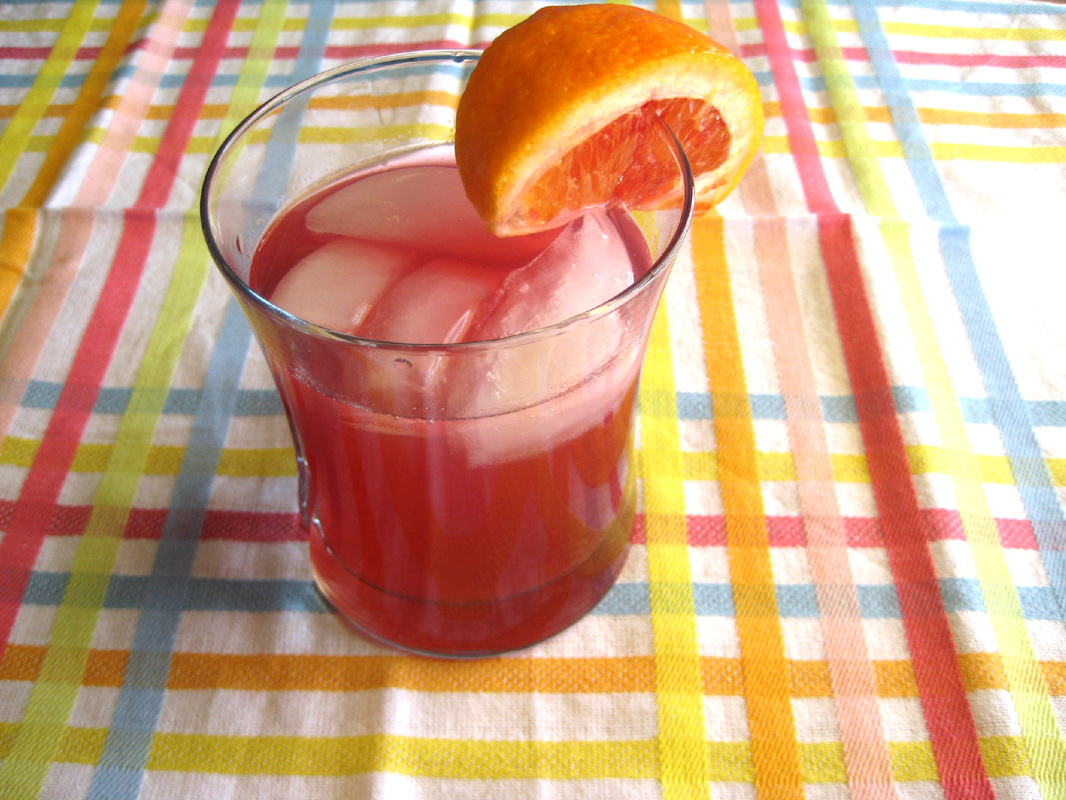
Picture
You may also like:
Loading...

Homemade Hot Cocoa Mix

11/8/2012

 
Picture
I've heard stories about how the economy is, shall we say, not so good, but it really hasn't affected me personally until about a week ago. My company is struggling and has done lay-offs the last three years. While that was pretty terrible for those laid-off and those of us left behind, it didn't hit home too much. However, last week they announced they were closing the office on Fridays (yay!) and cutting everyone's pay significantly (boo!). We are all part-time employees now. They are hopeful that things will come around and we can return to full-time work, but you just never know. So, what does this mean for me? Some good, some bad. Not working on Fridays means more time to work on the blog and my bakery business. While that's nice, it means a lot less money, which means that people are going to be getting a lot of homemade gifts this year for Christmas.
 
I actually love giving homemade food gifts, and while it does save money, I think it's a nice way to show people that you love them and were thinking of them while you were making and packaging their gift. I also love making gifts for other people to give to their friends, but that's another story. This hot cocoa gift is perfect for a gift. It's simple to make, it lasts a long time, it has two kinds of chocolate plus cocoa and vanilla sugar, and it makes a bulk quantity, so you can give it to many people. I made this last spring and gave it to my mom for her birthday. She's still enjoying it. And, if you don't like to share, and you drink a lot of hot cocoa, please make this and use it yourself. It's so much better than the packets you can buy or any of the standard mixes/syrups. My personal favorite way to drink this is with warm milk and a shot of Bailey's. Now that hits the spot, especially on Fridays when I don't have to go to work! 

Homemade Hot Cocoa Mix
Makes about 19 cups of mix, about 75 mugs of cocoa.
Print this recipe

If you have vanilla sugar on hand, use that. If not, you can easily make your own. I highly recommend making a lot of it and storing it in your pantry. It lasts for a long time, and you can easily refill the canister with more sugar to make more. My new favorite use for it is in pie crust.

2 vanilla beans
4 cups sugar
1 1/2 pounds good-quality semisweet chocolate, chopped
9 ounces good-quality bittersweet chocolate, chopped
2 cups Dutch process cocoa powder 

Split the vanilla beans lengthwise and scrape the middle out. Place the sugar in a large container that has a lid. Use your fingers to work the beans and middle filling into the sugar. Cover and let sit at least overnight. Remove the bean pods (you can use these to make more vanilla sugar).  

Combine the chopped chocolates in your food processor and process for four second pulses until the chocolate is very finely ground. If you don't process this until it's very fine, the chocolate won't dissolve in the milk. Add in the cocoa powder and vanilla sugar and process until combined. Store in an airtight container for up to six months. 
 
Serving instructions: Stir two tablespoons of the mix with 8 ounces of milk in a small saucepan over medium heat until the milk is warm and the cocoa is dissolved. Serve immediately.

Smaller Batch (2 1/2 cups):
To make a more manageable personal size, use the following quantities and the same instructions above. I recommend you make the 4 cups of vanilla sugar as above, but you'll only need to use 1 cup of it. Use the rest of the sugar for cookies, cakes, pies or anything where you want extra vanilla flavor.
1 cup vanilla sugar
6 ounces good-quality semisweet chocolate, chopped
2 1/4 ounces good-quality bittersweet chocolate, chopped
1/2 cup Dutch process cocoa powder

Source: Annie's Eats who got it from Confections of a Foodie Bride
Picture

Strawberry Mango Mojito

8/2/2012

 
Picture
Thank. Goodness. It's. Friday. I feel like this week has dragged on...maybe it's because I've been super tired from staying up late to watch the Olympics. I am not used to going to bed after 11 and getting up at 6:30. I need more hours of sleep! Let me tell you that once the clock strikes 5 today (ok, 3), I will be making myself one of these bad boys. I gotta get these refreshing drinks in today because there will be no drinking on Saturday in preparation for my triathlon on Sunday. I have to be fresh for the race!

I think that one of the secrets to an incredible mojito is brown sugar. One of my friends filled me in on that fantastic tip last summer, and it changed my world. The brown sugar gives it a deeper flavor. I love adding in fresh strawberries, but it's just as good without them. When the hubs turned 30, I made a big bowl of muddled strawberries, mint, and brown sugar, and I put out a bottle of mango run and a liter of Sprite. It was a make your own mojito bar, and it was fabulous. Again, I normally don't measure the ingredients, but I did it for you guys. If your mint plant is exploding like mine (I seriously cannot keep up), try these before the summer is gone! 

Strawberry Mango Mojito Recipe
Makes two rocks-size drinks
Print this recipe

Note: Feel free to play around with this. I love mango rum, but you could try a variety of different rums. Make yours as strong or as weak as you prefer (this is on the stronger side). If you like sweeter drinks, use more brown sugar.

1 tablespoon brown sugar
4 medium strawberries, hulled and diced
1/4 cup mint leaves, ripped
4 ounces mango rum
7.5 ounces Sprite
 
Using a mortar and pestle (or a bowl and spoon), mash together the strawberries, sugar, and mint. Let sit for 5-10 minutes so the strawberries release their juice. Divide this mixture into two rocks glasses. Divide the rum and sprite between the glasses. Stir and add ice.

A She Makes and Bakes recipe
Picture

PPQ: Bloody Marys

6/24/2012

 
Picture
I love myself a good bloody mary--it's a salad in a glass! My uncle makes rocking bloody marys, and I texted him to find out what he put in them. His secret ingredient: lots of love. The secret ingredient to these is Guinness. That's right, a dark beer, which is what you see floating on the top of the glass. I think the Guinness is an awesome touch, but I also think these are fantastic bloody marys without it. There is something, actually a lot, to be said about making a bloody mary from scratch instead of using a mix. You get more texture and flavor, and most of these ingredients you probably have in your pantry/fridge already. These are one of my favorite afternoon drinks, especially after a day of skiing moguls. It just hits the spot!  

Funny thing is, I'm not a big Guinness fan. While I like dark beer, it's a little too dark for me. However, while you're reading this, I'm in Ireland hoping to change my mind about this beer. I heard it tastes different in its native country. We'll see. And, even though I'm not a huge fan, it tastes great in this drink. It adds a little sweetness, although I had to drink it through a straw so I wasn't tasting all beer at the top. My husband, who loves Guinness, also loved these, and he definitely loved drinking the leftover Guinness. How many times can I say love in one sentence. Geez. Profound.

This is a Project Pastry Queen recipe, one that I'll be making again. Be sure to check out the webpage to see everyone's take on it. I sure hope someone else made it and loved it!  

Bloody Marys Recipe
Makes 4
Print this recipe

4 cups tomato juice
Juice from 2 limes
4 shots vodka
2 teaspoons fresh or prepared horseradish
2 teaspoons worcestershire sauce
1 teaspoon celery salt
Hot sauce
Salt and freshly ground black pepper
Coarse salt for the glass rims
1 can (12 ounces) ice cold draft Guinness
Celery, limes, or green olives for garnish

Combine the tomato juice, lime juice, vodka, horseradish, worcestershire, celery salt, hot sauce (to taste), and salt/pepper (to taste) in a large pitcher filled with ice. Wet the rims of 4 glasses with water and dip them in a bowl of coarse salt. Divide the tomato juice mixture evenly among the glasses. Pour 3 ounces of the Guinness on the top of each glass and serve immediately with the garnishes of your choosing.

Source: The Pastry Queen Cookbook
Picture

Homemade Irish Cream

3/29/2012

 
Picture
We'll go ahead and start off today by saying these aren't my best pictures. Please don't let that deter you from making your own Irish cream because wow. In case you haven't been reading my blog for long, I posted a few recipes using Irish cream for St. Patrick's Day. And those were some good recipes. I was going through quite a bit of Irish cream for those, and it's not cheap so I decided to make my own. This is super easy to make, it keeps for 2 months (although mine has never lasted that long because I drink it/cook with it), and it's delicious. Plus, it's a lot cheaper than buying it at the liquor store!

I adapted my version from a recipe that had cinnamon in it, which I ended up not liking because it didn't taste like true Irish cream to me. However, you could add in some cinnamon or nutmeg or anything else to help make it how you like it. The original recipe had cream in it, which I also didn't like because the cream just floated to the top, and it turned into a strange, curdled mess. Not good. So, I used 2% milk. If you want yours to be a little thicker, I would suggest using whole milk or half and half. But I think the 2% is just fine, and I really didn't want to add any more calories!

Homemade Irish Cream
Makes 1 quart
Print this recipe

1 teaspoon instant espresso granules
2 tablespoons cocoa powder
1 1/2 cups milk
1 can sweetened condensed milk (14 oz)
1 teaspoon honey
1 1/4 cup Irish whiskey
2 teaspoons vanilla

In a blender, add all the ingredients and blend until smooth and, well, blended. Transfer to a container, seal tightly, and leave in the refrigerator overnight to meld the flavors before using. Store in the fridge for up to 2 months, and shake well before each use.
 
Source: Adapted from Our Italian Kitchen
Picture

Mystic Mango

3/15/2012

 
Picture
I adore this drink. Is that weird? This drink reminds me of the beach, being in the Caribbean, and having fun. My uncle used to own a swim-up pool bar in Grand Cayman, and I spent a lot of time there in college (in Grand Cayman, not the bar...well, there may have been a good amount of time spent at the bar, too). On my first trip there, he introduced me to the gloriousness of a mystic mango. This drink tastes like juice, and it's perfect if you really don't like the taste of alcohol. There is no "whew that's a strong drink" sentiment until you've had too many and you're wondering why you can no longer say the word amenities. Is that too specific for you to wonder if it's true? 

When we have get togethers, I often make a pitcher of these so everyone can enjoy. I never measure the ingredients so play around with it and decide how strong you want it to be. The measurements below are for a pretty weak and small drink. I used a blood orange to make the one pictured, but I usually just use a regular carton of OJ, and you really only want a splash of the OJ. My favorite brand of mango rum is Cruzan, but any brand will do. Cruzan didn't pay me to say that, but I wish they would! I think my uncle got this "recipe" off their mango rum bottle long ago, but I'm not to clear on that...or much else from those wonderful Mystic Mango Grand Cayman days! 

Mystic Mango
Print this recipe
1/8-1/4 cup mango rum
1/4 cup orange juice
1/2 cup cranberry juice

Mix juices and rum together, add ice, stir, and enjoy!
  
Picture
Pin It

     Welcome!

    Cooking is fun and easy at high altitude, but baking can be frustrating. About 90% of my recipes work everywhere, but some are adjusted so us mountain dwellers can enjoy baked goods from scratch. I hope you find great recipes on here for your family, and I'll let you know if any are adjusted for high altitude. 

    Stay Updated!

    Add to your Reader:

    Get new posts delivered to your inbox:

    Enter your email address:

    Delivered by FeedBurner

    Categories

    All
    Appetizers
    Bars
    Beef
    Bread
    Breakfast
    Brownies
    Cake
    Cheese
    Chicken
    Chocolate
    Cinnamon
    Cookies
    Crackers
    Cupcakes
    Dessert
    Do It Yourself
    Drinks
    Fruit
    Ground Beef
    High Altitude
    How To
    Ice Cream
    Italian
    Main Courses
    Mexican
    Muffins
    Oatmeal
    Pasta
    Pastry
    Pie
    Pizza
    Pork
    Project Pastry Queen
    Pumpkin
    Salad
    Sauces
    Side Dishes
    Snacks
    Soup
    Sourdough
    Steak
    Vegetables

    My featured recipes on NoshOnIt

    Some Good Reads!

    Annie's Eats
    Bake at 350
    Climbing Grier Mountain
    Confections of a Foodie Bride
    How Sweet It Is
    I Am Baker
    Macaroni and Chesecake
    Pinch of Yum
    Pink Parsley
    Smells Like Home
    Smitten Kitchen
    Sunny Side Up
    The Curvy Carrot
    The Marvelous Misadventures of a Foodie
    The Pioneer Woman Cooks
All content copyright 2012-2013 She Makes and Bakes.