She Makes and Bakes
  • Home
  • About
  • Ramblings
  • Recipe Index
  • What We're Eating
  • High-Altitude Baking

Rosemary Parmesan Wheat Thins

3/11/2013

 
Picture
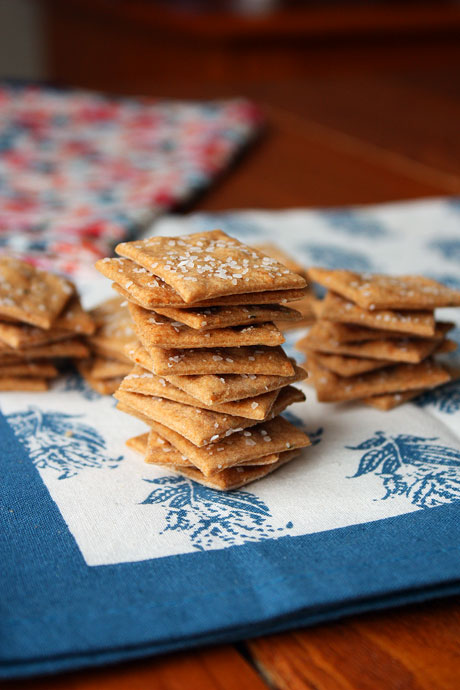
Do Wheat Thins come in a rosemary Parmesan flavor? If not, they should. Show of hands, when you hear wheat thins, do you automatically think of Stewie in the Family Guy Wheat Thins commercial? Whhheat Thins. Or is that just me? I swear. Every.time. Now that's good marketing!

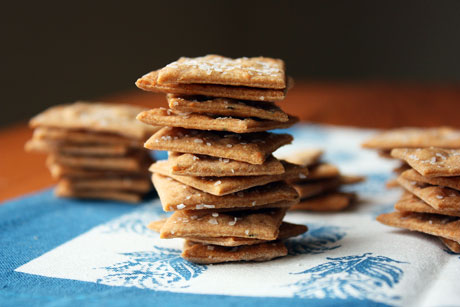
I love making crackers because they're shockingly easy and extremely adaptable. I was in a rosemary mood, so I took Deb's recipe and added in some of that flavor. And since everything is better with cheese, I decided to add in some Parmesan, too. And it totally worked. You should ignore the amount of kosher salt I have on top of my crackers though. I love salty things, but this was a bit too much. I highly recommend you have a lighter hand with the salt shaker.

If you want a plain wheat cracker, you can leave out the rosemary and Parmesan with great results. Or you can substitute other herbs. Either way, these are bound to be a hit. Plus, you know exactly what's going in them!

Rosemary Parmesan Wheat Thins Recipe
Makes about 3 dozen
Print this recipe

1 1/4 cups whole wheat flour
1 1/2 tablespoons sugar
1/2 teaspoon table salt
1/4 teaspoon paprika
4 tablespoons cold butter
1/4 cup grated Parmesan cheese
1/2-1 teaspoon rosemary, minced
1/4 cup cold water
Kosher salt for sprinkling

In a food processor, pulse together the flour, sugar, salt, paprika, cheese, and up to 1 teaspoon rosemary (depending on how much you like rosemary) until combined. Cut the butter into small cubes and add it into the processor. Pulse until it is evenly combined into the flour mixture.  With the machine running, slowly add in the cold water until it forms into a ball. You may need to add another 1-2 tablespoons of water to get the dough to come together but it should not be a sticky dough. Once it's formed into a ball, remove it from the food processor and place on a well floured counter.

Preheat your oven to 400 degrees.

Divide the dough into two pieces and roll it out very thin. The thinner you can roll them, the better they are. Be sure that your dough isn't sticking on your counter, and add more flour if needed. Use a pastry wheel to cut the dough into 1 1/2 inch squares (it doesn't have to be perfect). I use a pastry wheel and a ruler, but I'm pretty OCD. Poke each cracker with a toothpick several times so they don't puff up when they bake. Sprinkle with kosher salt.

Transfer the crackers to a cookie sheet and leave a little bit of space between each one. Bake until crisp and brown about 5-7 minutes. Keep an eye on them because the time to bake correlates directly with how thick or thin they are. Cool before eating.

Adapted from Smitten Kitchen
Picture
You may also like:
Loading...

Homemade Breakfast Sandwiches

2/14/2013

 
Picture
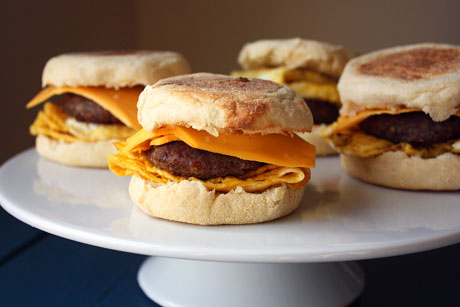
My husband absolutely loves breakfast sandwiches. So every now and then when I'm feeling like a nice wife, I'll buy the frozen ones for him (which he absolutely loves). You know the ones that come four to a large box and cost approximately 84 dollars? That *might* be a slight exaggeration, but those suckers are expensive!

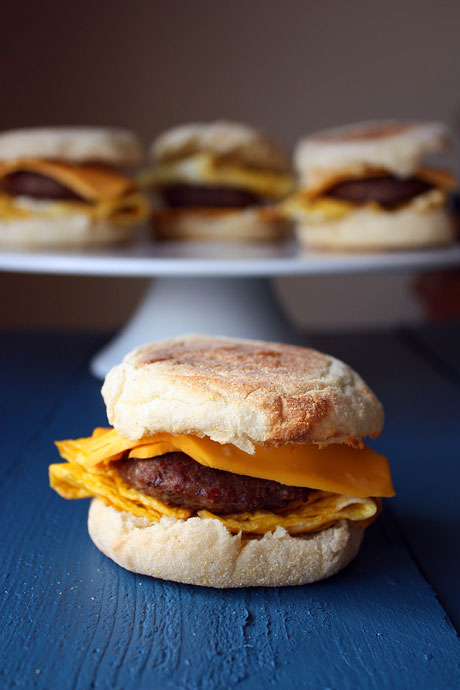
I knew that I could make them taste just as good and be a lot more cost efficient. Not to mention saving all that packaging waste. And guess what, they're easy. You certainly don't have to make four of them, but I made them on a Monday, stuck them in sandwich bags, and placed them in the freezer. The night before my husband wanted one, I placed it in the fridge. He took it to work the next morning and heated it up for 55 seconds in the microwave. Guess what, they tasted better than the prepackaged ones. I used American cheese, but I'm thinking cheddar would be great or even pepper jack to give it a little kick! There's so many different ways to play around with this recipe.

Homemade Breakfast Sandwiches
Makes 4
Print this recipe

4 English muffins
4 eggs
8 ounces breakfast sausage
4 slices cheese (I used American but cheddar or pepper jack would be great, too)

Cut the sausage into 1/2 inch slices and press down into wider patties. Cook for about 10-15 minutes on medium heat, flipping halfway through, until cooked through. Remove to a paper towel to drain. If you want your muffins toasted, toast them.

Crack one egg into a small bowl and scramble together with some salt and pepper. Heat a small skillet over medium heat and spray with cooking spray. Pour the mixed egg into the skillet and cook for one minute without stirring. Flip it over and cook for another 30 seconds. Fold the egg into quarters and place on the English muffin. Place the sausage patty on top and add a slice of cheese. Top with the other half of the English muffin. Serve.

To eat later, reheat in the microwave for 45-60 seconds or in the toaster oven for about 5 minutes until warm and the cheese has melted. If you want to freeze them, place them in separate bags in the freezer and let thaw in the fridge overnight before warming.
Picture
You may also like:
Loading...

Pizza Bites

1/31/2013

 
Picture
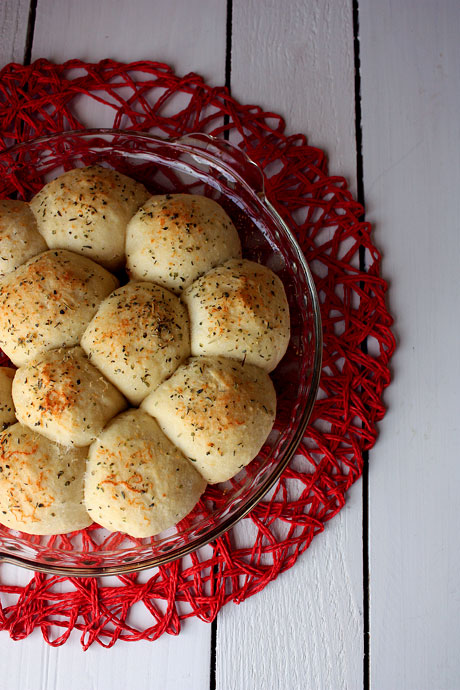
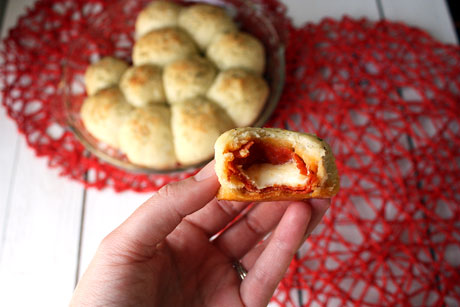
One last Superbowl snack before Sunday...pizza bites! When I saw this come up on one of my favorite blogs years ago, I had to make it that same week. And we're still eating them. Pizza bites are incredible...for lunch, a snack, or dinner. I make mine a little bigger than the original recipe indicates and place 3-4 pieces of pepperoni in each roll with a big hunk of mozzarella. The original recipe calls for 20-24 balls, and I can only try to get 12 out of mine.

Pizza dough isn't hard to make, and it rises pretty quick. This is my favorite and I actually make it all by hand now. I find it's much easier than using my big mixer. But feel free to grab some from the store or your local pizza place. I highly recommend you make these as soon as possible!

Pizza Bites
Print this recipe

For the dough:
6 ounces (about 1 cup) semolina flour
16 ounces (about 3 1/4 cups) bread flour
1 1/2 tablespoons sugar
1 teaspoon yeast
1/4-1/2 teaspoon garlic powder (optional)
2 teaspoons salt
14 ounces (1 3/4 cups) warm water
3 tablespoons extra virgin olive oil

For the bites:
About 40 pieces of pepperoni
3 pieces of string cheese
Olive oil
Italian seasoning
Grated Parmesan cheese

Combine the yeast, sugar, garlic, and water in a bowl and allow yeast to dissolve. Add flours and stir with a large spoon. Let the dough rest for a few minutes to give the yeast time to work. Add the oil and salt and stir. Place the dough on a floured counter and knead by hand until it's soft and elastic. Place in a lightly oiled bowl and cover. Let it rise about an hour or until it’s doubled in size. I like to cover my rising bread with shower caps that my friends pick up at hotels. They're easy to slip on and they're reusable.

Split into two pieces and shape or place in freezer bags to freeze and use late (you only need one ball of dough for this recipe).

Preheat your oven to 400 degrees.

Divide one ball of dough into 12 pieces. Stretch the piece into a circle about the size of your palm. Place the pepperoni and cheese in the middle of the circle and stretch the dough around it and pinch to close. Place the balls seam side down in a greased 9-inch pie plate.

Brush olive oil on top of the balls and sprinkle the Italian seasonings and parmesan cheese on top. Bake for 20 minutes or until the tops are golden brown. Serve warm.

Source: Annie's Eats
Picture
You may also like:
Loading...

Jalapeño Popper Chicken

1/30/2013

 
Picture
Apparently to be a good food blogger, I should be much more interested in the food/party part of the Superbowl than the food. But guess what, I'm not. Yes, I love making dips and snacks and delicious things to eat, but I love football and I love the NFL. A lot. So my favorite part about this upcoming Sunday will be watching the game. If you've been reading my site for any length of time (or know me at all), you know that I love the Broncos. In fact, I was lucky enough to go to the Superbowl in 1999 with my dad when the Broncos beat the Falcons! It was so much fun and is something that I'll remember doing my whole life. Football holds a special place in my life, and it's something that my dad and I have done together for decades.

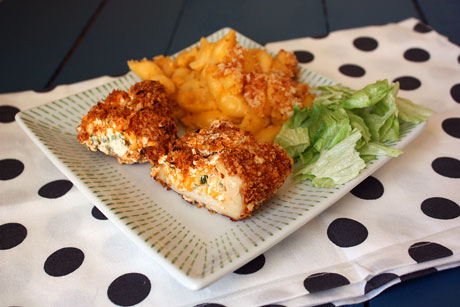
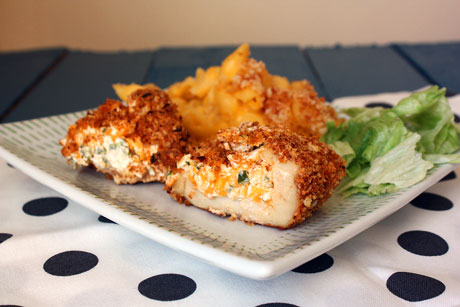
So this isn't really the perfect Superbowl snack, but it is an awesome meal that would be great this Sunday, next Sunday, or any other day. Jalapeño popper chicken was something that intrigued me when I first saw it. I tucked it away and then I finally tried it and totally fell in love. My first worry was that it would be super spicy from the large amount of jalapeños, but it's not. When you mix it in with the cheeses and then the chicken and breadcrumbs, the spice gets mellowed out. So if you want a lot of heat, I would add a lot of minced jalapeños. Do yourself a favor and make this soon because it's terrific!

Jalapeño Popper Chicken Recipe
Print this recipe

1/2 cup panko crumbs
2 teaspoons canola oil
2 teaspoons taco seasoning
1 egg
2 ounces cream cheese
1/4 cup cheddar cheese, shredded
1-2 jalapeños, seeds and ribs discarded and then minced
2 chicken breasts

In a small pan, combine the panko and canola oil. Cook on medium heat while stirring until the crumbs are golden brown. Remove from heat and mix with the taco seasoning. 

Preheat the oven to 375 degrees and set an ovenproof rack over a rimmed baking sheet. Spray lightly with cooking spray.

In a shallow bowl, mix the egg.

In another bowl, combine the cream cheese, cheddar cheese, and jalapeños. Use a small, sharp knife to cut a slit in the chicken breast horizontally (this is where you will stuff the cheese filling). Stuff with the filling and use toothpicks to secure if needed. Alternately, pound the chicken breast out thin, spread the filling over half of it, and fold the chicken on top of the cheese filling. Secure with toothpicks.

Dredge the stuffed chicken through the egg and then dip in the panko mixture. Make sure the crumbs are covering each part of the surface, and if any cheese is showing, cover that area really well so it doesn't drip out as much.

Place the breaded chicken on top of the rack, and if there is any cheese filling covered with the crumbs, place that side up. Bake for about 25-30 minutes or until the chicken is cooked through.

Source: Elly Says Opa and Sunny Side Up
Picture
You may also like:
Loading...

Onion Dip

1/27/2013

 
Picture
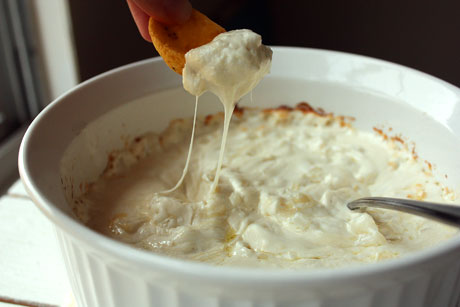
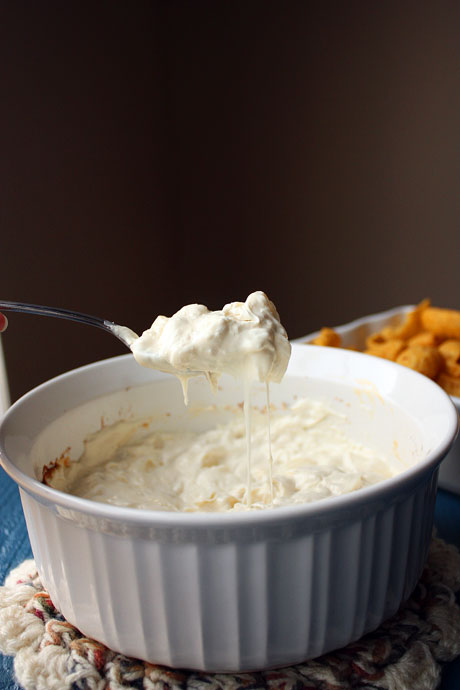
Are you ready for the most addicting dip ever? Seriously, ever. I could eat an entire bowl of this stuff. I first had this dip when my aunt and cousin served it, and it's possible that I consumed nearly the entire bowl. But I've learned my lesson and now I only make it when I know there will be people to help me eat it. Lots of people.

The beauty of this? Only four ingredients. If you're going for super easy and tear free, use a bag of frozen diced onions. I've done this, and it's just as good as a freshly diced onion. When cream cheese and Parmesan cheese are main ingredients, it's really hard to go wrong. Gooey cheese + tangy onion = amazing appetizer.

I've made this with both Miracle Whip and regular mayo, and they both work great. Low fat cream cheese is a great substitution also. The recipe below is actually a half batch because I find that's more than enough, but if you're feeding a lot of people, feel free to double the recipe below. Happy snacking!

Onion Dip
Print this recipe

1/2 white onion, diced
1 1/2 bricks of cream cheese (12 ounces)
1/4 cup mayo
1 cup shredded Parmesan cheese

Preheat your oven to 350 degrees.

In a large bowl combine all of the ingredients. Spray a quart cooking dish with cooking spray and spread the dip in it. Bake for 30 minutes or until hot and bubbling. Serve with chips.

Recipe from my cousin Caitlyn
Picture
You may also like:
Loading...

Pesto Puffs

1/13/2013

 
Picture
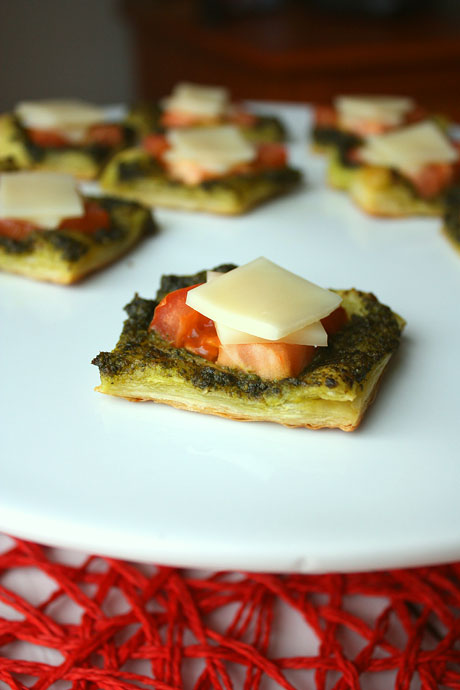
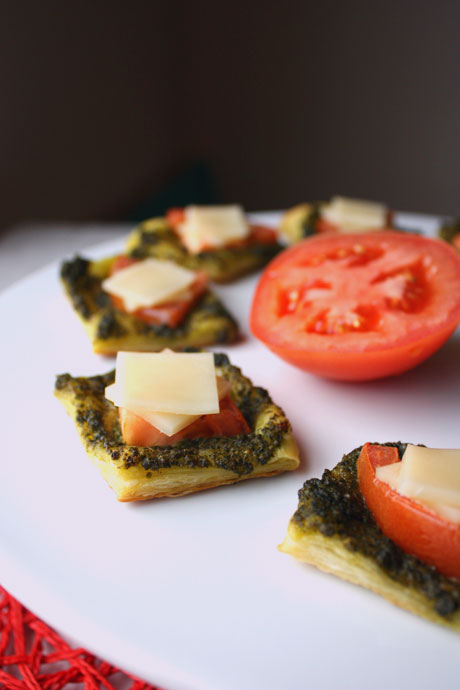
What's in a name? Really these should be called pesto tomato mozzarella puff pastry bites, but that seemed just a bit too long. Pesto caprese puffs? Awesome appetizer? I dunno, but I do know they're pretty lovely. It's really hard to go wrong with puff pastry and pesto in my humble opinion. By the way, I love that spell check is freaking out over caprese but not dunno. Really? Ok spell check. Whatevs. Oops...there you go again.

I served these at my husband's 30th birthday party last summer, and I think they're great for a party because they don't have to be served hot. Sadly, the day of football playoff parties is over here in Denver. Ask me how fun it was standing through double overtime in single degree temperatures (with a windchill of negative 6) to have my team lose. My toes still are screaming at me. Anyway....if you're lucky enough to be attending or throwing a playoff party, I highly recommend these guys. They'll make you happy, even if your team is losing. Or loses in the last second. And for that big game in a couple of weeks that could have been ours, well I think I'll whip up a batch of these to console me. 
Picture
Pesto Puffs Recipe
Print this recipe

One sheet puff pastry, thawed
1/4 cup pesto
1 tomato, sliced
Mozzarella slices cut into 1-inch squares

Preheat your oven to 400 degrees.

Unfold the puff pastry on your counter and spread the pesto on top (you may need more or less depending on your love for pesto). Cut into 3-inch squares and place 1-inch apart on a baking sheet covered with parchment paper or a silicone baking mat.

Cut the tomato slices into quarters and place a quarter on each square. Bake for 10-12 minutes or until the bottoms and edges are lightly browned. If you want warm, melty cheese, place the cheese on top of the tomatoes immediately. If you want to serve the puffs at room temperature, plate the puffs and then add the cheese after they've cooled. Refrigerate any leftovers.
Picture
You may also like:
Loading...

President Reagan's Mac and Cheese

1/9/2013

 
Picture
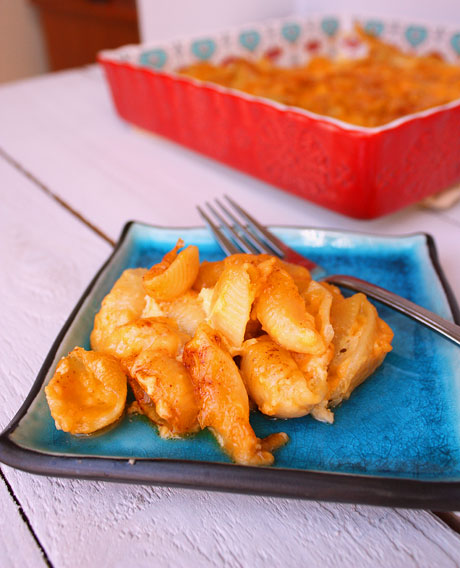
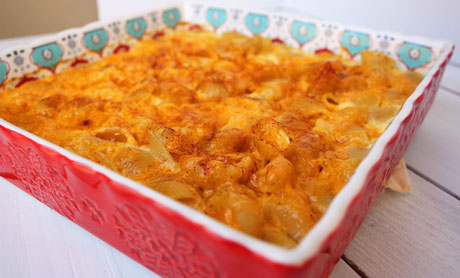
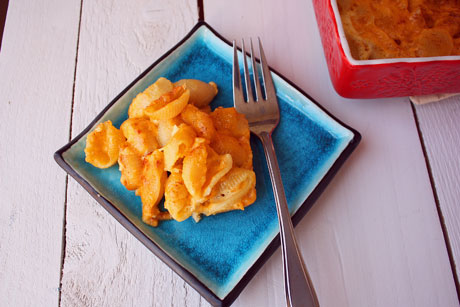
Word on the street is that this was President Reagan's favorite mac and cheese. Word in my house is that this is what my Grandma served me every time I came over for lunch or dinner. Every time. I never knew it was Ronald Reagan's favorite until we went through her recipe box. He had good taste because it definitely was my favorite meal at her house.

This is not your stringy ooey gooey mac and cheese. If that's what you're looking for, don't try this recipe. However, this is just as good. It has a custard-y (yes, that's a word--go with it) sauce (except it's not really a sauce). Oh boy. I love trying to express myself. The best part of the mac and cheese is the crispy and crunchy topping that it gets when it bakes. Oh boy. My grandma always sprinkled some paprika on everything so I had to carry the tradition. Plus, it really does taste better with it. Just gives it a little something extra.

So if you have good taste like me and the prez, I highly recommend you try this. As soon as possible. It's easy to make and it has no roux, which means it reheats pretty nicely, too. I should know because I've been eating a lot of it lately!
Picture
President Reagan's Mac and Cheese Recipe
Print this recipe

8 ounces macaroni (I used shells)
1 tablespoon butter
1 egg
1 cup milk
1 teaspoon dry mustard
1/2 teaspoon salt
1 tablespoon hot water
3 cups cheddar cheese, shredded
Paprika

Preheat your oven to 350 degrees.

Boil the macaroni in salted water until al dente. Drain. Off the heat add the butter to the pot with the macaroni. Stir in the egg until the macaroni is covered. Dissolve the dry mustard and salt in the hot water and add to the milk. Stir the milk mixture into the pasta. Add in 2 cups of cheddar cheese. Pour into a greased 9x9 or 10x10 pan and sprinkle the remaining 1 cup of cheese on top. Sprinkle with paprika. Bake for about 45 minutes until bubbling and crispy on top. Let cool for a few minutes before serving.
Picture
You may also like:
Loading...

Apricot Brie Crostini

1/2/2013

 
Picture
Did you guys make New Years resolutions? I admit that I didn't this year. With everything up in the air, I couldn't add another thing to my already overwhelmed life. Last year, my resolution was to try a new recipe or two every week. I did really well for a few months, then I started my blog, then I forgot about it. That's what happens, right? We eventually just forget about those pesky resolutions? By the way, how come every time I type resolutions I want to type resolutations? That's definitely not a word. Maybe my resolution can be typing better. Maybe.

When I was in high school, I was at church youth group, and we went around a circle and said our resolutions. I was slouched over like I normally sat and was listening to other people. When it was my turn, I said that mine was having better posture. Then I realized that my posture was completely terrible and I should probably get a better goal for the year. Something that I wouldn't break in 2.5 seconds.

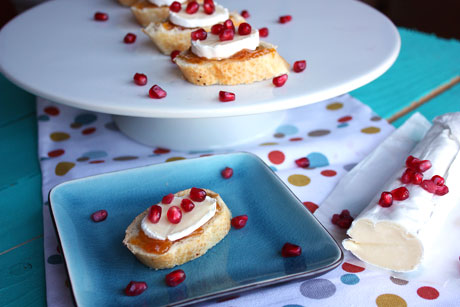
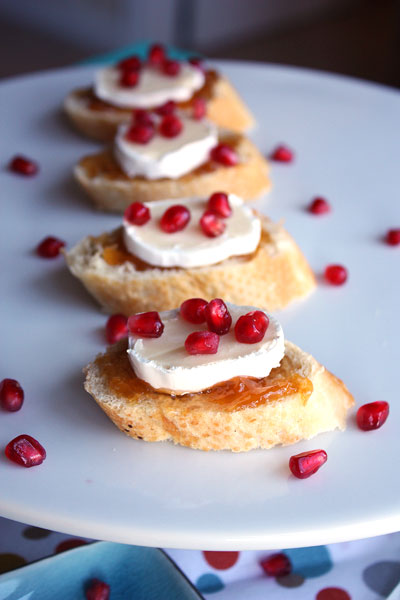
So I know many resolutions are centered on eating better/losing weight. While this crostini isn't going to throw you off your new diet, it's probably not extremely healthy. It's very tasty though, and I love it for a light lunch or appetizers at one of the bowl games. We need to girl those college football games up a little bit. I love how pretty it is, and I downed about 5 of these today because they are good. First, who doesn't love bread? Then you top it with some apricot jam, a slice of brie, and pomegranate seeds. Creamy, sweet, and tangy are all flavors we want right now. Right? Oh and I know that this isn't technically a crostini because the bread isn't toasted, but we can pretend, right? I really liked it with a crusty baguette and didn't feel the need to toast it, too.

Apricot Brie Crostini
Print this recipe
This is more of a method than a recipe, so make how much you want.

Baguette
Apricot jam
Brie log
Pomegranate seeds

Slice the baguette into pieces. Spread about one tablespoon of jam on each piece. Slice the brie log into thin slices and place on top of the jam. Sprinkle the pomegranate seeds on top and serve. You could make this ahead of time and store in the refrigerator, too.

Inspired by 5280 magazine
Picture
You may also like:
Loading...

Lasagna Rollups

12/9/2012

 
Picture
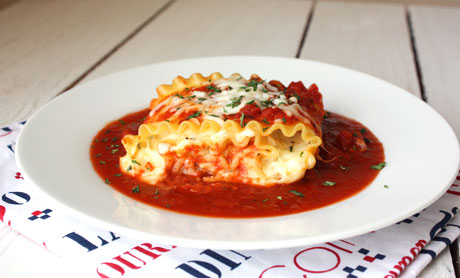
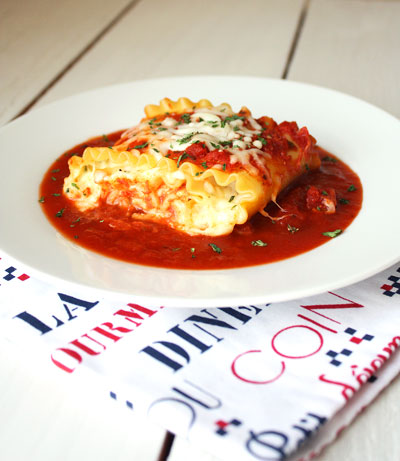
One of the few pasta dishes I can get away with at home is lasagna. While my husband won't eat any other type of pasta, he will eat lasagna. However, when there are only two people eating it, it gets pretty tiresome. Enter these rollups. I make four of them, and they're the perfect size for dinner with minimal or no leftovers. I love that I don't have to eat lasagna for an entire week when I make these. These are really easy to make, and I've made them easier by using jarred sauce. You can certainly make your own or use your favorite brand. I was going for as easy as possible here. To make these, you lay a cooked noodle flat (you can't use the no boil noodles here), spread the cheese mixture on top of it, and roll it up. Then place it in the pan, cover it with some sauce and voila. Dinner!

By the way, I'm not normally a huge pepper fan. Like at all. I'm never one to get it on my salad or put it on everything. However, I do love some fresh cracked pepper in my cheese mixture. It really adds something, so I don't recommend skipping it. I also use cottage cheese in my lasagna, but I puree it in the food processor first so I can get rid of the clumps. I like the texture/creaminess better than using ricotta, but you can certainly use either one.

Lasagna Rollups
Makes four
Print this recipe

4 lasagna noodles, cooked al dente (don't use no boil noodles)
1 egg
1/2 cup cottage cheese or ricotta
1/4 cup grated parmesan, plus more for sprinkling
1/2 cup mozzarella, plus more for sprinkling
1 teaspoon garlic powder
1 teaspoon dried parsley
1/4 teaspoon fresh cracked pepper
2 cups spaghetti sauce

Preheat your oven to 350 degrees.

If you're using cottage cheese, process it in a food processor or blender until the clumps are gone. In a medium size bowl, mix together the egg, cheeses, garlic powder, parsley, and pepper.

In a small baking dish, spread enough of the spaghetti sauce to cover the bottom of the dish.

Lay the noodles flat and dry them off with a paper towel if wet. Spread one quarter of the cheese mixture on top of one noodle, leaving one inch at the end with no cheese. Start with the other end and roll up the noodle. 

Lay the noodle flat in the baking dish. Repeat with the other noodles. Pour the rest of the spaghetti sauce on top of the noodles. Cover with aluminum foil and bake for 20 minutes.

Uncover the dish, sprinkle the additional cheese on top, and place back in the oven for 15-20 minutes until heated through (leave it uncovered).
Picture

Mushroom Gorgonzola Steak Pasta

11/6/2012

 
Picture
Sigh. It's over. I imagine that living in a swing state meant that I saw and heard more political ads and got more junk mail and phone calls than other states. I hope it's true so that people in "normal" states didn't get harassed as much, but I'm thinking that's the way it was everywhere. So it's over and whether your preferred candidate won or not, at least the campaign is over. Sigh.

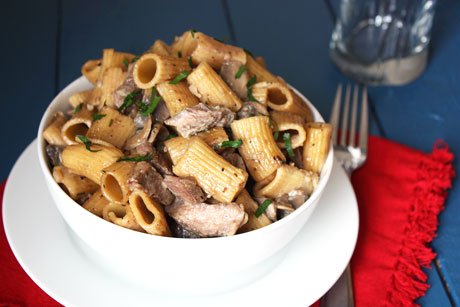
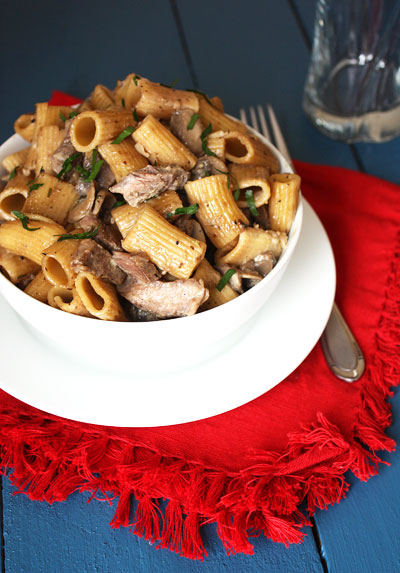
So, this pasta. Awhile ago, I checked out Emeril's Sizzling Skillets and Other One-Pot Wonders cookbook from the library. It had several recipes in it that I wanted to try, including this one. It was a great meal, but boy was it a lot of food. It certainly didn't help that my husband didn't eat any of it. Since he hates pasta, I gave him have a ribeye steak with a baked potato instead of having the steak mixed in this pasta. Turns out, we were both pretty happy with that decision. I got to try something new, and he wasn't "forced" to eat pasta. I halved the recipe, but I think I could have quartered it to make it a more manageable dinner plus lunch leftovers for the week. As it was, I ended up throwing some of it away because I couldn't eat all of it in time. The combination of mushrooms, gorgonzola, steak, and pasta was pretty comforting. I ended up adding a few dashes of Worcestershire to it to add a little more savory-ness and offset the gorgonzola. I'll be making this again, but I think I'll wait until we have company to help me eat it! 

Mushroom Gorgonzola Steak Pasta Recipe
Serves 6-8
Print this recipe

3 tablespoons vegetable oil
1 tablespoon butter
1 1/2 lb ribeye or sirloin steak, cut about 1 1/4 inch thick
1 teaspoon kosher salt
1/4 teaspoon fresh ground pepper
1 pound mushrooms, sliced
1/3 cup minced shallot
1 large clove garlic, minced
1/2 teaspoon minced fresh rosemary
1/2 teaspoon minced fresh thyme
1 1/2 cups beef broth
1 tablespoon all purpose flour
5 ounces crumbled gorgonzola or blue cheese
2/3 cup heavy cream
1 teaspoon Worcestershire
1 pound rigatoni, cooked al dente and drained
Fresh parsley for garnish

Season the steak with the salt and 1/4 teaspoon of the pepper on both sides. In a large skillet, combine the butter and 1 tablespoon of the veg oil over medium high heat until melted and hot. Add the steak and sear on one side without moving it until brown, about 4 minutes. Flip the steak and cook for another 4 minutes or until it's your desired temperature. If your steak is thinner, you won't have to cook it as long on each side. Remove the steak to a plate and tent it with foil.

Add the remaining oil, mushrooms, and pepper to the skillet and cook until the mushrooms have softened and their liquid has evaporated. Add the shallot, garlic, rosemary, and thyme and cook for a couple of minutes, stirring frequently. Once the shallot has softened, sprinkle with the flour and stir to combine. Add in the beef broth and cook while stirring, especially scraping the bottom to release any brown bits. Let cook until the liquid has reduced by half, about 5 minutes. Mix in the cheese and cream and cook about 2-3 minutes until the cheese has melted.
 
Mix the rigatoni into the skillet. If the sauce is too thick, add in more beef broth. Thinly slice the beef, stir into the pasta and serve, topping with the parsley.

Source: Emeril's Sizzling Skillets and Other One-Pot Wonders 
Picture
<<Previous

     Welcome!

    Cooking is fun and easy at high altitude, but baking can be frustrating. About 90% of my recipes work everywhere, but some are adjusted so us mountain dwellers can enjoy baked goods from scratch. I hope you find great recipes on here for your family, and I'll let you know if any are adjusted for high altitude. 

    Stay Updated!

    Add to your Reader:

    Get new posts delivered to your inbox:

    Enter your email address:

    Delivered by FeedBurner

    Categories

    All
    Appetizers
    Bars
    Beef
    Bread
    Breakfast
    Brownies
    Cake
    Cheese
    Chicken
    Chocolate
    Cinnamon
    Cookies
    Crackers
    Cupcakes
    Dessert
    Do It Yourself
    Drinks
    Fruit
    Ground Beef
    High Altitude
    How To
    Ice Cream
    Italian
    Main Courses
    Mexican
    Muffins
    Oatmeal
    Pasta
    Pastry
    Pie
    Pizza
    Pork
    Project Pastry Queen
    Pumpkin
    Salad
    Sauces
    Side Dishes
    Snacks
    Soup
    Sourdough
    Steak
    Vegetables

    My featured recipes on NoshOnIt

    Some Good Reads!

    Annie's Eats
    Bake at 350
    Climbing Grier Mountain
    Confections of a Foodie Bride
    How Sweet It Is
    I Am Baker
    Macaroni and Chesecake
    Pinch of Yum
    Pink Parsley
    Smells Like Home
    Smitten Kitchen
    Sunny Side Up
    The Curvy Carrot
    The Marvelous Misadventures of a Foodie
    The Pioneer Woman Cooks
All content copyright 2012-2013 She Makes and Bakes.