
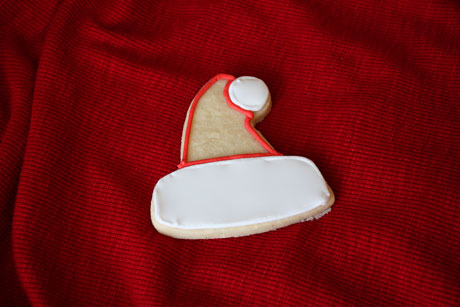
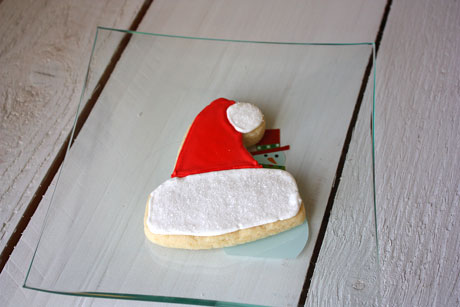
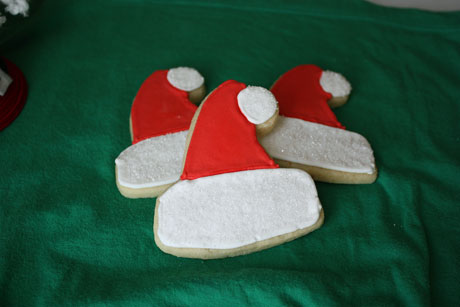
I'm a fairly firm believer that there are bakers in the world and decorators. Most people prefer one or the other. While I love to bake, I'm not a huge fan of decorating cakes and cookies. I can do it (although I don't have crazy good skills like some people), but I don't really enjoy it as much as when I bake. So I try and keep things fairly simple. These Santa Hat cookies that are decorated with royal icing fit the bill. There's only two colors. There's no extra piping detail, and it's fairly easy decorating because I used sanding sugar to add the extra pop.
It's not difficult to use royal icing, so let me show you the way. One thing before we start is that royal icing will dry out, so you must always keep it closed and covered (I use a wet paper towel).
First of all, this is my go-to sugar cookie recipe now when I want to do cut outs (even if I'm not going to go all out and use royal icing). The one that I used growing up is awesome, but it never held its shape. So I use this one now, and I also love it because it's really soft. The one thing I moved over from my family recipe is the nutmeg. If you've never had nutmeg in your sugar cookies, I insist you try it. It's pretty much the best thing ever. Just saying. People love my sugar cookies.
Here's what you'll need to decorate these cookies:
-Two airtight containers for your icing
-Gel red food coloring
-Two piping bags
-Number 2 or 3 piping tips
-Two squeeze bottles (optional but recommended)
-Toothpicks
First you make your icing using a stand mixer and the paddle attachment. I'm sure that it would work with a hand mixer, but I've never tried it. You have to whip the frosting until it's fluffy.
While the frosting is whipping, place the cookies on a cookie sheet.
Next you divide your frosting between containers and tint it. Place some of it into piping bags--you only need to put as much in as what you'll need for piping.
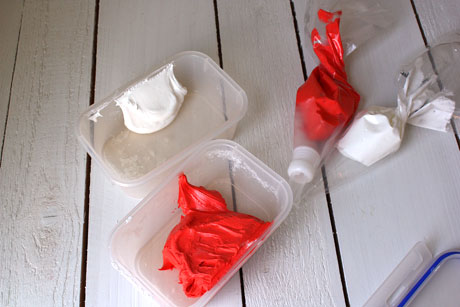
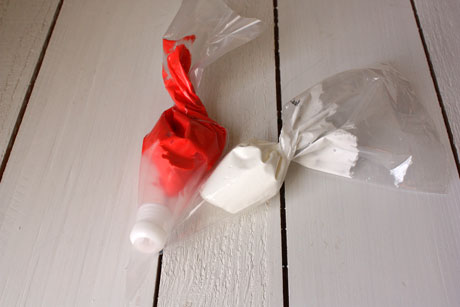
I got a little ahead of myself and forgot to put a coupler on one of the bags. Don't be like me. Close up the bags nice and tight so they don't dry out.I wait to cut off the tip of the plastic bag and put the icing tip on until I'm ready to do the outline.
Then take what's left of the frosting and add a little bit of water (1/2 teaspoon at a time) to thin it out so you can coat the cookie with it. Stir until the water is completely mixed in.
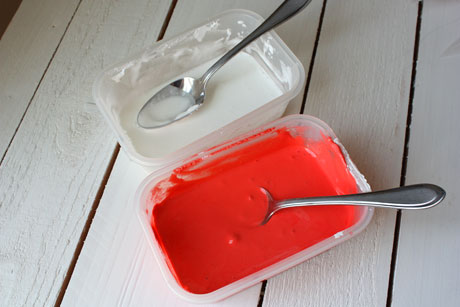
You'll know that your icing is thin enough when it runs off the back of a spoon and disappears into the bowl in 5-10 seconds. Note that you can always add more water but you can't take it away (although you can add the thicker icing from your piping bag into it if needed to thicken it up). Cover up the thinned icing.

Now you can start decorating the cookies. Attach a number 2 or 3 tip to the coupler on your piping bag and pipe the outline of the cookies. Since the red outline for these depends on where the white outline is, I started with the white outline. Pipe the outline on all the cookies in the one color. Then start with the first cookie you did, and pipe on the second outline. I find that by the time I've finished piping all the cookies, the first cookie is dry enough for me to work with again (I was decorating 20 cookies). When you're not working with an open bag of frosting, cover the tip with a wet paper towel.
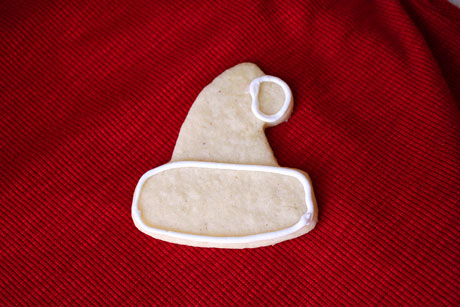
Then you'll pipe on the red outline. By the time you've finished all of the cookies, the first cookie should be dry enough for you to start the flooding process. You'll know if it's dry enough if you can lightly touch the outline and it's firm.

To flood the cookies, you'll first want to gently stir the frosting near the surface to get rid of any air bubbles that developed while it sat. You can transfer the icing into squeeze bottles or you can use a spoon to drop the icing onto the cookie. I use a spoon because my squeeze bottles are in my crawl space and I'm too lazy to get them (but squeeze bottles definitely make it easier). Carefully drop a good amount of the thinned icing in the center of the area and then use a toothpick to move it to the edges (sorry, didn't get a picture of the icing in the center). Do this on all the cookies.
Once the cookies all are flooded with the white icing, start with the first cookie you flooded and repeat with the thinned red icing. If you see any air bubbles, you can pop them with the toothpick.

Once you cookies are frosted, you want to let them sit for at least a few hours or overnight (uncovered is fine) to let the icing set. The icing will be hard and have a matte sheen.
The next day I wet a small paintbrush and lightly and gently brushed it on top of the white icing. Then I sprinkled white sanding sugar on top and shook off the excess. And I forgot to take a picture. Sorry.
Sugar Cookie Recipe
Makes about 40 cookies, depending on your shape
Print this recipe
1 cup butter
1 cup powdered sugar
1 egg
2 teaspoons vanilla
3/4 teaspoon salt
1/2 teaspoon nutmeg
2 1/2 cups all purpose flour
In the bowl of an electric mixer, cream together the butter and powdered sugar until combined. Add in the egg and mix, scraping down the sides of the bowl. Add the vanilla, salt, and nutmeg and mix until incorporated. Add in the flour and mix until combined. Place the dough in plastic wrap and chill until firm.
Preheat your oven to 375 degrees.
Roll the dough out to 1/4 inch thickness on a floured counter. Cut with cookie cutters and place on a greased cookie sheet. Bake for 8-10 minutes; the cookies will not brown. Remove from the pan and let cool completely before decorating.
Royal Icing Recipe
4 tablespoons meringue powder
Scant 1/2 cup water
1 pound powdered sugar, sifted
1/2-1 tablespoon corn syrup
Few drops of clear extract (I use clear vanilla)
Place the meringue powder and water in the bowl of your stand mixer. Use the paddle attachment to beat it until it's combined and foamy. Add in the sifted powdered sugar and beat on low until combined. Add in the corn syrup and extract and beat on high until the icing is thick and glossy. It should have stiff peaks. Divide the icing into bowls to tint, and make sure to keep it covered.
Cookies adapted from Annie's Eats
Icing recipe from Bake at 350
For a great decorating tutorial, check this out. For some FAQs on royal icing, check this out.

