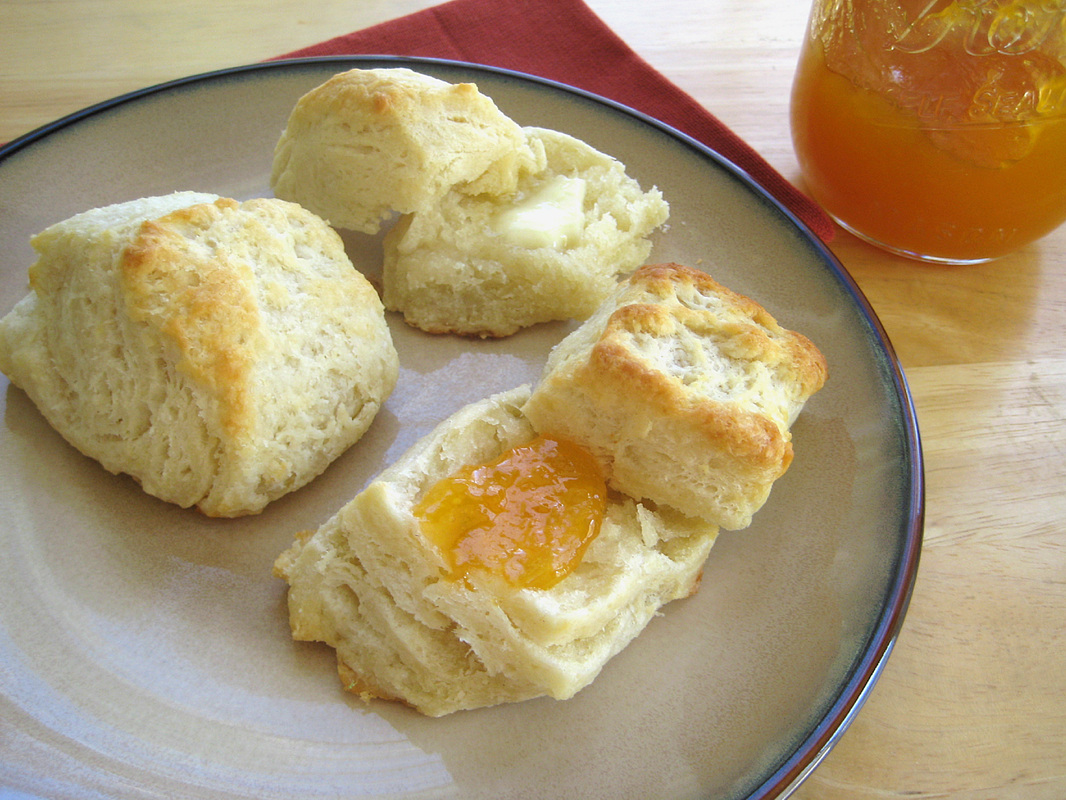
Just look at those layers. Yum!
Do you ever buy a container of heavy whipping cream for a recipe and then have at least half of it left? This happens to me pretty frequently. I’ll buy cream for a chocolate ganache and use a cup of it, but I don’t want to waste the leftover. Cream isn’t super expensive, but it’s enough that I don’t want to pour it down the drain. The answer to this leftover cream problem is to make these biscuits.
These took me about 10 minutes to make when I got home from work, and then I stuck the cut biscuit dough in the freezer for an upcoming weekend breakfast. I used up my leftover cream, and I don’t have to eat all (or any) of the biscuits right away. These will last for a couple of months in the freezer, and you can pull out as many as you want, thaw, and bake them. Usually, on a Friday night I will take a few of them out of the freezer, place them on a greased baking sheet, and let them defrost in the fridge overnight. Saturday morning we can have fresh, flaky, layered, buttery biscuits that rise nice and tall and make your house smell great.
The secret to getting the layers in these biscuits is the folding method. It may seem intimidating, but it's really easy, and it doesn't take much time, especially once you get the hang of it. You could use a rolling pin, but I found it was faster and easier to use my hands because I don't want to get the dough too thin. I want my biscuits big and tall. Also make sure that your butter and cream are very cold and stay cold. You can make these the night before you need them or right before you want to bake them. They’re pretty versatile; I like knowing I have these beauties waiting for me in my freezer.
Flaky Cream Biscuits
Print this recipe
2 tablespoons vinegar
1 cup cold heavy cream
1/2 cup cold butter
1 3/4 cup all-purpose flour
1 tablespoon sugar
2 1/4 teaspoons baking powder (2 3/4 teaspoons*)
1/4 teaspoon baking soda (1/2 teaspoon*)
1/2 teaspoon salt
Stir the vinegar into the cream and refrigerate it to keep it cold. Whisk the dry ingredients into a large bowl. Cut the cold butter into 1/4 inch pieces and add to the dry ingredients. Using your fingers or forks, work the butter into the dry ingredients until it resembles coarse crumbs. Add the cream mixture and stir until it forms into a ball. Turn the dough onto a clean surface and pat into a rectangle, leaving the dough about 3/4 of an inch thick. Fold the top edge of the dough down 1/3 of the way and fold the bottom end up like you're folding a letter (see below). Pick the dough up and place the smooth edge on the left (you'll be rotating it 90 degrees). Pat the dough into a rectangle and repeat the folding process. You'll do this a total of four times. After you've done 4 folds/turns, pat the dough into a rectangle about 3/4 of an inch thick. Using a pizza wheel, cut into 12 or 15 biscuits. Separate the biscuits, place them on a greased cookie sheet, and let them chill in the fridge for about 15 minutes while the oven is preheating. When the oven reaches 450 degrees, place the biscuits in the oven and bake for about 14-18 minutes or until the biscuits are golden brown. Let the biscuits cool for about 3 minutes before serving.
If you make these the night before you want to bake and eat them, place plastic wrap over the sheet pan and keep in the fridge overnight. Take them out of the fridge about 30 minutes before you want to bake them.
If you want to freeze these for later, place them on a sheet pan and freeze them for 30 minutes. After 30 minutes, remove them from the sheet pan and place them in a freezer bag. The night before you want to bake them, take them out of the freezer, place the biscuits on a greased pan, cover with plastic wrap, and let them thaw in the fridge overnight. Take them out of the freezer about 30 minutes before you want to bake them. You also can take them out of the freezer, place them on a greased baking sheet, and let them thaw on the counter for about 3 hours. Don't bake them while they're frozen or they won't bake/rise evenly.
*The baking soda and powder in parenthesis are adjusted for high altitude. The original recipe wasn’t baking up tall enough for me, so I added a little more to both. Try the regular version first and if they're not tall enough, try the * version.
Source: Peter Reinhart's Artisan Breads Every Day
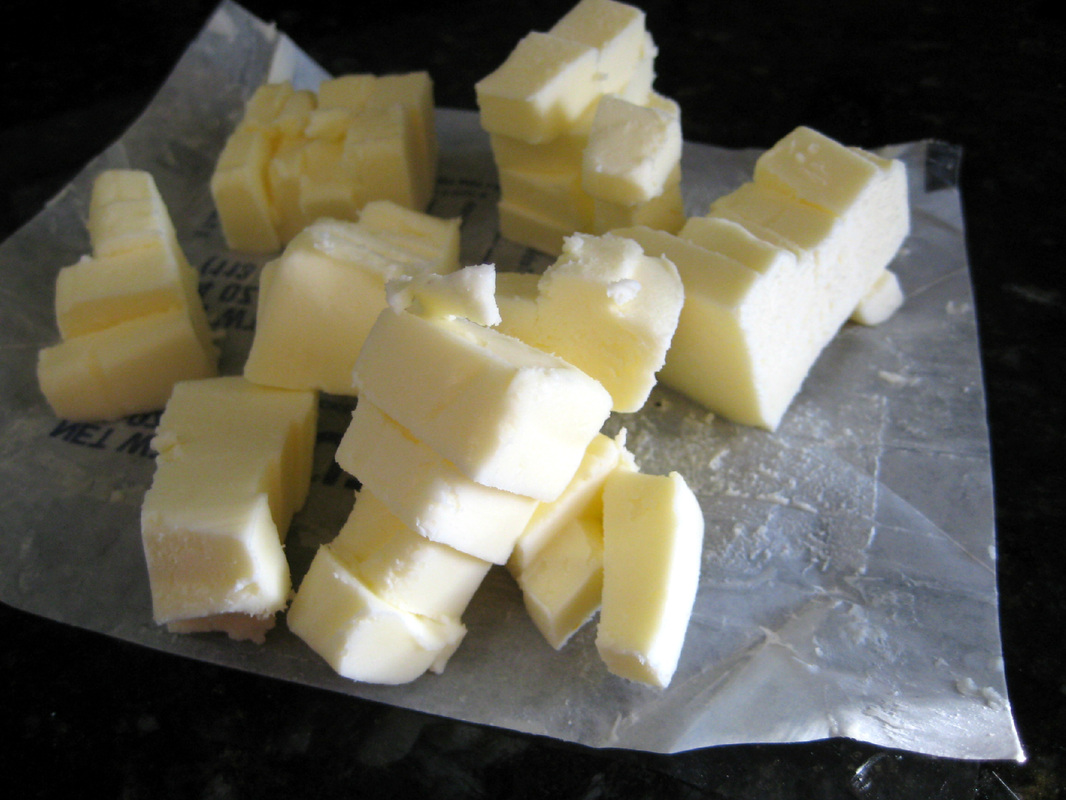
Here's the visual on how to make the dough. Cut your butter into pieces.
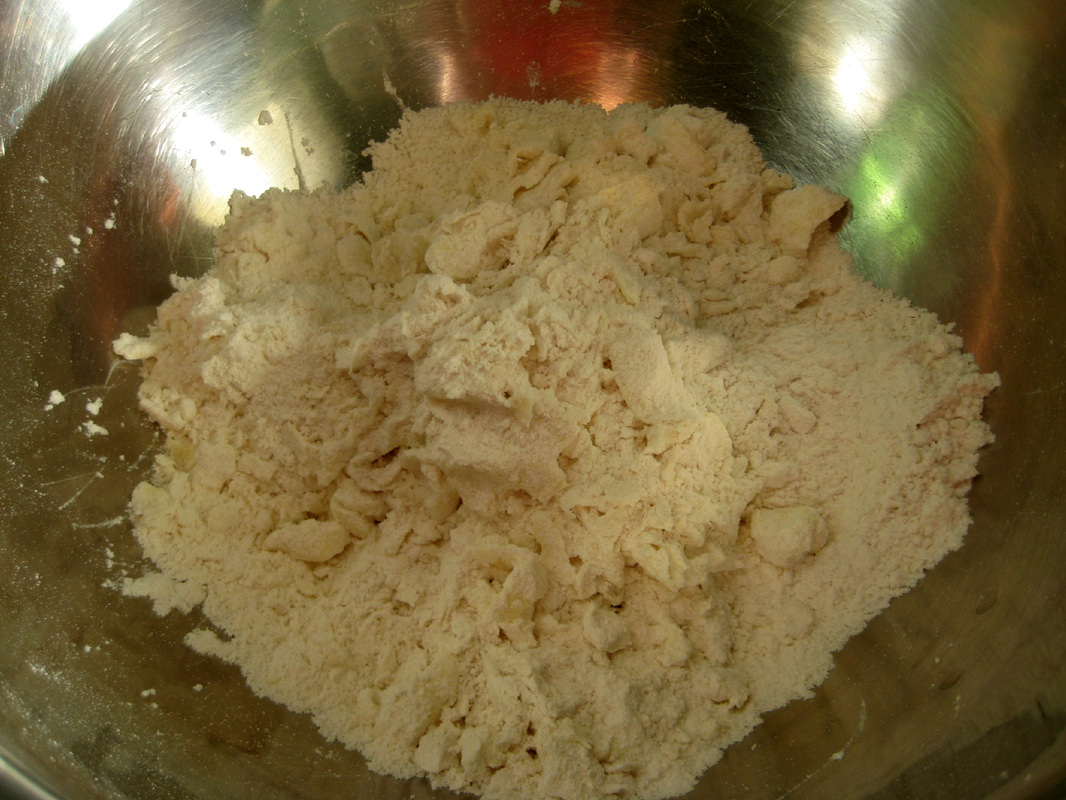
Add the butter to your dry ingredients, and mix it in using a fork or your fingers until it resembles coarse crumbs.
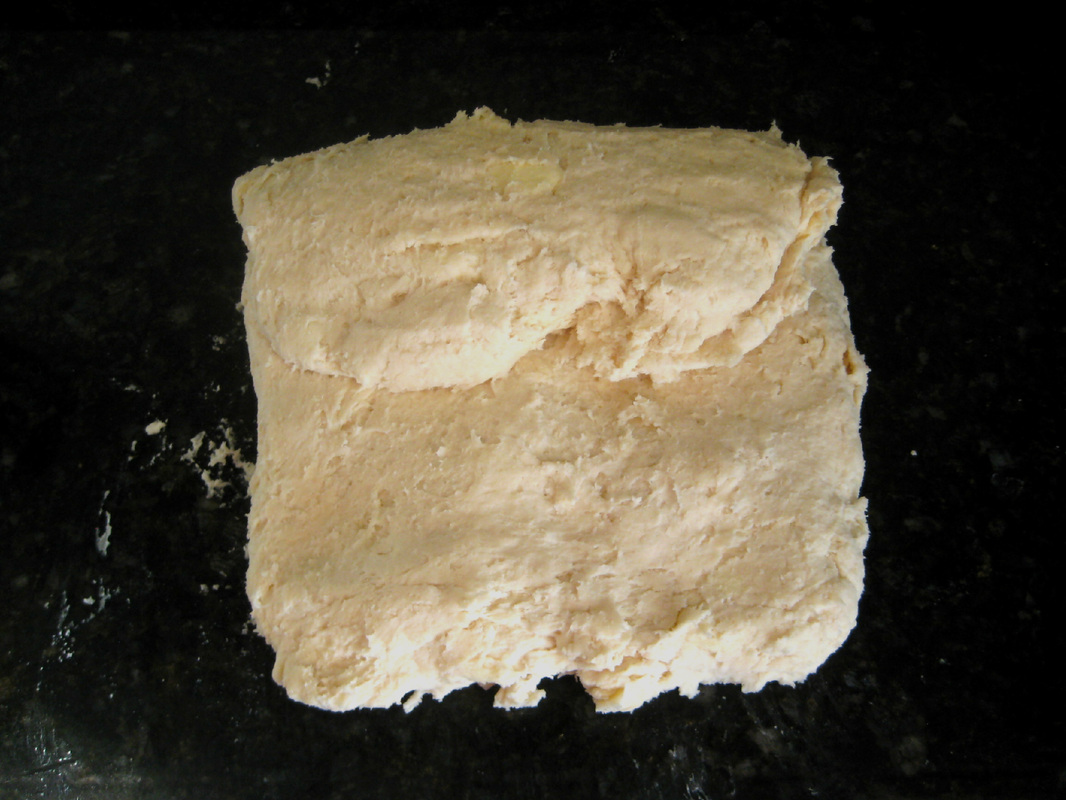
Add the cream and form in into a ball (not pictured, sorry). Then dump the dough onto your clean counter and pat it into a rectangle. You want the dough to be 1/2-3/4 inch thick, so don't make it too big.
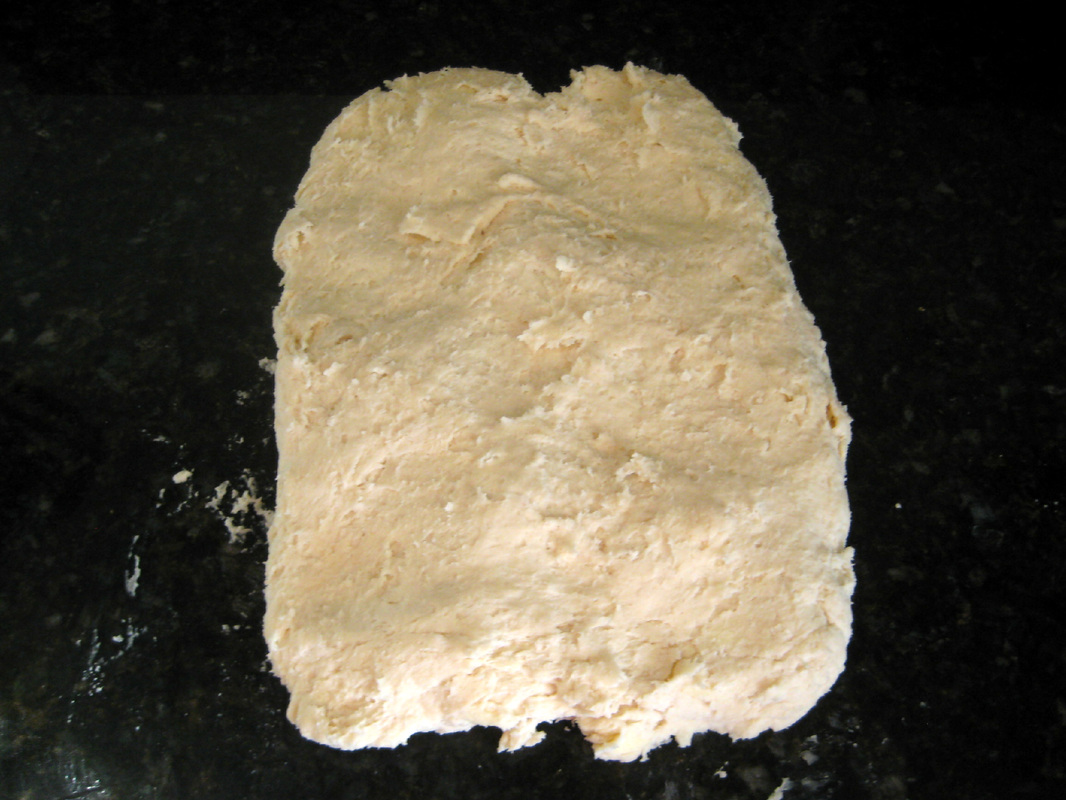
You also can use a rolling pin, but since I want thick layers, I just pat it with my hands. Now we're going to do the folds, which is also what you do when making croissants. Take the top of the rectangle and fold it down 1/3 of the way (like a letter).
Then take the bottom of the rectangle and fold it up, on top of the first part (again, like you're folding a letter).
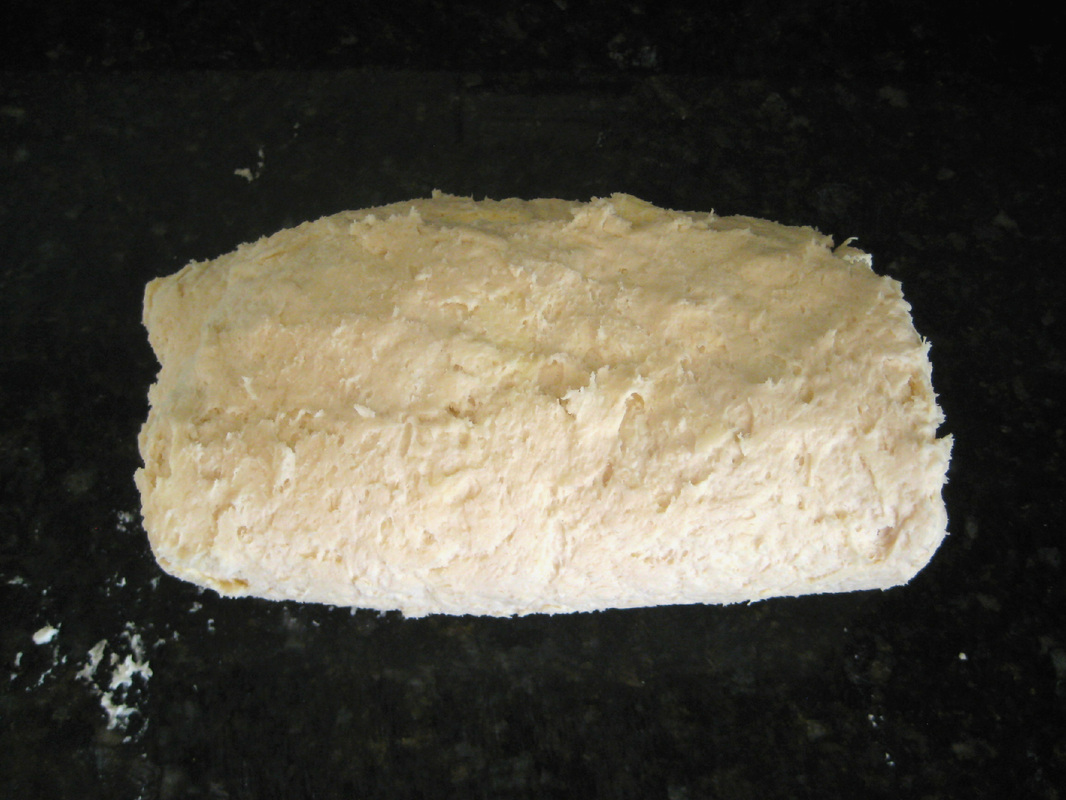
Pick up the dough and place the smooth edge on the left.
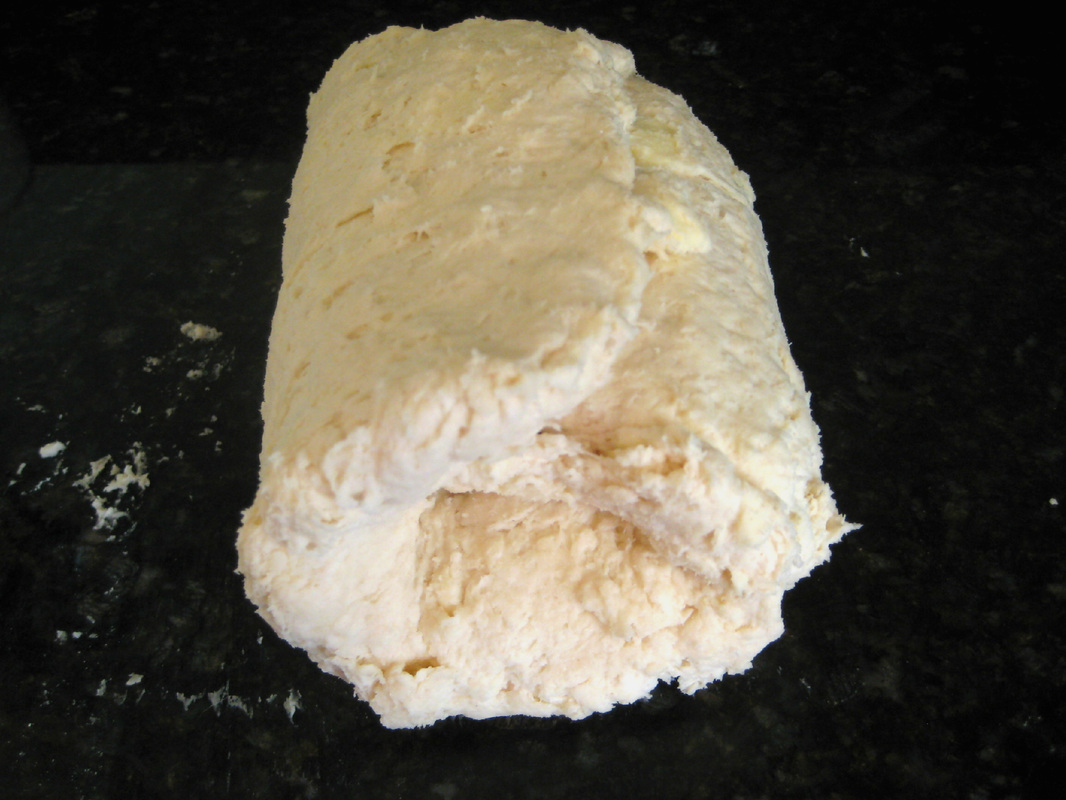
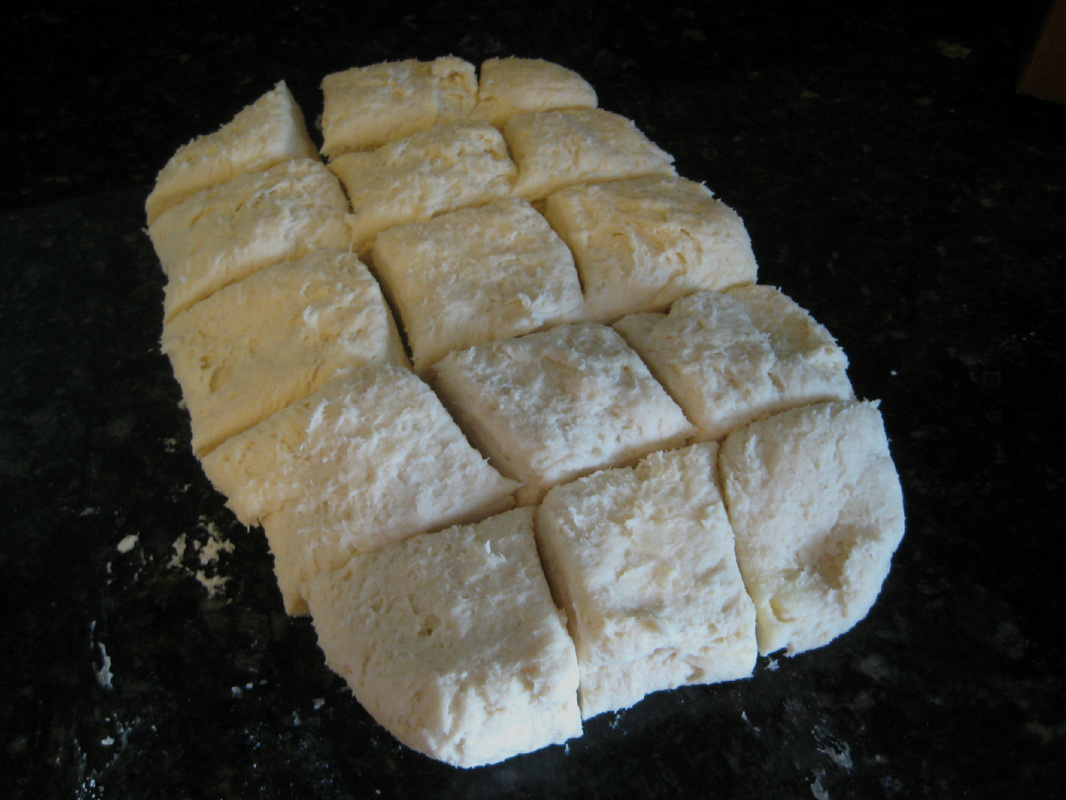
Now you'll pat this into a rectangle and start the folding process again. You'll do this four times. After the fourth fold, pat the dough into another rectangle and leave the dough about 3/4 of an inch thick. Using a pizza wheel, cut the dough into 12 or 15 pieces. You could cut it into circles, but you'll waste dough, so I opt for the square biscuits instead.
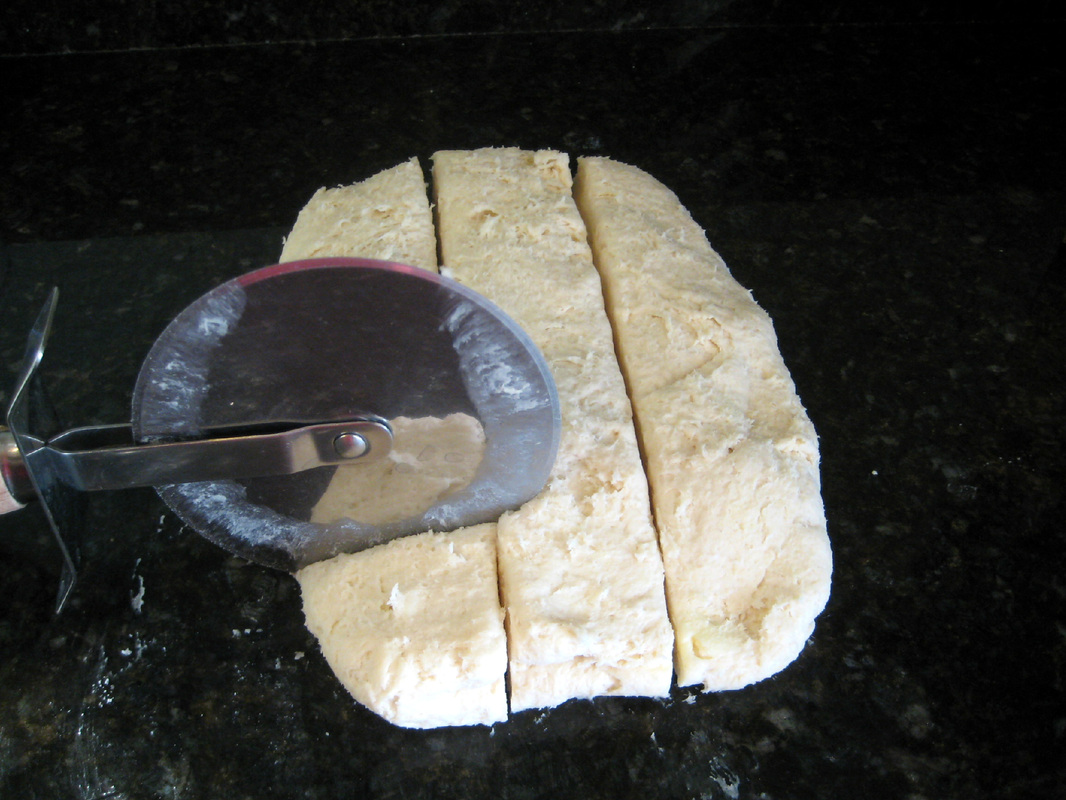
Because of the layers in the dough, you really can't combine all the scraps and shape them into another ball. This is another reason I go with the square biscuits.
Now you can separate these and bake all of them right away, put them in the fridge for the morning, or put them in the freezer for another day.
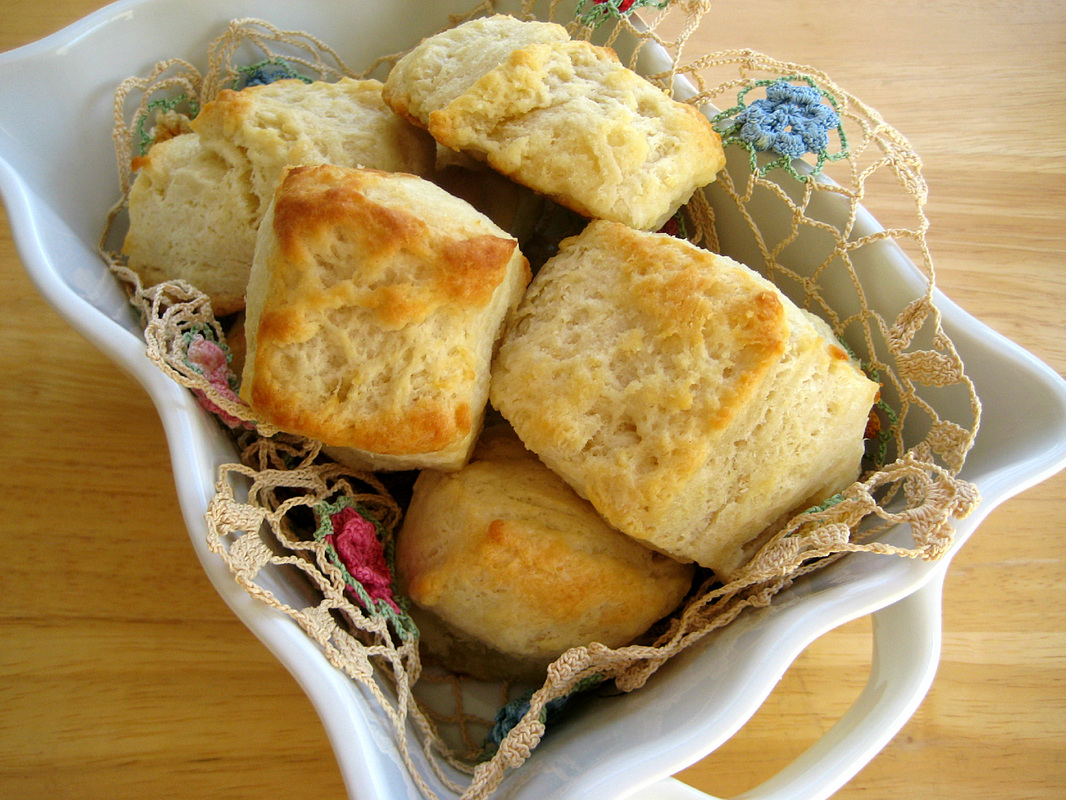
Delicious!
