She Makes and Bakes
  • Home
  • About
  • Ramblings
  • Recipe Index
  • What We're Eating
  • High-Altitude Baking

Rosemary Parmesan Wheat Thins

3/11/2013

 
Picture
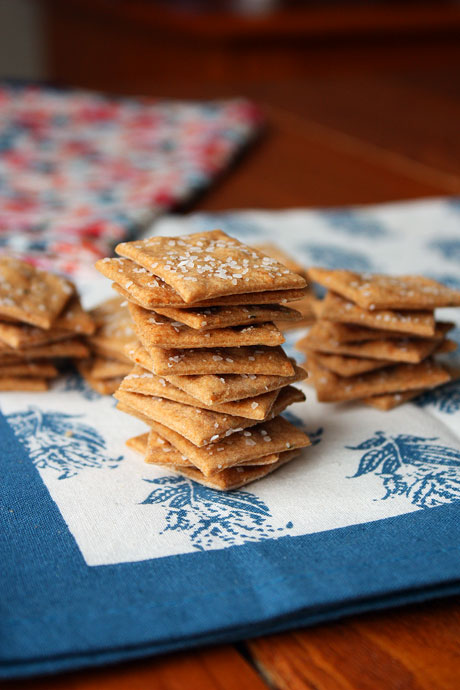
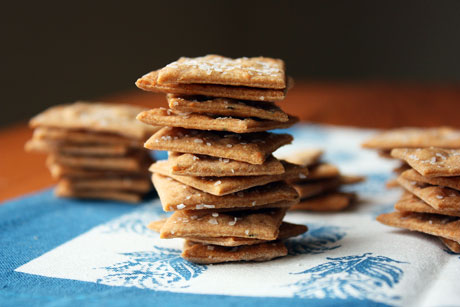
Do Wheat Thins come in a rosemary Parmesan flavor? If not, they should. Show of hands, when you hear wheat thins, do you automatically think of Stewie in the Family Guy Wheat Thins commercial? Whhheat Thins. Or is that just me? I swear. Every.time. Now that's good marketing!

I love making crackers because they're shockingly easy and extremely adaptable. I was in a rosemary mood, so I took Deb's recipe and added in some of that flavor. And since everything is better with cheese, I decided to add in some Parmesan, too. And it totally worked. You should ignore the amount of kosher salt I have on top of my crackers though. I love salty things, but this was a bit too much. I highly recommend you have a lighter hand with the salt shaker.

If you want a plain wheat cracker, you can leave out the rosemary and Parmesan with great results. Or you can substitute other herbs. Either way, these are bound to be a hit. Plus, you know exactly what's going in them!

Rosemary Parmesan Wheat Thins Recipe
Makes about 3 dozen
Print this recipe

1 1/4 cups whole wheat flour
1 1/2 tablespoons sugar
1/2 teaspoon table salt
1/4 teaspoon paprika
4 tablespoons cold butter
1/4 cup grated Parmesan cheese
1/2-1 teaspoon rosemary, minced
1/4 cup cold water
Kosher salt for sprinkling

In a food processor, pulse together the flour, sugar, salt, paprika, cheese, and up to 1 teaspoon rosemary (depending on how much you like rosemary) until combined. Cut the butter into small cubes and add it into the processor. Pulse until it is evenly combined into the flour mixture.  With the machine running, slowly add in the cold water until it forms into a ball. You may need to add another 1-2 tablespoons of water to get the dough to come together but it should not be a sticky dough. Once it's formed into a ball, remove it from the food processor and place on a well floured counter.

Preheat your oven to 400 degrees.

Divide the dough into two pieces and roll it out very thin. The thinner you can roll them, the better they are. Be sure that your dough isn't sticking on your counter, and add more flour if needed. Use a pastry wheel to cut the dough into 1 1/2 inch squares (it doesn't have to be perfect). I use a pastry wheel and a ruler, but I'm pretty OCD. Poke each cracker with a toothpick several times so they don't puff up when they bake. Sprinkle with kosher salt.

Transfer the crackers to a cookie sheet and leave a little bit of space between each one. Bake until crisp and brown about 5-7 minutes. Keep an eye on them because the time to bake correlates directly with how thick or thin they are. Cool before eating.

Adapted from Smitten Kitchen
Picture
You may also like:
Loading...

Homemade Breakfast Sandwiches

2/14/2013

 
Picture
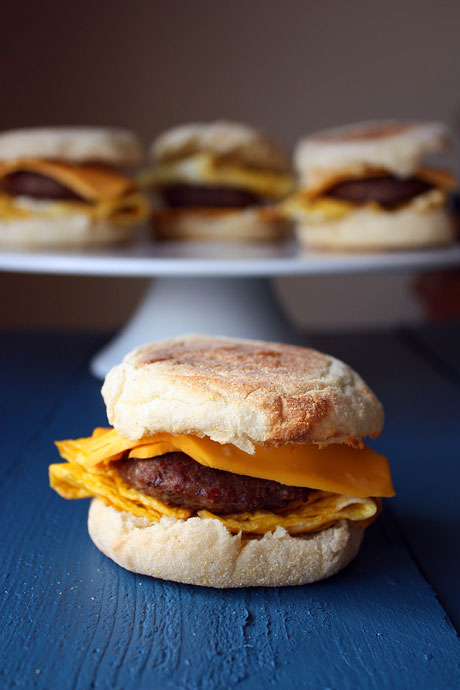
My husband absolutely loves breakfast sandwiches. So every now and then when I'm feeling like a nice wife, I'll buy the frozen ones for him (which he absolutely loves). You know the ones that come four to a large box and cost approximately 84 dollars? That *might* be a slight exaggeration, but those suckers are expensive!

I knew that I could make them taste just as good and be a lot more cost efficient. Not to mention saving all that packaging waste. And guess what, they're easy. You certainly don't have to make four of them, but I made them on a Monday, stuck them in sandwich bags, and placed them in the freezer. The night before my husband wanted one, I placed it in the fridge. He took it to work the next morning and heated it up for 55 seconds in the microwave. Guess what, they tasted better than the prepackaged ones. I used American cheese, but I'm thinking cheddar would be great or even pepper jack to give it a little kick! There's so many different ways to play around with this recipe.

Homemade Breakfast Sandwiches
Makes 4
Print this recipe

4 English muffins
4 eggs
8 ounces breakfast sausage
4 slices cheese (I used American but cheddar or pepper jack would be great, too)

Cut the sausage into 1/2 inch slices and press down into wider patties. Cook for about 10-15 minutes on medium heat, flipping halfway through, until cooked through. Remove to a paper towel to drain. If you want your muffins toasted, toast them.

Crack one egg into a small bowl and scramble together with some salt and pepper. Heat a small skillet over medium heat and spray with cooking spray. Pour the mixed egg into the skillet and cook for one minute without stirring. Flip it over and cook for another 30 seconds. Fold the egg into quarters and place on the English muffin. Place the sausage patty on top and add a slice of cheese. Top with the other half of the English muffin. Serve.

To eat later, reheat in the microwave for 45-60 seconds or in the toaster oven for about 5 minutes until warm and the cheese has melted. If you want to freeze them, place them in separate bags in the freezer and let thaw in the fridge overnight before warming.
Picture
You may also like:
Loading...

Homemade Cake Release

2/3/2013

 
Picture
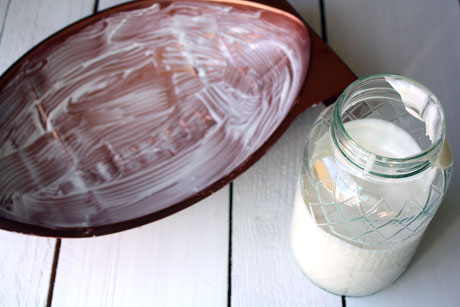
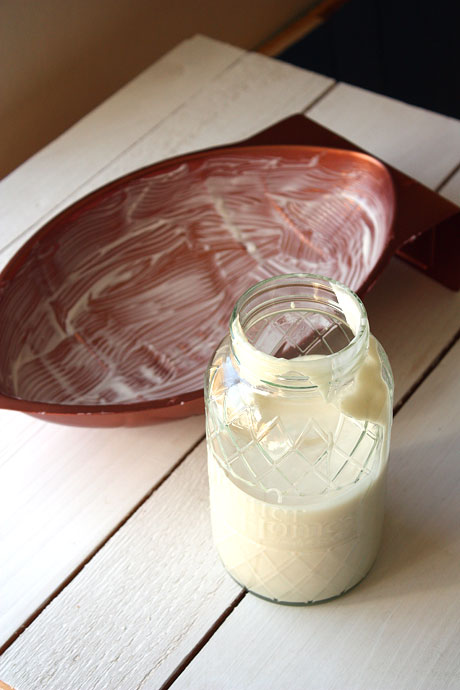
I had a hard time naming this post because I wasn't sure what this was called. You know the baking spray that has the flour in it? That's what this is...except you don't spray it. You brush it on. So whether you call it Baker's Joy, Pam with flour, cake release, or baking spray, this is the home version of it.

I have some *pretty* exciting news today. Many of you know that I had my own bakery and since I got laid off in December I've been working hard at it. Well, another baker in my neighborhood and I created a new bakery called Whipped Bakery, and we're working together! It's amazing, especially because I'm not a fan of decorating cakes and she loves that part. It's the perfect marriage. So, I'd love for you to check it out! Let me know what you think. You can find us on the interwebs here or on Facebook here. If you check us out on Facebook, be sure to like us...and tell any Colorado people about it (please and thank you!).

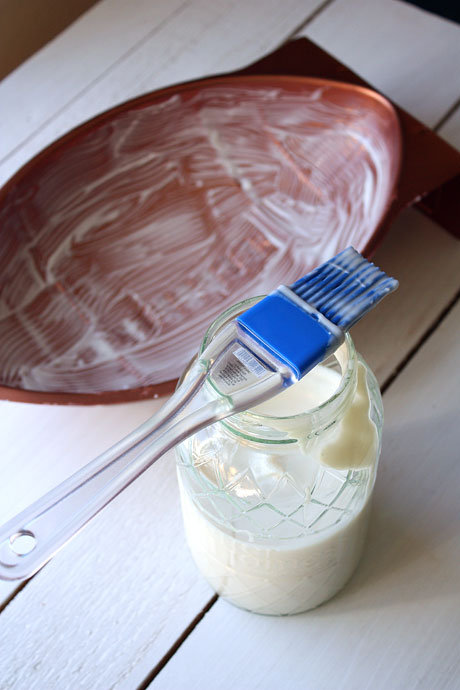
So in that regard, I will be baking a lot of cakes in the near future. And guess what, that non-stick spray with flour is super expensive. I'm trying to save money, so any little bit helps. Since I make my own cake flour, I figured I better find something to take the place of this expensive spray. I definitely will be using this a lot since it's only three ingredients and can be stored in the pantry. This is a huge win. When I'm baking large cakes (like this football cake), I'm still going to line the pan with parchment paper because I don't want to tempt fate, but I'm extremely happy to not spend $3-$4 on spray when a batch of the homemade stuff probably costs less than $2. As Charlie Sheen says, winning! 
Picture
Homemade Baking Spray

1 cup shortening (6.7 ounces)
1 cup all purpose flour
1 cup vegetable oil

In a medium sized bowl, combine the three ingredients. Whisk until smooth. Store in a resealable container and liberally brush on pans before you add the cake batter (line big pans with parchment paper, too).

Source: Rose Bakes
Picture
You may also like:
Loading...

Vanilla Bean Salted Caramel Sauce

1/17/2013

 
Picture
Can we get any better than vanilla beans, sea salt, and homemade caramel? I didn't think so. Let me just repeat that to be sure. Vanilla beans. Sea salt. Caramelized sugar. Got it? Good.

I tend to cheat when I make caramel by using brown sugar. It's easy to achieve the caramel color when you start with it, right? But the thing about using brown sugar is that the sugar doesn't caramelize, so it's not a true caramel. So this was the first time I've made a true caramel sauce, and it won't be the last.

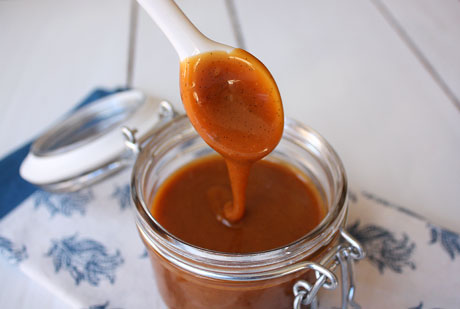
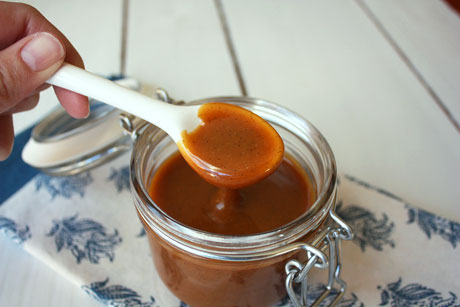
I'm not going to lie to you and say it can be done in 10 minutes. Well, maybe it can but it took me much longer. One of the annoying things about making caramel sauce is that when you add the cream, it lumps together and then you have this clumpy mess and you're left with this inedible sugar rock and cream floating around it. Or maybe that's just me. But....if you keep cooking it on low heat, the rock of sugar will melt again and it will get smooth and creamy like the picture above. Or below. You just have to patient (which is definitely not my virtue). However, this is so worth it. When you stick a spoon of it in your mouth, you will want to sit with the jar, devour the entire thing, and then wonder accusingly who ate all the caramel. Trust me.

This took me an hour to make but I know how to shorten that time. Use a large pan. Either a saucepan or a skillet. I used a 6-inch saucepan, and it took forever. If you have a bigger surface area to caramelize the sugar, it will happen quicker (duh!). So I highly recommend doing that because the sooner you can get this in your mouth, the better. Seriously.

Vanilla Bean Salted Caramel Sauce Recipe
Print this recipe

1 cup sugar
1 1/4 cups heavy cream
1 vanilla bean, split lengthwise (or 1 teaspoon vanilla extract in addition to the vanilla below)
1/4 teaspoon sea salt
1/2 teaspoon vanilla extract

In a large heavy bottom pan, spread the sugar in an even layer and turn the heat on medium low. Scrape the seeds out of the vanilla bean and add them to the cream. Heat the cream in the microwave for about 1 minute so it's not really cold.

Keep an eye on the sugar without stirring, and once the edges start to liquify, slowly stir the sugar together until it all melts and is liquid. If it starts to turn brown too quickly, turn the heat to medium. If it starts to clump, turn the heat to low and let it melt. Don't stir too often so it can liquify.

Once it's liquid and is a deep amber color (you can test a drop on a white plate if you need), slowly add the cream while whisking. Be careful because it will boil violently. If it clumps (good chance it will), return the pan to the burner on medium low and slowly whisk it until it melts. While you're stirring it, add in the sea salt and extract. Once the sauce is completely smooth, remove it from the heat and let it cool for a couple of minutes and then place it in a heat-proof container (like a mason jar). Store in the fridge for up to one month.

Source: Smells Like Home
Picture

Snowflake Sugar Cookies

12/16/2012

 
Picture
First of all, I'd like to say that I'm praying for all those affected by the shooting. Unfortunately I have been there, and I know what those people in Connecticut are going through. I was in a school shooting, and it's something I wouldn't wish on my worst enemy. I can only hope (probably in vain) that those children are too young to remember it or for it to have long-lasting effects. Because it 100% has changed my life. Even 13.5 years later, it affects my life on a regular basis. One of these effects is that I cannot watch/read the coverage. It takes me back to the days of sadness, sorrow, confusion, fear, and the unrelenting media coverage. Of the few details I do know, I know that it was horrific. The fact that it was an adult killing innocent young children is unspeakable. So, the most I can handle right now is praying for those people and staying away from the television. By the way, in the weeks, months, and years after the shooting, the support and love from the community, nation, and world was unbelievable. I will never forget all the love and support that we felt. 
Picture
In other news of the week from you know where, I was laid off after six and a half years. So I'm left asking the question, what do I want to be when I grow up? I never thought I'd have to answer that question again after I decided in college, but I'm a decade out of college and I find myself asking it again. The real question is do I find another job in the same field or do I pursue my love of cooking and baking? Decisions, decisions. 
Picture
In the midst of all these changes and dramatic events, these cookies make me happy. I think they're calm and reassuring and fun. If you're looking for Christmas gifts to give to loved ones, I highly suggest making a batch of these. Trust me, your friends and family will be blown away by them. I made them using this recipe and tutorial. In my tutorial, I don't cover how to pipe on top of the flooded icing. So...after you flood the icing, let them dry for 3-4 hours. Then you can pipe the design on top and let them dry overnight. When I made these, I outlined them in the morning and then flooded them. I piped the design on top after dinner and packaged them up the next morning. You certainly can spread out the timeline more, but I was on a deadline.

In the wake of sorrow, beauty is much appreciated.

Inspired by Annie's Eats
Picture

Sugar Cookies and Royal Icing Tutorial

12/6/2012

 
Picture
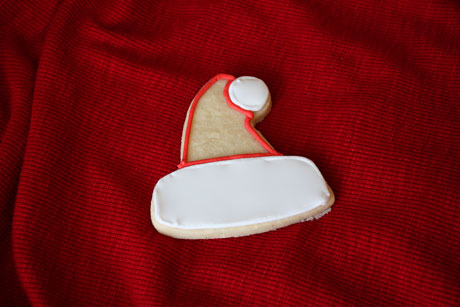
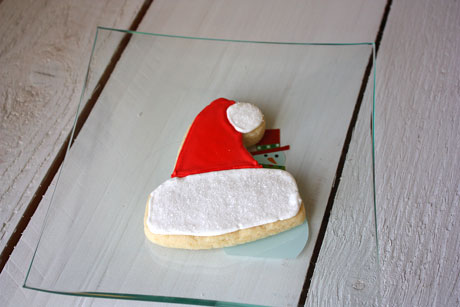
I'm a fairly firm believer that there are bakers in the world and decorators. Most people prefer one or the other. While I love to bake, I'm not a huge fan of decorating cakes and cookies. I can do it (although I don't have crazy good skills like some people), but I don't really enjoy it as much as when I bake. So I try and keep things fairly simple. These Santa Hat cookies that are decorated with royal icing fit the bill. There's only two colors. There's no extra piping detail, and it's fairly easy decorating because I used sanding sugar to add the extra pop.

It's not difficult to use royal icing, so let me show you the way. One thing before we start is that royal icing will dry out, so you must always keep it closed and covered (I use a wet paper towel).

First of all, this is my go-to sugar cookie recipe now when I want to do cut outs (even if I'm not going to go all out and use royal icing). The one that I used growing up is awesome, but it never held its shape. So I use this one now, and I also love it because it's really soft. The one thing I moved over from my family recipe is the nutmeg. If you've never had nutmeg in your sugar cookies, I insist you try it. It's pretty much the best thing ever. Just saying. People love my sugar cookies.

Here's what you'll need to decorate these cookies:
-Two airtight containers for your icing
-Gel red food coloring
-Two piping bags
-Number 2 or 3 piping tips
-Two squeeze bottles (optional but recommended)
-Toothpicks

First you make your icing using a stand mixer and the paddle attachment. I'm sure that it would work with a hand mixer, but I've never tried it. You have to whip the frosting until it's fluffy.

While the frosting is whipping, place the cookies on a cookie sheet.

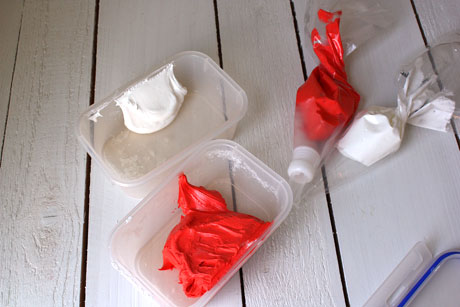
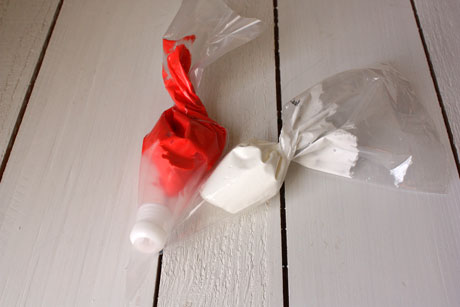
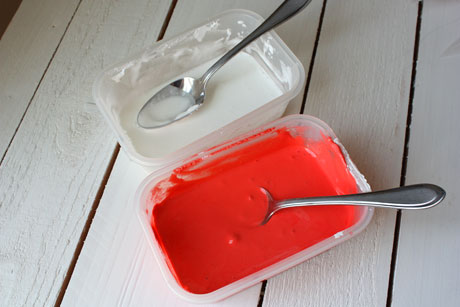
Next you divide your frosting between containers and tint it. Place some of it into piping bags--you only need to put as much in as what you'll need for piping.
Picture
I got a little ahead of myself and forgot to put a coupler on one of the bags. Don't be like me. Close up the bags nice and tight so they don't dry out.I wait to cut off the tip of the plastic bag and put the icing tip on until I'm ready to do the outline.
Picture
Then take what's left of the frosting and add a little bit of water (1/2 teaspoon at a time) to thin it out so you can coat the cookie with it. Stir until the water is completely mixed in.
Picture
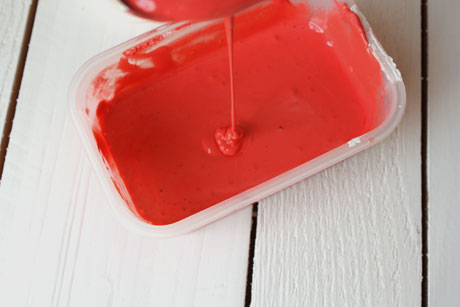
You'll know that your icing is thin enough when it runs off the back of a spoon and disappears into the bowl in 5-10 seconds. Note that you can always add more water but you can't take it away (although you can add the thicker icing from your piping bag into it if needed to thicken it up). Cover up the thinned icing. 
Picture
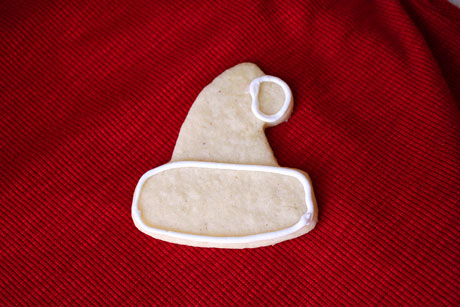
Now you can start decorating the cookies. Attach a number 2 or 3 tip to the coupler on your piping bag and pipe the outline of the cookies. Since the red outline for these depends on where the white outline is, I started with the white outline. Pipe the outline on all the cookies in the one color. Then start with the first cookie you did, and pipe on the second outline. I find that by the time I've finished piping all the cookies, the first cookie is dry enough for me to work with again (I was decorating 20 cookies). When you're not working with an open bag of frosting, cover the tip with a wet paper towel.
Picture
Then you'll pipe on the red outline. By the time you've finished all of the cookies, the first cookie should be dry enough for you to start the flooding process. You'll know if it's dry enough if you can lightly touch the outline and it's firm.
Picture
To flood the cookies, you'll first want to gently stir the frosting near the surface to get rid of any air bubbles that developed while it sat. You can transfer the icing into squeeze bottles or you can use a spoon to drop the icing onto the cookie. I use a spoon because my squeeze bottles are in my crawl space and I'm too lazy to get them (but squeeze bottles definitely make it easier). Carefully drop a good amount of the thinned icing in the center of the area and then use a toothpick to move it to the edges (sorry, didn't get a picture of the icing in the center). Do this on all the cookies.
Picture
Once the cookies all are flooded with the white icing, start with the first cookie you flooded and repeat with the thinned red icing. If you see any air bubbles, you can pop them with the toothpick.
Picture
Once you cookies are frosted, you want to let them sit for at least a few hours or overnight (uncovered is fine) to let the icing set. The icing will be hard and have a matte sheen.
Picture
The next day I wet a small paintbrush and lightly and gently brushed it on top of the white icing. Then I sprinkled white sanding sugar on top and shook off the excess. And I forgot to take a picture. Sorry.
Picture
Sugar Cookie Recipe
Makes about 40 cookies, depending on your shape
Print this recipe

1 cup butter
1 cup powdered sugar
1 egg
2 teaspoons vanilla
3/4 teaspoon salt
1/2 teaspoon nutmeg
2 1/2 cups all purpose flour

In the bowl of an electric mixer, cream together the butter and powdered sugar until combined. Add in the egg and mix, scraping down the sides of the bowl. Add the vanilla, salt, and nutmeg and mix until incorporated. Add in the flour and mix until combined. Place the dough in plastic wrap and chill until firm.

Preheat your oven to 375 degrees.

Roll the dough out to 1/4 inch thickness on a floured counter. Cut with cookie cutters and place on a greased cookie sheet. Bake for 8-10 minutes; the cookies will not brown. Remove from the pan and let cool completely before decorating.

Royal Icing Recipe

4 tablespoons meringue powder
Scant 1/2 cup water
1 pound powdered sugar, sifted
1/2-1 tablespoon corn syrup
Few drops of clear extract (I use clear vanilla)

Place the meringue powder and water in the bowl of your stand mixer. Use the paddle attachment to beat it until it's combined and foamy. Add in the sifted powdered sugar and beat on low until combined. Add in the corn syrup and extract and beat on high until the icing is thick and glossy. It should have stiff peaks. Divide the icing into bowls to tint, and make sure to keep it covered.

Cookies adapted from Annie's Eats
Icing recipe from Bake at 350

For a great decorating tutorial, check this out. For some FAQs on royal icing, check this out.  
Picture

Caramel Popcorn

12/5/2012

 
Picture
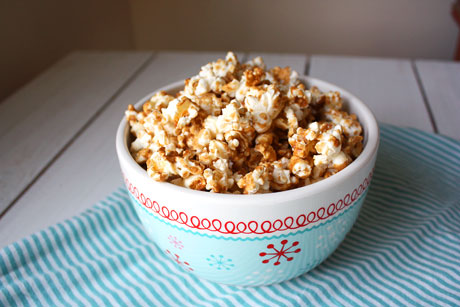
While I absolutely love popcorn, I'm not a huge fan of caramel popcorn. Until now. I have never made my own because I was worried that when I poured the caramel sauce on top of the popcorn, the popcorn would get soggy and squished. Well, that didn't happen, and I was excited.

I had a hard time with this though...I had a hard time not eating all of the popcorn before I poured the caramel on top of it. I had a hard time not eating all of the caramel popcorn before I put it in the oven, and I had a hard time not eating all of it before I could take a picture. When I saw the recipe, I wondered what the baking step did...it dries out the popcorn so it's extra crisp, which makes it taste like typical caramel popcorn. I'm going to play around with this recipe and add melted chocolate or peanuts next time. Now that I've tried this, I'm not going back!

My dad and I go to the Denver Broncos football games together, and we always get a snack in the third quarter. Last week, our snack was this popcorn, and it was quickly devoured between touchdowns. This is a great snack for the holidays and for football. Cheers to that! 

Caramel Popcorn Recipe
Print this recipe

1 bag popped popcorn (about 12 cups)
1/4 cup butter
1/2 cup packed brown sugar
2 tablespoons milk
1/8 teaspoon baking soda
1/2 tablespoon light corn syrup

Preheat your oven to 250 degrees and line a cookie sheet with foil (and spray with cooking spray) or a silicone baking mat.

In a medium saucepan, melt the butter over medium heat. Add in the brown sugar and bring to a boil while stirring. Stir in the milk, baking soda, and corn syrup and bring to a boil again. Remove from heat and cool for 15 minutes. Place the popcorn in a large heat-proof bowl. After the brown sugar mixture has cooled, pour it over the popcorn in the bowl and toss to coat.

Spread the popcorn in a single layer on the cookie sheet. Bake for 45 minutes, stirring every 15 minutes. Remove from the oven and let cool.

Adapted from Pennies on a Platter 
Picture

Homemade Marshmallows

11/29/2012

 
Picture
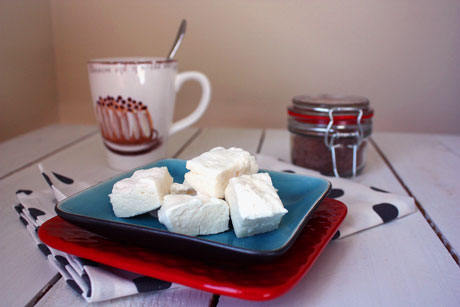
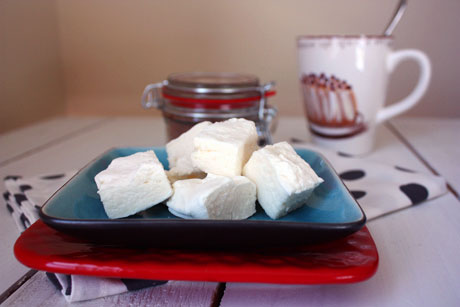
Why should you make marshmallows when you can buy them for $2? Because they're better, that's why. Don't get me wrong, I still buy marshmallows, but these are a special treat...especially when you pair them with homemade hot cocoa.

The first time I *tried* to make my own marshmallows, it was a hot mess, and I mean that quite literally. For some reason, when the recipe said to mix it, I decided to use a hand mixer. Huge mistake. Then the recipe said to cook the sugar to the hard ball stage and I did that instead of using my brain. My gelatin was cold, so the hot sugar met the cold gelatin and I tried to mix it with a hand mixer while pouring and trying to hold a bowl, and it was awful. Hard, hot sugar pieces were flying onto me and my countertops and my husband was looking at me like I was crazy. Which I was. Then I had to clean hardened sugar off of several dishes, utensils, and countertops. Not fun at all. This recipe is not that recipe.
 
Sometimes I amaze myself. I can't believe I tried marshmallows again. But I did, and they were ok. The recipe called for a lot of vanilla, so they tasted like vanilla bits. Normally I'd be all over that, but I wanted them to taste like marshmallows. That recipe also gave me dense marshmallows. This recipe is not that recipe.

My third attempt was with Bailey's marshmallows. A sure hit, right? Wrong. It somehow turned into Bailey's taffy, which is not what I wanted. I threw them out. Again, this recipe is not that recipe.

So this recipe turned into marshmallows that taste like marshmallows. They're not dense, and I didn't have hardened sugar trying to blind or burn me. There are quite a few steps to this, but it's not hard. You must have a candy thermometer and a stand mixer. Don't try to do it without them because they make it easy and foolproof. During the last part when you add the gelatin to the whipped egg whites, I almost gave up and threw everything away because it was complete liquid and I didn't see it becoming marshmallows any time soon. However, I kept going and they finally turned into beautiful white puffy marshmallows. Finally! A success!

Homemade Marshmallows Recipe
Makes about 30-40 marshmallows
Print this recipe

Note: I've included directions for sanitizing your egg whites so that pregnant women or immunocompromised people can eat homemade marshmallows. Feel free to skip that step.

2 packets of unflavored gelatin
1/2 cup + 1/3 cup cold water
1 cup sugar
1/3 cup light corn syrup
4 large egg whites at room temperature
Pinch of salt
2 teaspoons vanilla extract
1 cup powdered sugar
1 cup corn starch

Mix together the powdered sugar and corn starch in a large bowl.

(Optional step to sanitize your egg whites.) Place the egg whites in the bowl of your stand mixer and place the bowl on top of a small saucepan that's filled 1/3 of the way with water (be sure that the bottom of your bowl doesn't touch the water). Place a candy thermometer in the bowl. Place the saucepan on medium heat and bring to a boil while stirring the egg whites in one direction. Once it boils, turn down the heat and keep stirring the egg whites until they reach 140 degrees. Remove the bowl from the saucepan and place on your stand mixer.  

In a small bowl, sprinkle the gelatin over the 1/2 cup of cold water to dissolve and soften it.

In a medium sized saucepan, attach your candy thermometer and add the sugar, corn syrup, and 1/3 cup water. Place it over medium-high heat.
 
While the syrup is cooking, beat the egg whites on low speed using the whisk attachment until they are frothy. Add in the salt.

When the syrup reaches 210 degrees, beat the egg whites on high until they are thick and fluffy.

When the syrup reaches 245 degrees, slowly pour the syrup into the running mixer. Try to not pour the syrup onto the mixer or it will splatter onto the sides of the bowl and make a big mess.

Spoon the gelatin/water combo into the pan that you had the syrup in and swirl it to dissolve the gelatin. The residual heat from the pan will help this process.

Slowly pour the gelatin mixture into the egg whites while they are mixing.  Add in the vanilla extract and beat on high for about 5 minutes, until the mixture is thick and fluffy and the bowl is cool to the touch. If it's still liquid, keep beating on high.

Use a sifter to generously dust a baking sheet with the powdered sugar/corn starch combo. Make sure it is completely covered. Spray a spatula with cooking spray and use the spatula to spread the marshmallows on the pan. Allow the marshmallows to dry, uncovered, for at least 4 hours or overnight.  

Store the remaining powdered sugar/corn starch mixture in a bag.

After the marshmallows have dried, dust the top of them with the powdered sugar/corn starch mixture. Use a greased pizza wheel or scissors to cut them into pieces (or you can use cookie cutters, too). Toss the marshmallows in the powdered sugar/corn starch mixture and shake them in a strainer to get rid of the excess powder.

The marshmallows are good for one week in an airtight container or for longer in the freezer.

Source: David Lebovitz
Picture

Vanilla Bean Salted Caramels

11/28/2012

 
Picture
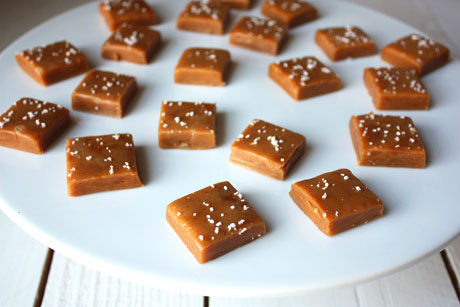
I read a post on Facebook the other day that said that because this person didn't make a lot of money, they were forced to give homemade food as gifts. And this person clearly did not think this was a positive thing. I almost said something but I don't like to fight with people in general and definitely not on the interwebz. So I bit my tongue...or fingers...and silently screamed, homemade food gifts are awesome! Seriously. Last year, my peeps got brownie mix in a jar. I've given cookies and other great stuff, and this year, some lucky people will be getting these vanilla bean salted caramels. They are amazing. And now I've ruined the surprise for some, but they'll forgive me when they pop one of these suckers into their mouths and moan with pleasure. By the way, if you Googled moan with pleasure and came up here, I'm sorry, but you should try these too!

Anyway...making caramel is hard you say. Guess what? It's not. This recipe is super easy to follow and while it takes some time, it's pretty much inactive time where you're watching sugar boil. I made these chocolate peppermint cupcakes while I was making these caramels because I try to multitask whenever possible.

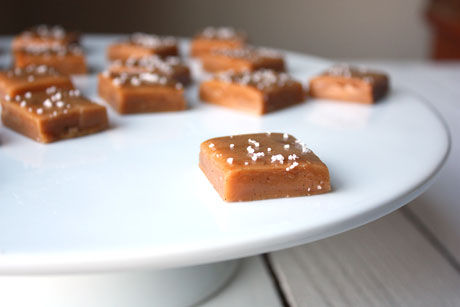
And now let me really sell you. I'm not a big caramel fan, but I've been eating a handful of these daily. Homemade caramel is leaps and bounds better than store bought. When you add a vanilla bean into them, there is such a great depth of flavor and richness. And then you sprinkle some sea salt on top, and it satisfies every sweet/salty craving you've ever had. They are truly incredible. I insist you make these and if you can, give some as gifts. If you can't because you ate them all, I understand. There's always next year.  

Vanilla Bean Salted Caramels Recipe
Makes 64 caramels
Print this recipe

Note: I cooked my caramel to 248 degrees, but it took me a little bit of time to actually pour the caramel out of the pan. So my caramels were a bit too hard (but still edible and delicious). To cut them, I placed the large square on a plate and microwaved them for about 15 seconds until they were soft enough to cut. Next time, I will cook my caramel to 246-247 degrees.

1 cup heavy cream
5 tablespoons butter, cut into pieces
1/2 teaspoon vanilla extract
1 vanilla bean, split and scraped
1 1/4 teaspoon sea salt, plus more for sprinkling
1 1/2 cups sugar
1/4 cup light corn syrup
1/4 cup water

Line the bottom and sides of an 8-inch square baking dish with parchment paper and lightly butter the parchment.

In a small saucepan, combine the cream, butter, vanilla extract, vanilla beans, pods, and sea salt in a pan and set over medium high heat until it boils. Then remove from heat and set aside.

In a 3-4 quart heavy saucepan, boil the sugar, corn syrup, and water, stirring until the sugar has dissolved. Don't stir anymore but swirl the pan every so often until the mixture turns a light golden color.

Remove the pods from the cream mixture and then slowly and carefully stir the cream mixture into the boiling sugar (it will bubble up so be careful). Stir frequently and simmer until the mixture registers 246-248 degrees on a candy thermometer (246 will give you a softer caramel and 248 will be a firmer caramel).

Pour the mixture into the prepared pan and let sit for 30 minutes. After 30 minutes, sprinkle some additional sea salt on top of the caramel. Let cool completely and then remove from the pan and cut into 1-inch squares, using a greased knife or pizza wheel. Wrap each piece into a 4-inch square of waxed paper, twisting the two ends to close.  

Source: Confections of a Foodie Bride
Picture

Homemade Green Bean Casserole

11/11/2012

 
Picture
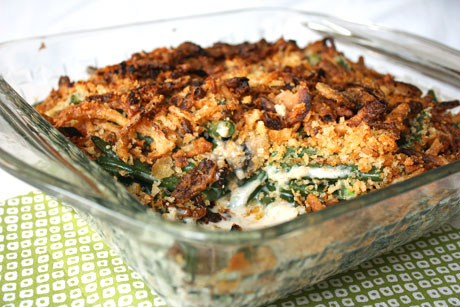
Thanksgiving is less than two weeks away; are you ready? Let the menu planning begin. Or maybe you're like me and you've already been planning. We always go to my parent's house for Thanksgiving, and it's usually a fairly small affair. We love to have variety, so we try and do small batches of everything but that hardly works. We always have way too much food.

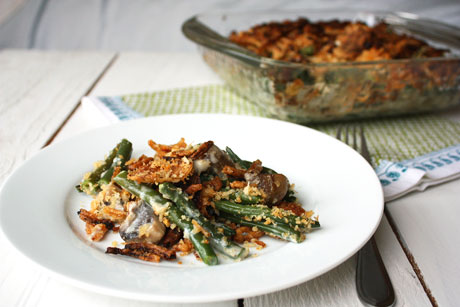
Too much food at Thanksgiving? That probably only happens at my house, right? One of my favorite Thanksgiving foods is green bean casserole, and while I love the cream of mushroom version, it is absolutely incredible homemade. As in completely from scratch. Real green beans, a real roux sauce, and real mushrooms. We first had this a couple of years ago when I saw it in one of my America's Test Kitchen cookbooks. The flavors are stupendous, and it's everything you want your green bean casserole to be. The first time I made this recipe, I used this recipe for crispy fried onion strings as my topping. I highly recommend it, but it's kind of a pain to fry the onions and such. If you want the more convenient and still delicious route, the onion topping below is the way to go. I know this takes more time than the usual green bean casserole, but it's definitely worth it!

Homemade Green Bean Casserole
Makes a 9x13 pan
Print this recipe

2 pounds green beans, trimmed and halved
3 tablespoons butter
1 pound mushrooms, stems removed and quartered
3 garlic cloves, minced
Salt and pepper
3 tablespoons all purpose flour
1 1/2 cups chicken broth
1 1/2 cups heavy cream

For the topping: 
1 cup panko bread crumbs
2 tablespoons butter
1/4 teaspoon seasoned salt
1/4 teaspoon pepper
3 cups canned fried onions

Fill a large bowl half full with cold water and some ice. Bring a large pot of salted water to boil. Add the green beans to the boiling water and cook until bright green and tender but crisp, about 5-6 minutes. Drain the green beans and then plunge them into the cold water bath to stop the cooking. 

Preheat your oven to 425 degrees.

In the same pot, melt the butter over medium-high heat. Add the mushrooms and garlic and cook until the mushrooms have released their liquid and it has evaporated. Add the flour and cook for one minute while stirring. Add in the broth and let simmer, stirring constantly, and then add in the cream. Reduce the heat to medium and simmer until the sauce has thickened, about 10-12 minutes. Season with salt and pepper to taste.

While the sauce is thickening, make the topping. Melt the butter in a small skillet and add in the panko bread crumbs. Mix in the seasoned salt and pepper and stir frequently. When the bread crumbs have turned a golden brown color, remove from heat and stir in the canned fried onions.

When the sauce has thickened, stir in the drained green beans. Spoon the green bean mixture into a greased 9x13 pan and spread the topping mixture on top. Bake for 15 minutes until the top is brown and the sauce is bubbling around the sides.

Barely adapted from The Best of America's Test Kitchen 2008 cookbook 
Picture
<<Previous

     Welcome!

    Cooking is fun and easy at high altitude, but baking can be frustrating. About 90% of my recipes work everywhere, but some are adjusted so us mountain dwellers can enjoy baked goods from scratch. I hope you find great recipes on here for your family, and I'll let you know if any are adjusted for high altitude. 

    Stay Updated!

    Add to your Reader:

    Get new posts delivered to your inbox:

    Enter your email address:

    Delivered by FeedBurner

    Categories

    All
    Appetizers
    Bars
    Beef
    Bread
    Breakfast
    Brownies
    Cake
    Cheese
    Chicken
    Chocolate
    Cinnamon
    Cookies
    Crackers
    Cupcakes
    Dessert
    Do It Yourself
    Drinks
    Fruit
    Ground Beef
    High Altitude
    How To
    Ice Cream
    Italian
    Main Courses
    Mexican
    Muffins
    Oatmeal
    Pasta
    Pastry
    Pie
    Pizza
    Pork
    Project Pastry Queen
    Pumpkin
    Salad
    Sauces
    Side Dishes
    Snacks
    Soup
    Sourdough
    Steak
    Vegetables

    My featured recipes on NoshOnIt

    Some Good Reads!

    Annie's Eats
    Bake at 350
    Climbing Grier Mountain
    Confections of a Foodie Bride
    How Sweet It Is
    I Am Baker
    Macaroni and Chesecake
    Pinch of Yum
    Pink Parsley
    Smells Like Home
    Smitten Kitchen

    Sunny Side Up
    The Curvy Carrot
    The Marvelous Misadventures of a Foodie
    The Pioneer Woman Cooks
All content copyright 2012-2013 She Makes and Bakes.