She Makes and Bakes
  • Home
  • About
  • Ramblings
  • Recipe Index
  • What We're Eating
  • High-Altitude Baking

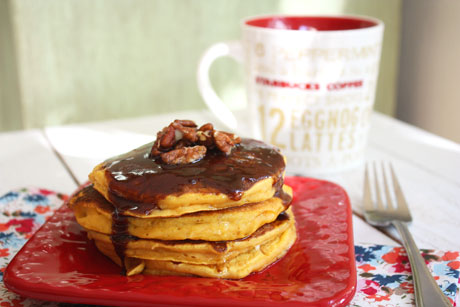
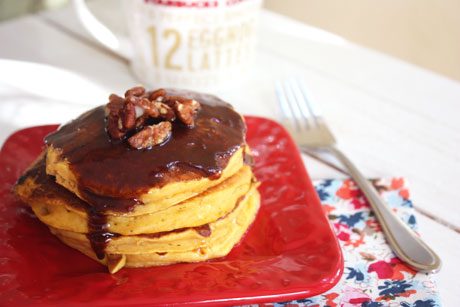
Pumpkin Pancakes with Cinnamon Brown Butter

10/4/2012

 
Picture
I first saw this recipe two years ago and ripped it out of my Taste of Home magazine and placed it in my recipe binder. And then I kept coming across it but never actually made it. I've said before that I'm not really a big fancy pancake eater. I like the simple classics. But I finally tried these, and now I'm kicking myself. Why oh why didn't I do this sooner?? The pancakes, as you would expect with any good pumpkin recipe, are very moist and flavorful. The cinnamon brown butter? Oh my. I halved the entire recipe since the hubs doesn't like pancakes, and I poured half of the butter over the stack. Clearly I was watching my diet that morning! It was worth it though...it's such a great fall morning breakfast that I definitely will be making often. 

By the way, this recipe calls for ricotta cheese. I wasn't expecting that, and since I didn't read the recipe ahead of time, I did not have any ricotta. After scouring my fridge, I did see cottage cheese. Normally I would pulse the cottage cheese in my food processor to get rid of the clumps, but I was lazy and didn't want to pull it out. So I mashed it with a fork. There were still small clumps in my pancake batter, but it tasted just fine to me. I wouldn't really recommend using cottage cheese as is though. Next time I'm planning on buying some ricotta so I can try them with that. 

I wasn't planning on sharing this recipe for a few more weeks, but it's supposed to snow in Denver Saturday morning so I'm busting them out. And if I'm enjoying them, you should too!

Pumpkin Pancakes with Cinnamon Brown Butter Recipe
Makes about 16 pancakes
Print this recipe

For the butter:
1/2 cup butter
1/4 cup maple syrup
1/2 teaspoon cinnamon
1/4 teaspoon nutmeg
1/2 cup chopped pecans (optional)

For the pancakes:
1 1/2 cups all purpose flour
2 tablespoons packed brown sugar
2 teaspoons baking powder
1 teaspoon salt
2 eggs
1 1/3 cup milk
3/4 cup canned pumpkin
1/2 cup ricotta cheese

In a saucepan over medium heat, melt the butter and keep it on the stove until it foams and then starts to turn brown. Scrape up the brown bits, add the cinnamon, nutmeg, and maple syrup, and remove from heat. Stir in the pecans if using (or you can place them on top of your finished pancakes). 

In a large bowl, mix together the eggs, milk, sugar, pumpkin, and ricotta cheese. Stir in the brown sugar, baking powder, and salt. Add in the flour and stir until just incorporated. 

Heat a skillet over medium heat and spray with cooking spray or melted butter. Drop about 1/4 cup of batter on the skillet and cook until bubbles form on the top (about a few minutes). Flip the pancakes and cook until golden brown. Serve with the butter. 

Source: Taste of Home  
Picture

Egg in the Hole

10/2/2012

 
Picture
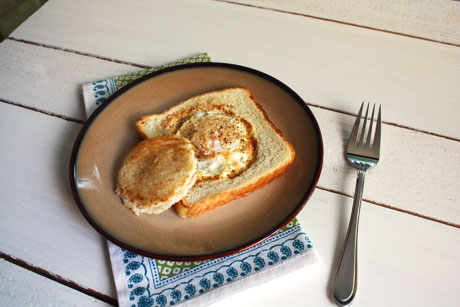
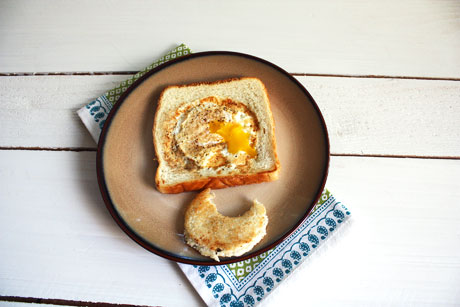
For some people growing up, this was a classic breakfast. Those people are lucky. I had never heard of it until I saw it on The Pioneer Woman's Food Network show. My husband looked at me like I was crazy. Apparently it has many different names, too, but this is the easiest for me to remember. The real selling point of this for me is the buttery toasted bread and the egg whites.

I'm pretty sure I'm sinning against the food blog community, but I'm really not a fan of runny egg yolks. I can eat about one or part of one and that's enough. Sometimes I can't even choke down one. I much prefer the whites to the yolk any day. In fact, I went to breakfast once and ordered scrambled egg whites. They charged me an extra dollar for that. Um, excuse me, but shouldn't it be less money because you're not giving me the entire egg?? So confusing. Anyway, I can do cooked yolk a little more than runny but I still much prefer the white. I haven't tried this minus the yolk yet, but I think that's next. I can imagine that this would be a really fun breakfast to make with or for your kids if you have them. It's something different, that's for sure. 

Egg in the Hole Recipe
Makes one (multiply for how many you need)
Print this recipe

1 piece of white bread
1 tablespoon butter
1 egg
Salt and pepper to taste

Use a round cookie cutter or the rim of a glass to cut a circle in your piece of bread. Melt the butter in a skillet over medium high heat and place the bread in the skillet. Crack the egg into the hole, sprinkle with salt and pepper, and let it cook for about a minute until it's set and you can flip it. Flip it, let it cook for about 30 seconds and then move the bread around to soak up the remaining butter. Once your yolk is how you like it, remove the bread to a plate. Place the circle of bread in the skillet, and move it around to butter it and brown it on both sides.

Source: The Pioneer Woman   
Picture

Apple Cinnamon Muffins

9/27/2012

 
Picture
Since today's Friday (yay!), I thought I would give you something to spice up your weekend. I wish I was going to be eating these this weekend, but Saturday morning I'm doing a color run. I realize I should be looking forward to this and excited about it, but I'm kind of not. I'm not too excited about getting dirty. Pathetic, right? Oh well. It's close to my house, and I'm sure it will be more fun than I'm expecting. After that, it's home to work on some baking recipes. I'm definitely looking forward to that!

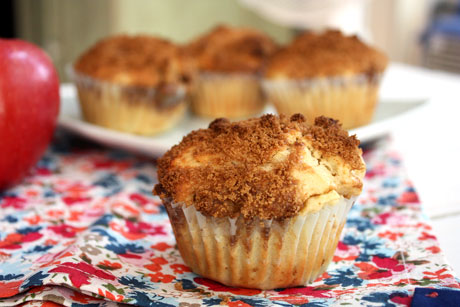
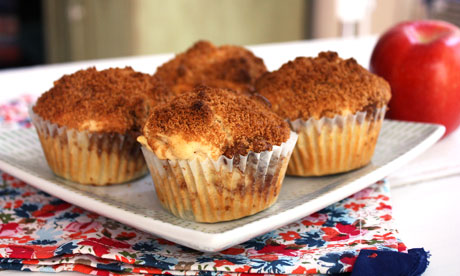
Anyway, this is another muffin recipe from a great cookbook I got for my birthday. And this recipe is another win. It's a muffin with a great crumb that is studded with apple chunks. There's wonderful cinnamon flavor, and it has a brown sugar/cinnamon crunch on top. The brown sugar gets a little caramelized while it bakes, which is pretty unique. I would not skip the brown sugar on top because they don't have much sugar in them otherwise. While I don't want to eat a cupcake disguised as a muffin for breakfast, it does need to be a little sweet. This is that muffin. I hope they make your mornings warm and cozy!
 
Apple Cinnamon Muffin Recipe
Makes 6-7 muffins
Print this recipe

For the muffins:
1 egg
3 tablespoons sugar
1/2 cup milk
1/4 cup butter, melted and cooled
1 1/2 teaspoon baking powder
1 teaspoon ground cinnamon
1/2 teaspoon salt
1 1/4 cups all purpose flour
1 Granny Smith apple peeled, cored, and chopped

For the topping:
1/4 cup packed brown sugar
1/2 teaspoon cinnamon 

Preheat your oven to 400 degrees. Line your muffin tin with paper cups.

In a large bowl, whisk together the egg, sugar, milk, and melted/cooled butter. Add in the baking powder, cinnamon, and salt and stir to combine. Stir in the flour until just incorporated. Fold in the chopped apples. Spoon the mixture into the paper cups. Note: It's a pretty thick batter. I filled the cups almost full and put about 1/4 cup of the batter in the cups.

To make the topping, mix together the brown sugar and cinnamon. Sprinkle it on top of the batter.

Bake the muffins for 30-35 minutes or until a toothpick comes out clean. Let cool in the pan for 5 minutes and then remove from the pan to cool.

Source: Best-Ever Book of Cupcakes & Muffins
Picture

Roasted Peach Scones

8/23/2012

 
Picture
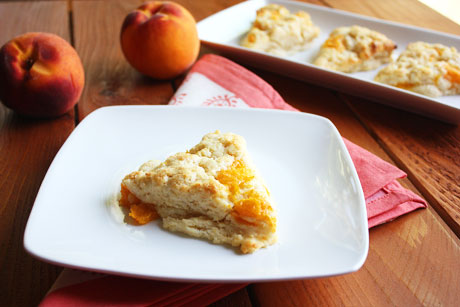
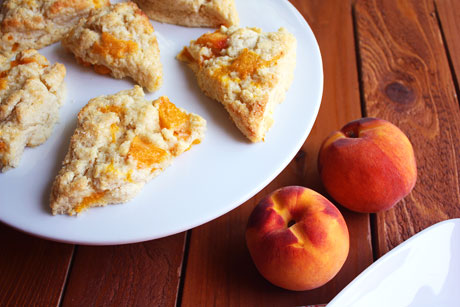
After making strawberry scones and greatly enjoying them, I figured they were adaptable to other fruits as well. Since I've been loving peach season this year, I wanted to include them in scones. Peaches have a lot of juice in them, so I decided to roast them first to intensify the flavor and dispel some of the juice. Best. Decision. Ever. These scones are just as good as the strawberry ones, and I'm very happy to have another scone variation to try. I was never a big scone person, but I'm quickly becoming one!

This is a wet dough, so don't worry when you make it. If you aren't going to eat all of these right away, I recommend you let them cool, wrap the uneaten ones in plastic wrap, and place them in a freezer bag in the freezer. When you want a scone, take one out of the freezer and defrost it. It'll still have a little crunch to the outside and will have a better texture than if it sits on the counter in a bag.

Roasted Peach Scones Recipe
Makes 8 wedges
Print this recipe

To roast the peach:
1 medium peach, peeled
2 tablespoons sugar
2 tablespoons hot water

For the scones:
2 cups all-purpose flour
1 tablespoon baking powder
3 tablespoons sugar
1/2 teaspoon salt
5 tablespoons cold butter
1 cup heavy cream

Preheat your oven to 400 degrees. 

Cut the peeled peach into bite-size chunks and place in a single layer on a small sheet pan. Combine the sugar and hot water and pour over the peaches. Place in the oven and roast for about 15 minutes or until the juices are dissolved. Let cool.  

Increase the oven temperature to 425 degrees.

Combine the flour, baking powder, sugar, and salt into a large bowl. Cut your cold butter into small pieces and then mix with a pastry blender or two forks until it resembles coarse crumbs. Gently fold in the roasted peaches. Add in the cold cream and shape the dough into a ball. Form it into a flat circle about one inch thick on your counter. Cut into 8 wedges. Place the wedges on a greased baking sheet. Brush them with an egg wash (1 egg mixed with 1 tablespoon water), melted butter, or cream; sprinkle with turbinado sugar; and bake for 12-15 minutes until light brown. Let cool on a wire rack for about 10 minutes before serving.
 
Adapted from A Cozy Kitchen
Picture

Peach Almond Muffins

8/21/2012

 
Picture
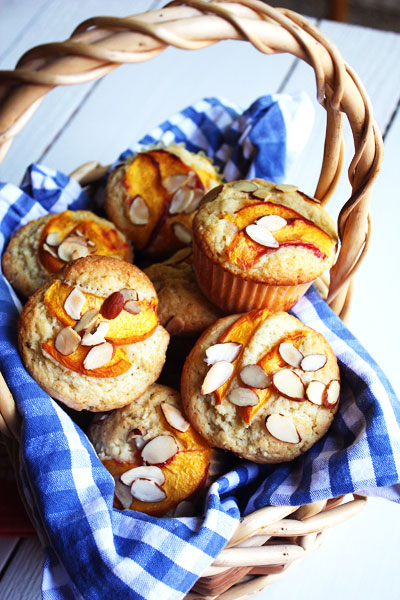
A few weeks ago, I noticed that there were no muffin recipes on the blog. I'm not a big muffin person, but I wanted to have at least a couple! Then I got a great birthday present: the Best-Ever Book of Cupcakes & Muffins. It's a great cookbook with beautiful pictures of every recipe and great variety. I can't wait to work my way through the book. Another beauty of the book is that it's from the UK, so it has international measurements. Score for my international friends! Since I am loving peach season in Colorado right now, I decided to make the peach almond muffins.

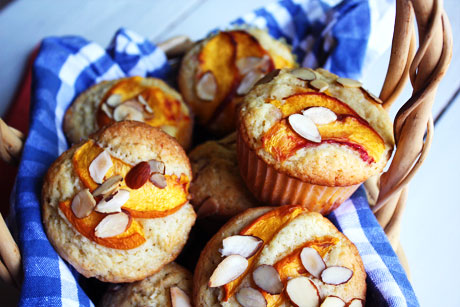
These are great muffins. They rise nicely, they're moist (sorry if you hate that word), have a great crumb that's dense without being too dense, and they're just sweet enough. The pops of juicy peach throughout the muffin give great texture and flavor, as do the almonds. This truly is a muffin--not a cupcake without frosting that we'll call a muffin to make it legit to eat it at breakfast (but no one actually does that, right?). I was a little worried while I was making them because the batter was extremely thick, but they came out wonderfully. I'll definitely be adding these to the rotation. If you're at high altitude, see the note below. The only change is to decrease the baking powder.

By the way, the recipe says it makes 8 muffins. I got 11 out of it. I'm not sure if the baking cups in the UK are bigger than US muffin tins. If you're in the UK, you may only get 8 muffins.

Peach Almond Muffins Recipe
Makes 10-11 muffins
Print this recipe

*Note: If you live at high altitude, decrease the baking powder to 2 1/4 teaspoons and keep everything else the same.

2 large ripe peaches
2 cups (225 g) all purpose flour
1 tablespoon (15 ml) baking powder*
1/2 cup + 3 tablespoons (150 g) sugar
1/4 cup + 4 teaspoons (40 g) ground almonds
2 eggs
6 tablespoons (75 g) butter, melted and cooled
1/4 cup (50 ml) canola oil
4 teaspoons (20 ml) sour cream
1 tablespoon (15 ml) sliced almonds (for the garnish)

Preheat your oven to 350 degrees.

Cut one peach into small pieces for inside the muffins. Cut the other peach into crescent slices for the top and set aside.

In a large bowl, stir together the flour, baking powder, sugar, and ground almonds. In a separate bowl, mix together the eggs, melted and cooled butter, oil, and sour cream. Pour the wet ingredients into the bowl with the dry ingredients. Partly fold in, add the chopped peaches, and continue to fold in until just combined. 

Spoon the batter into a paper-lined muffin tin until the cups are 3/4 full (I put four tablespoons of batter into each cup). Arrange the peach slices on top of the muffins and sprinkle the sliced almonds on top. Bake for 27-29 minutes or until a toothpick comes out clean. Let stand in the pan for a few minutes and then remove to cool. 

Source: Best Ever Book of Cupcakes & Muffins by Carol Pastor 
Picture

PPQ: Peach Kolache

8/11/2012

 
Picture
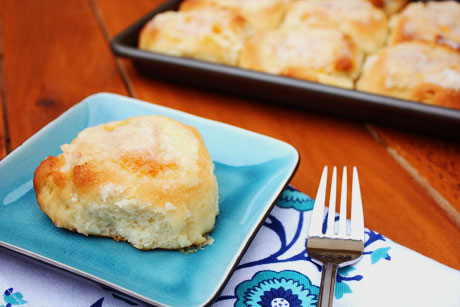
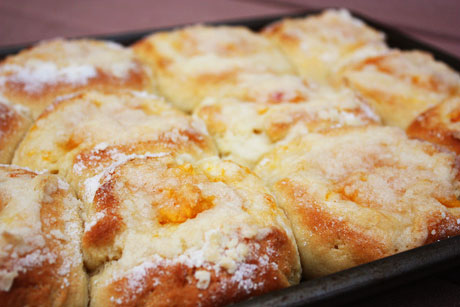
It's my turn to host Project Pastry Queen this week, and I chose to make peach kolache. Kolache was the kick-off project back in 2010 and something I've always wanted to make. From what I can tell, kolache are sweet, soft Czech or Danish pastries. They're very popular in Texas; I had never heard of them. I knew something was wrong when I made them because the dough is supposed to be sticky and wet. Mine was not. Not even close. My dough was tough and tacky, so I knew something was off. I figured it was a humidity/altitude thing until I was typing this recipe out and saw that I definitely did not add in the warm water. Well, that'll explain the tough dough part. When you make this, make sure you add in all the ingredients. Generally that helps make the recipe good. Other than being a little tough/dry, they were great. They have a really great flavor. I'll definitely be making these again, and this time I'll be sure to add in everything.

Another great thing about this recipe is how versatile it is. You can have sweet or savory variations. I'm looking forward to a peach/strawberry combo as well as a sausage/egg combo. I can tell this is going to be a great recipe!

Peach Kolache Recipe
Yield: 16-18 buns
Print this recipe

For the dough:
2 cups milk
2 1/4 teaspoons active dry yeast
1/2 cup lukewarm water
1/2 cup butter
2 eggs
1 1/4 cups sugar
2 teaspoons salt
8 1/2 cups all purpose flour

For the peach filling:
2 cups pitted and chopped peaches
1 cup peach jam

For the streusel topping:
1/2 cup all purpose flour
1/2 cup sugar
3 tablespoons butter, cut into small pieces and chilled

To make the dough, warm the milk in a medium saucepan set over medium heat until the milk starts to steam and forms a skin. Don't let it boil. Cool for 10-15 minutes until it's 110 to 115 degrees or warm to the touch. Dissolve the yeast in the warm water and let it sit until foamy (5 minutes). Melt the butter and let cool for about 5 minutes.

In a large bowl, combine the eggs, sugar, salt, and butter. Add in the cooled milk and the warm water/yeast. Add in the flour, two cups at a time, mixing in between. Use a wooden spoon or your hands to mix the dough until all the flour is fully incorporated. Don't overwork the dough or it'll be tough. It's going to be a sticky, light dough. Grease a large bowl lightly, and place the dough in the bowl. Cover with plastic, and let it rise until doubled in size (about 1-2 hours). Deflate the dough by pressing on it a couple of times, recover it with plastic wrap, and refrigerate at least four hours or overnight.

To make the filling, combine the chopped peaches with the peach jam.

Grease a 12x17 baking sheet with cooking spray or butter. Shape the dough into 2 1/2 inch diameter balls (they'll be the size of small limes). Arrange the balls on the baking sheet, three across and six down. Using your thumb, press down in the middle of each ball to form a well for the peach filling. Mound one tablespoons or so of the peaches in the middle of the ball. Cover them loosely with plastic wrap and let them rise in a warm place for about 1 hour until doubled.

Preheat your oven to 375 degrees.

To make the streusel topping, mix the flour, sugar, and butter together until crumbly. You can use your hands, two knives, or a pastry cutter to mix the butter. Scatter this over the kolaches before baking.

Bake them for 25-30 minutes until lightly browned on top. Cool for 20 minutes before serving.

Source: The Pastry Queen
Picture

Perfect Pancakes

8/7/2012

 
Picture
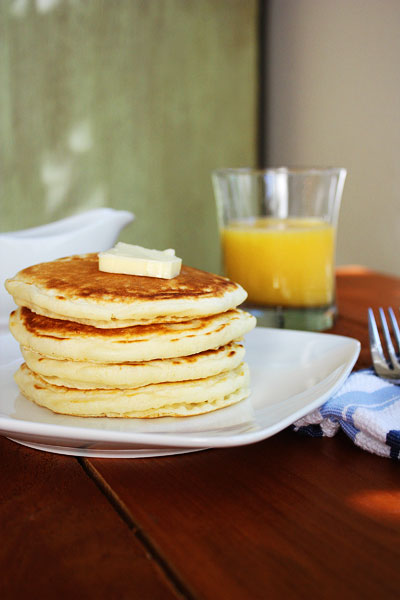
Since I've already mentioned how picky I am about my french toast, it shouldn't surprise you that I'm picky about my pancakes, too. The thing is...I grew up on Bisquick, and I loved it. I know...hang with me and keep reading because I know that's blaspheme to some. I loved it so much that I never ordered pancakes at restaurants because I knew I wouldn't like them.

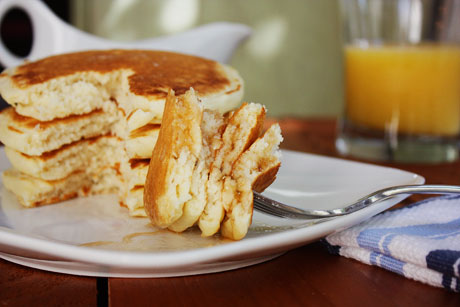
However, a few years ago I noticed that Bisquick started to taste funny so I decided it was time to try a homemade recipe. I tried a lot of recipes, and it was hard to find one that tasted like Bisquick but better. I don't want vanilla in my pancakes, and for the longest time I didn't like maple syrup. I needed a pancake that would stand on its own without needing to be masked by other flavors. After many tries, I finally found the perfect recipe. It creates fluffy, thick pancakes with great flavor. These are great for any add-ins you want to include, like blueberries, but they're great with just a touch of butter, too. 

Perfect Pancake Recipe
Yield: About 12 pancakes
Print this recipe

1 1/2 cups all-purpose flour
3 1/2 teaspoons baking powder
1/2 teaspoon salt
1 tablespoon sugar
1 1/4 cups milk
1 egg
3 tablespoons melted butter, cooled

In a large bowl, combine together the flour, baking powder, salt, and sugar. Whisk in the egg, milk, and cooled melted butter until just combined. 

Heat a griddle or skillet over medium heat and spray with cooking spray. Drop 1/4 cups of the batter on the griddle and let cook for 2-3 minutes until bubbles appear on the top of the pancakes and the underside is golden brown. Flip the pancakes and let them cook for 1-2 minutes longer until golden brown.

Serve immediately or let them rest on a wire rack so they remain crisp.

Source: I think I got this from Allrecipes awhile ago but can't find it now. If it's your recipe, please let me know!
Picture

Cinnamon Russian Braid

6/7/2012

 
Picture
First of all, for those of you who follow me on a reader, I just realized that my pictures are getting stretched and distorted on there. Sorry. I'm working on fixing it. I didn't realize that getting my awesome DSLR and using Photoshop would cause that....hang in there while I figure out how to fix it, and thanks for continuing to read!

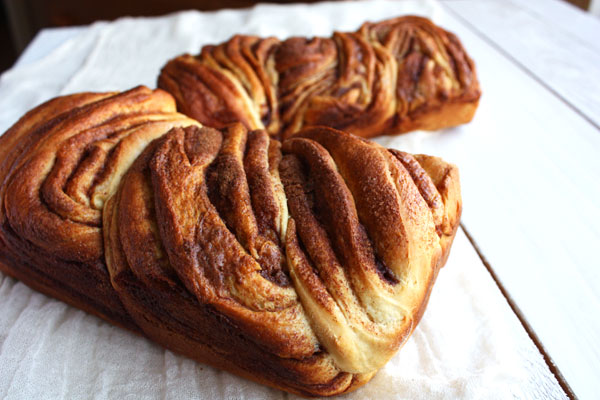
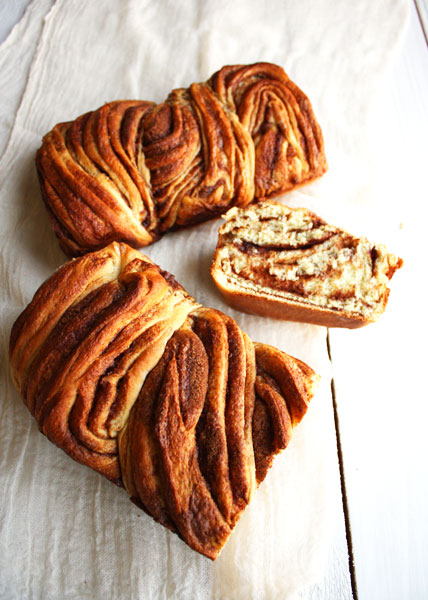
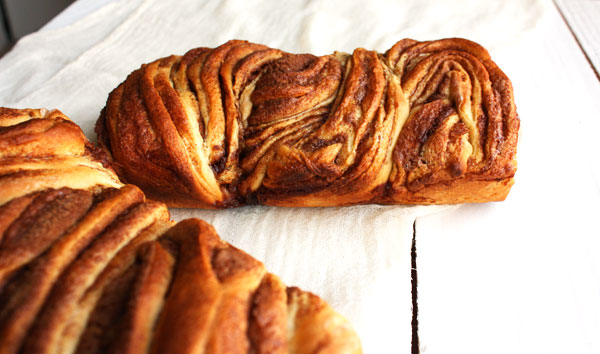
Back to the good stuff. Last November I took a bread class, and we learned how to make a sweet dough and then used it to make this bread, doughnuts, and fruit swirl rolls. This, by far, was my favorite as I am a cinnamon fiend. Not only is this very easy to make, it's a beautiful loaf of bread, outside and in. I'm really not sure why it's called a Russian braid, but let's just go with it. The bread is similar to a cinnamon roll, but you use cream instead of butter. Also, the cinnamon sugar is very potent--there's much more cinnamon in the mix than for regular cinnamon rolls. A great alternative to this is subbing out the cinnamon for cocoa powder, and then you have a chocolate braid. I haven't tried this because I can't seem to move beyond the cinnamon, but I'm sure it's excellent. The next time you want a sweet treat, you definitely should try this!

While it looks like it must take a lot of time and be hard to make, it's really not. The extra steps are rolling it out, spreading the toppings on it, rolling it up, cutting it, twisting it, and cramming it into pans to rise. I think it takes the same amount of time as cinnamon rolls, and it's definitely something unique looking. Your guests will be impressed. I guarantee it.   
Picture
Russian Braid Recipe
Makes 2 loaves
Print this recipe

For the bread:
1 cup warm milk
5 ounces sugar (1/2 cup)
1 1/2 tablespoon yeast
1/2 cup butter, softened
2 eggs
1/2 teaspoon salt
21 ounces all purpose flour (4 1/4 cups)

For the filling:
1/4 cup cinnamon
2/3 cup sugar
1/4 cup heavy whipping cream

To make the dough, in a large mixing bowl, mix together the yeast, sugar, and warm milk (about 100 degrees). Let sit for 5-10 minutes until foamy. Add butter, eggs, and salt and combine with the paddle attachment. Add in flour and mix until a soft dough forms. Switch to dough hook and knead until dough is soft and supple. This dough will be wet and sticky, but you'll want to avoid adding a lot more flour. Transfer to a greased bowl, cover, and let it rise until doubled (about 1 hour). If you have time, punch the dough down and place in the fridge for at least an hour. If you don't have the time, don't worry. Keep reading. 

Combine the cinnamon and sugar together. Line two 9-inch bread pans with parchment paper.

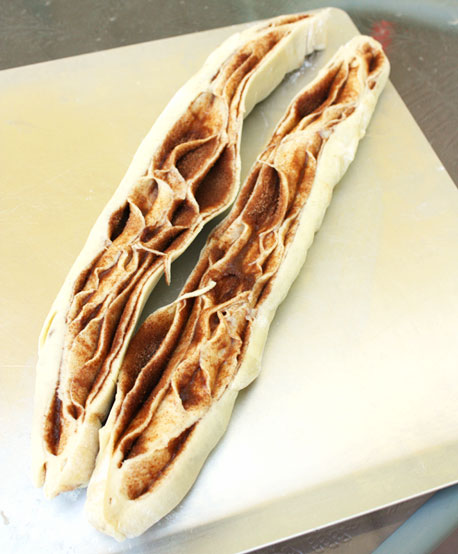
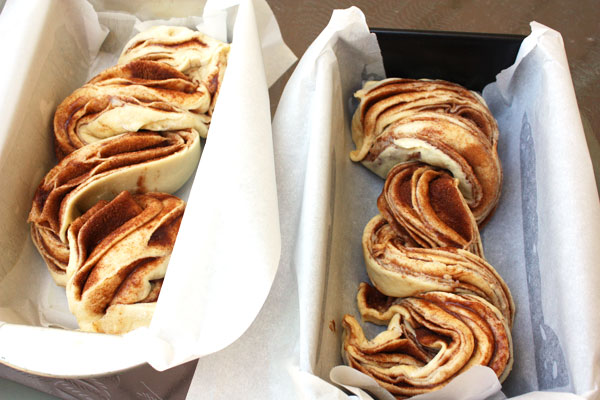
Divide the dough into two pieces, and roll each piece into a 12x17 inch rectangle. Brush with the cream, and sprinkle the cinnamon sugar over the cream. Roll each rectangle from the 12 inch side into a log. If you dough is chilled, cut each log in half lengthwise (see picture below). If your dough was not chilled, place the log in the freezer for 10-20 minutes until slightly firm (this will make it much easier to cut and work with), and then you can cut it in half lengthwise.  

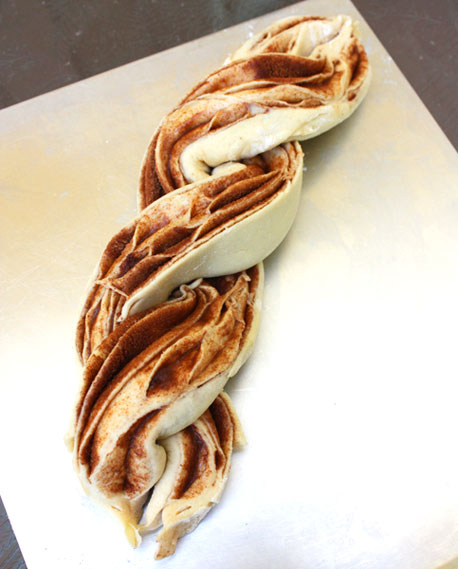
Take the two pieces and loosely twist together, leaving the cut side up. Place the twists in the parchment-lined bread pans, cut side up. You'll have to squish it in there a bit. Let the loaves proof until doubled, about 30-60 minutes. Bake in a 350 degree oven for 35-40 minutes until browned. Let cool before serving.

Source: Cook Street

Here's some (hopefully) helpful pictures:
Cut the logs in half lengthwise.
Picture
Loosely twist the pieces together, leaving the cut side up, and pinch the ends together.  
Picture
Then cram the twist into the parchment-lined bread pan.
Picture
Let proof (rise) for about 30-60 minutes or until almost doubled, bake, and you'll have some very pretty and tasty loaves.
Picture
You may also like:
Loading...

Strawberry Scones

5/27/2012

 
Picture
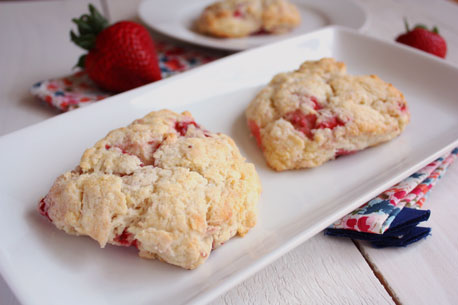
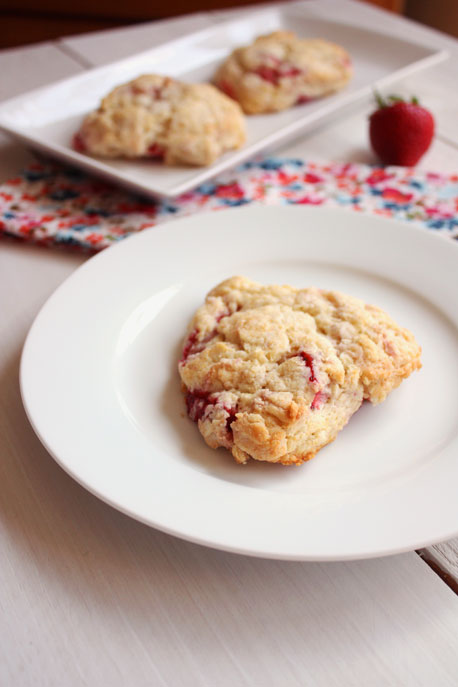
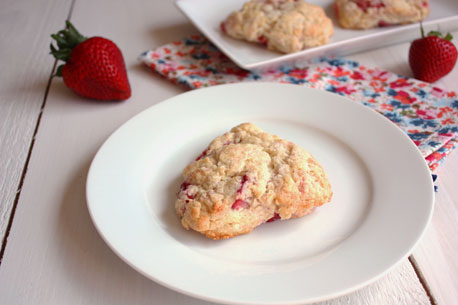
Now that strawberries are back in season, I've been seeing strawberry scone and biscuit recipes pop up all over the place. Every time I see one, I swoon and want to go to my kitchen immediately. Yet I never do. The thing is, I was spoiled my freshman year of college. My roommate was from Puyallup, Washington, and they have a fair every year. Apparently at this fair, they have scone trucks (why don't we have these in Colorado??). In fact, she had one of these trucks come to her wedding reception. These scones are so good...and they have a mix that you can buy. I've tried to get her to ship me the mix for the past decade, but it never happened...could you imagine the shipping price on that? Yikes. After being spoiled with those awesome scones, I tried to make them once, and they were terrible. Dry and nothing to write home about. I haven't made them since. 

However, after seeing all the recipes out there, I decided to give it a go again, and this one was fantastic. My only regret is that I meant to add in some almond extract, and I forgot. I love strawberries and almonds, and I think the extract would have been phenomenal. Try these before strawberries go out of season! If you aren't going to eat all of these right away, I recommend you let them cool, wrap the uneaten ones in plastic wrap, and place them in a freezer bag. When you want a scone, take one out of the freezer and defrost it. It'll still have a little crunch to the outside and will have a better texture than if it sits on the counter in a bag.
Picture
Strawberry Scones Recipe
Makes 8 wedges
Print this recipe

8 medium strawberries, quartered
2 cups all-purpose flour
1 tablespoon baking powder
3 tablespoons sugar
1/2 teaspoon salt
5 tablespoons cold butter
1 cup heavy cream
1/4-1/2 teaspoon almond extract (optional)

Preheat your oven to 425 degrees.

Arrange your cut strawberries in a single layer and press down on them with a paper towel to remove some of the moisture.

Combine the flour, baking powder, sugar, and salt into a large bowl. Cut your cold butter into small pieces and then mix with a pastry blender or two forks until it resembles coarse crumbs. Gently fold in your pressed strawberries. Add in the cold cream and shape the dough into a ball. Form it into a flat circle about one inch thick on your counter. Cut into 8 wedges. Place the wedges on a greased baking sheet. Brush them with an egg wash (1 egg mixed with 1 tablespoon water) or melted butter, sprinkle with turbinado sugar, and bake for 12-15 minutes until light brown. Let cool on a wire rack for about 10 minutes before serving.
 
Adapted slightly from A Cozy Kitchen 
Picture
You may also like:
Loading...

Flaky Cream Biscuits

5/10/2012

 
Picture
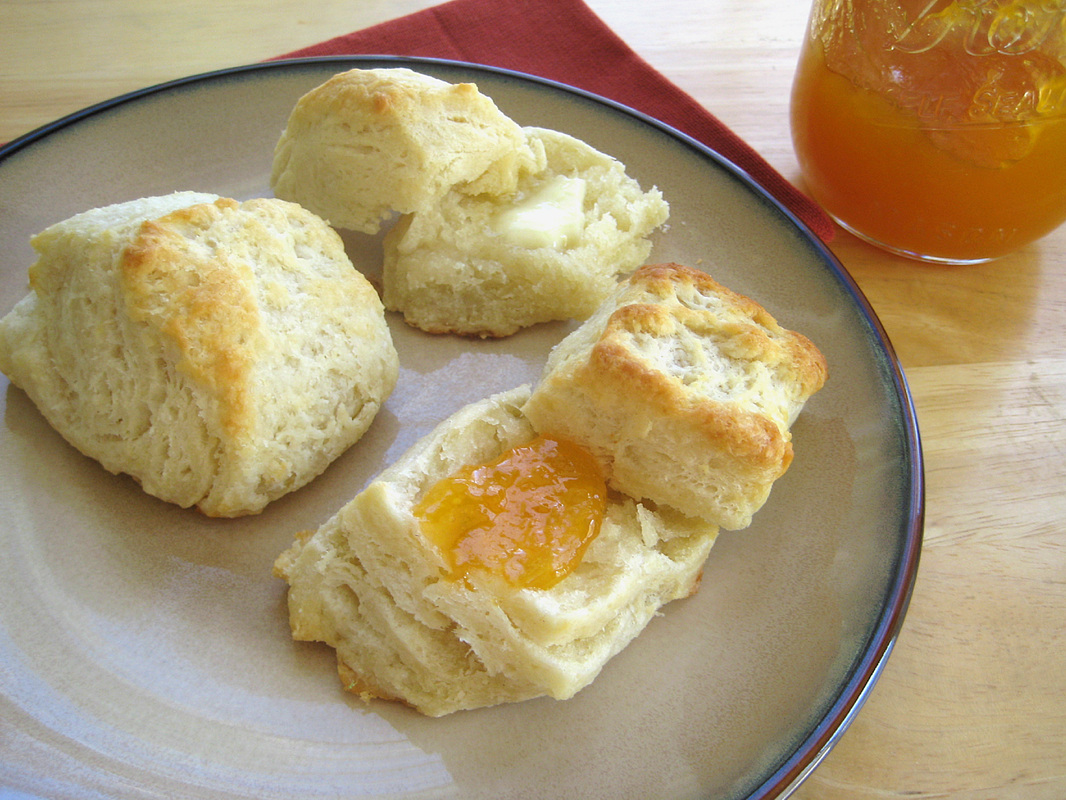
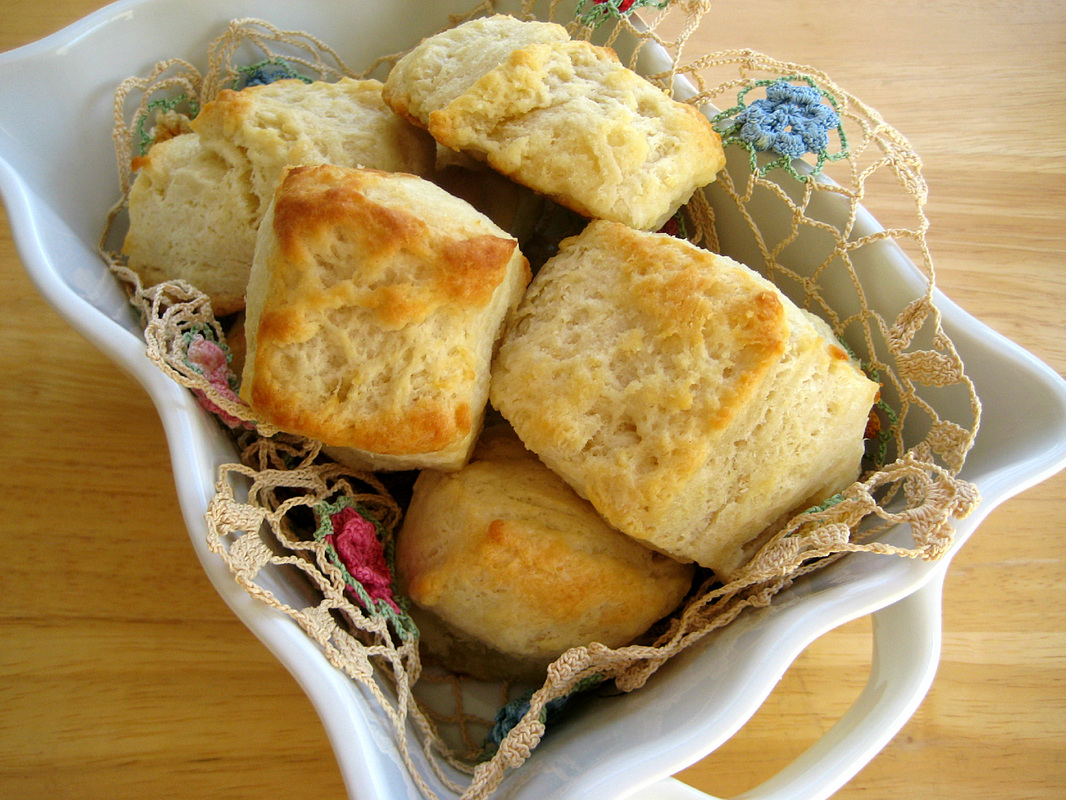
Just look at those layers. Yum!

Do you ever buy a container of heavy whipping cream for a recipe and then have at least half of it left? This happens to me pretty frequently. I’ll buy cream for a chocolate ganache and use a cup of it, but I don’t want to waste the leftover. Cream isn’t super expensive, but it’s enough that I don’t want to pour it down the drain. The answer to this leftover cream problem is to make these biscuits.

These took me about 10 minutes to make when I got home from work, and then I stuck the cut biscuit dough in the freezer for an upcoming weekend breakfast. I used up my leftover cream, and I don’t have to eat all (or any) of the biscuits right away. These will last for a couple of months in the freezer, and you can pull out as many as you want, thaw, and bake them. Usually, on a Friday night I will take a few of them out of the freezer, place them on a greased baking sheet, and let them defrost in the fridge overnight. Saturday morning we can have fresh, flaky, layered, buttery biscuits that rise nice and tall and make your house smell great.

The secret to getting the layers in these biscuits is the folding method. It may seem intimidating, but it's really easy, and it doesn't take much time, especially once you get the hang of it. You could use a rolling pin, but I found it was faster and easier to use my hands because I don't want to get the dough too thin. I want my biscuits big and tall. Also make sure that your butter and cream are very cold and stay cold. You can make these the night before you need them or right before you want to bake them. They’re pretty versatile; I like knowing I have these beauties waiting for me in my freezer.

Flaky Cream Biscuits
Print this recipe

2 tablespoons vinegar
1 cup cold heavy cream
1/2 cup cold butter
1 3/4 cup all-purpose flour
1 tablespoon sugar
2 1/4 teaspoons baking powder (2 3/4 teaspoons*)
1/4 teaspoon baking soda (1/2 teaspoon*)
1/2 teaspoon salt

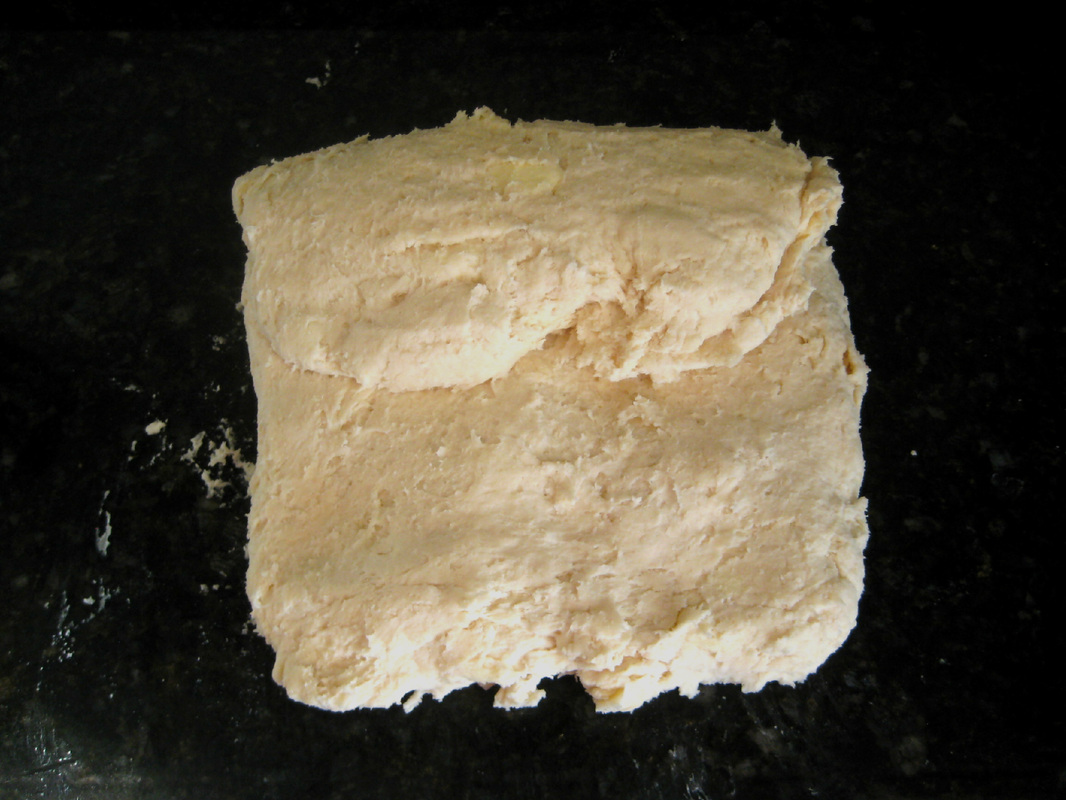
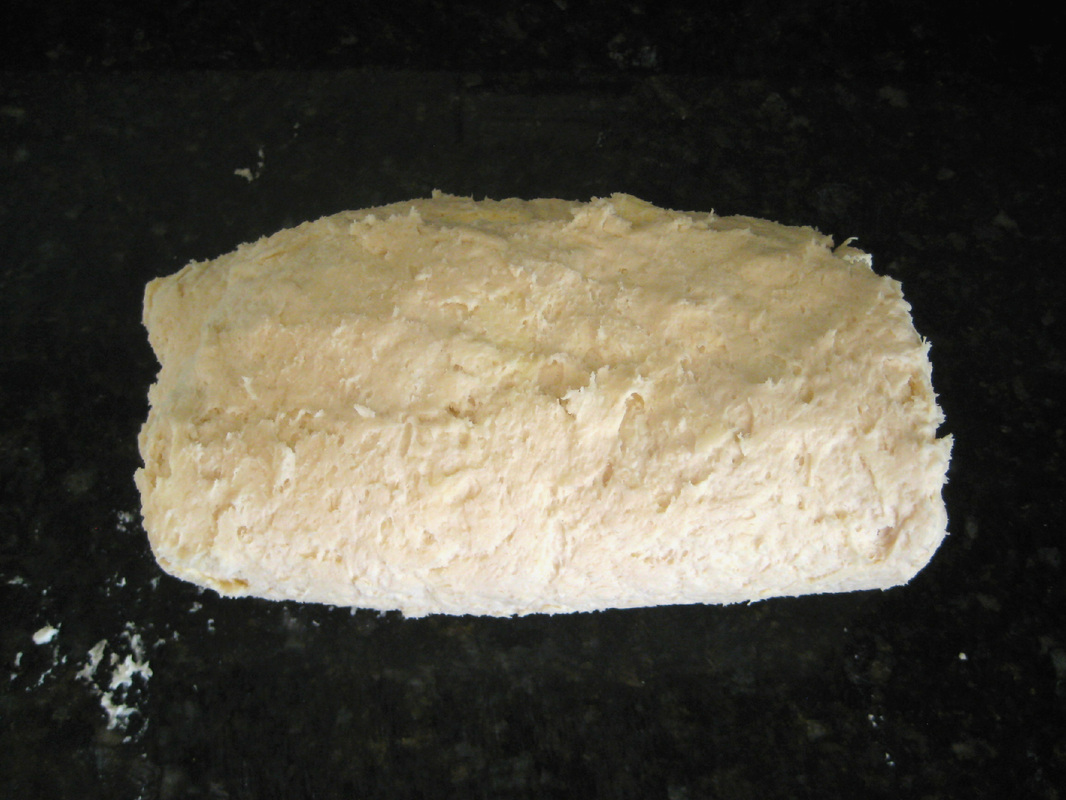
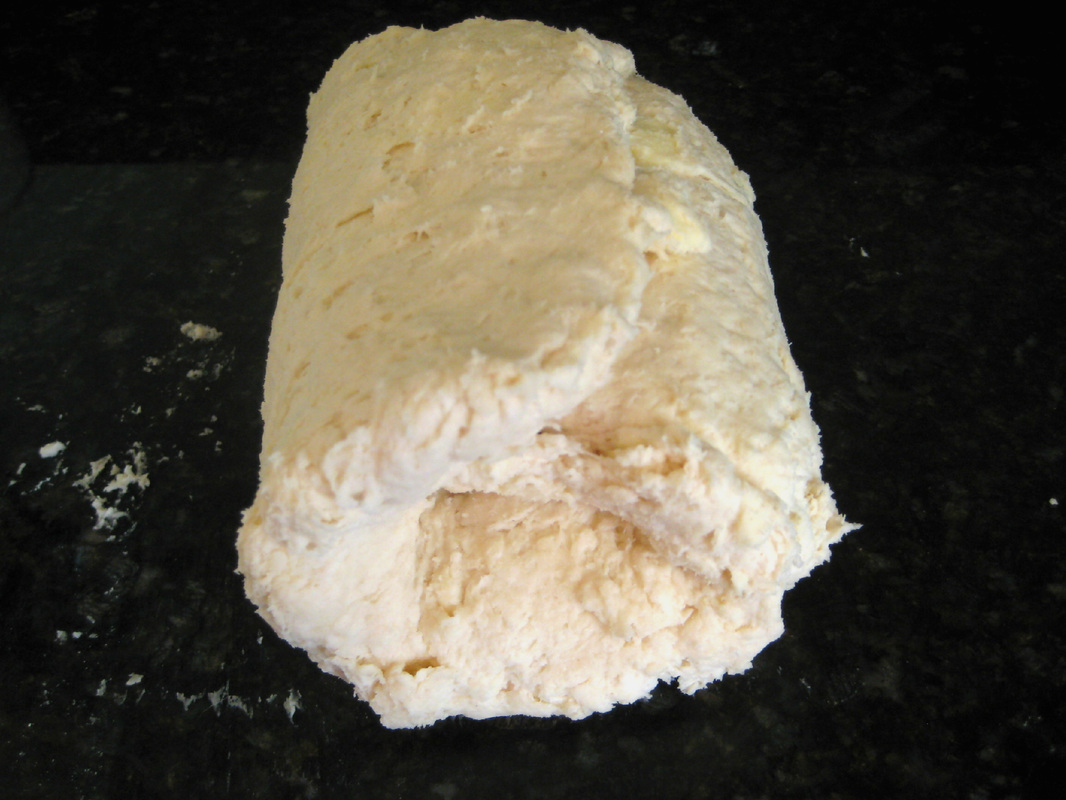
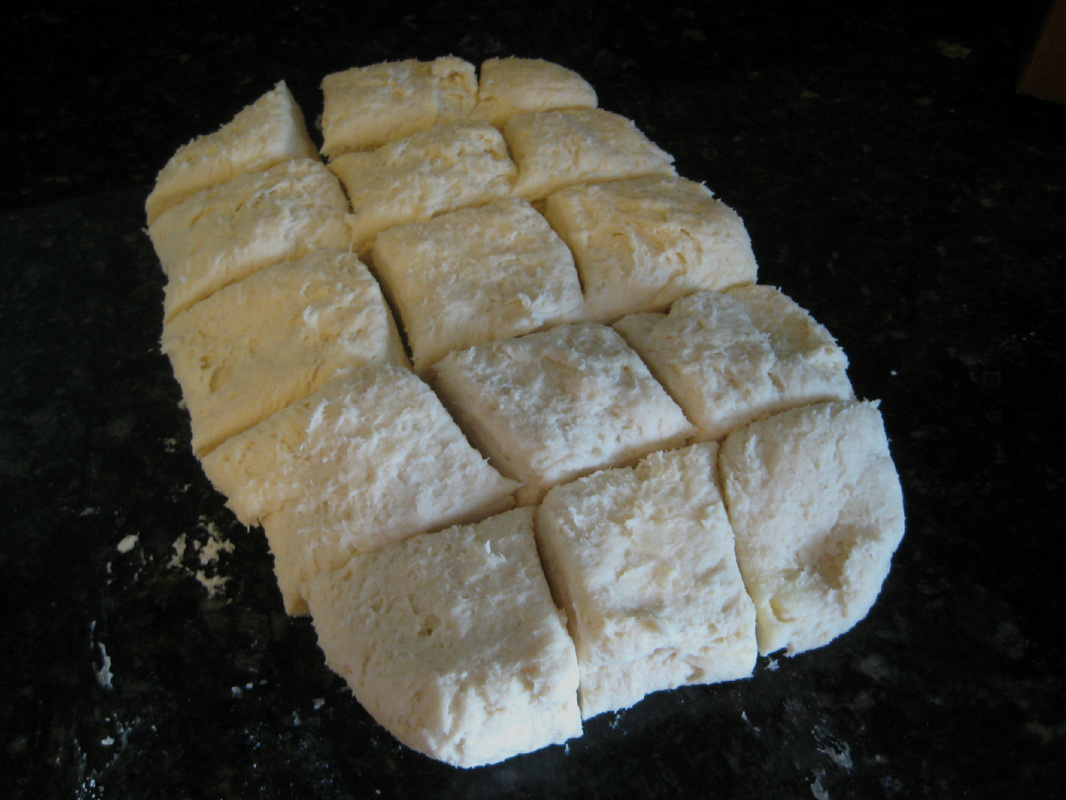
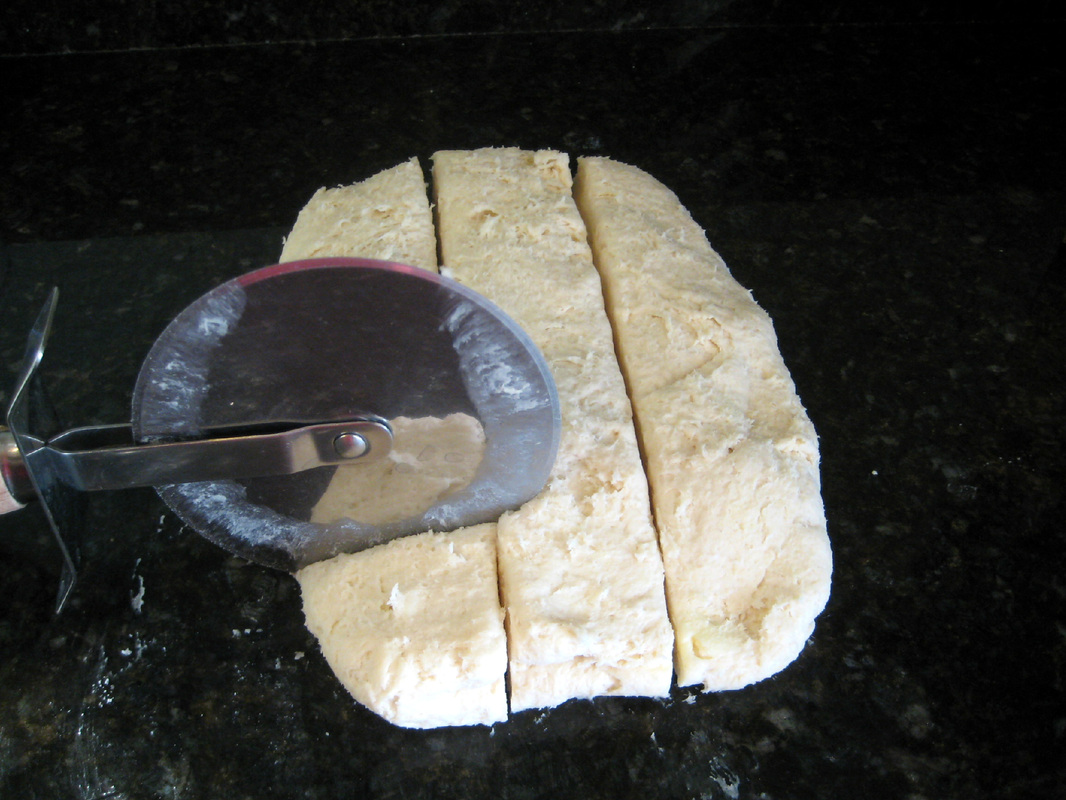
Stir the vinegar into the cream and refrigerate it to keep it cold. Whisk the dry ingredients into a large bowl. Cut the cold butter into 1/4 inch pieces and add to the dry ingredients. Using your fingers or forks, work the butter into the dry ingredients until it resembles coarse crumbs. Add the cream mixture and stir until it forms into a ball. Turn the dough onto a clean surface and pat into a rectangle, leaving the dough about 3/4 of an inch thick. Fold the top edge of the dough down 1/3 of the way and fold the bottom end up like you're folding a letter (see below). Pick the dough up and place the smooth edge on the left (you'll be rotating it 90 degrees). Pat the dough into a rectangle and repeat the folding process. You'll do this a total of four times. After you've done 4 folds/turns, pat the dough into a rectangle about 3/4 of an inch thick. Using a pizza wheel, cut into 12 or 15 biscuits. Separate the biscuits, place them on a greased cookie sheet, and let them chill in the fridge for about 15 minutes while the oven is preheating. When the oven reaches 450 degrees, place the biscuits in the oven and bake for about 14-18 minutes or until the biscuits are golden brown. Let the biscuits cool for about 3 minutes before serving.

If you make these the night before you want to bake and eat them, place plastic wrap over the sheet pan and keep in the fridge overnight. Take them out of the fridge about 30 minutes before you want to bake them.

If you want to freeze these for later, place them on a sheet pan and freeze them for 30 minutes. After 30 minutes, remove them from the sheet pan and place them in a freezer bag. The night before you want to bake them, take them out of the freezer, place the biscuits on a greased pan, cover with plastic wrap, and let them thaw in the fridge overnight. Take them out of the freezer about 30 minutes before you want to bake them. You also can take them out of the freezer, place them on a greased baking sheet, and let them thaw on the counter for about 3 hours. Don't bake them while they're frozen or they won't bake/rise evenly.

*The baking soda and powder in parenthesis are adjusted for high altitude. The original recipe wasn’t baking up tall enough for me, so I added a little more to both. Try the regular version first and if they're not tall enough, try the * version.

Source: Peter Reinhart's Artisan Breads Every Day
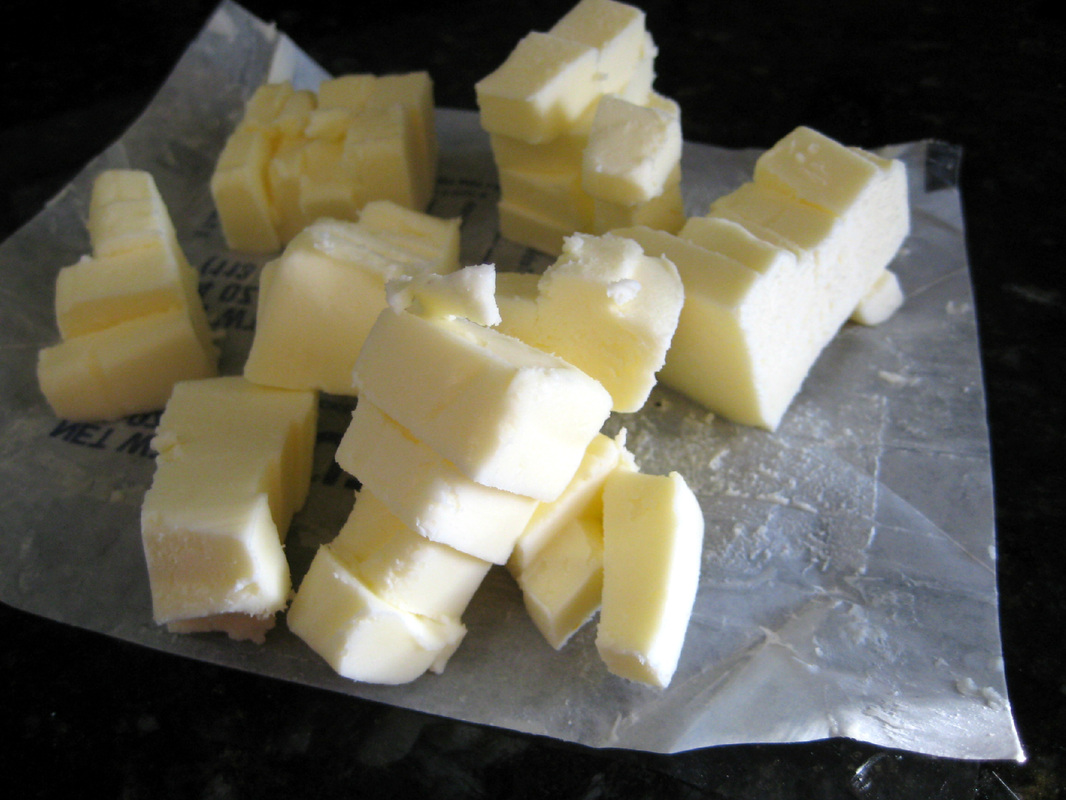
Here's the visual on how to make the dough. Cut your butter into pieces.
Picture
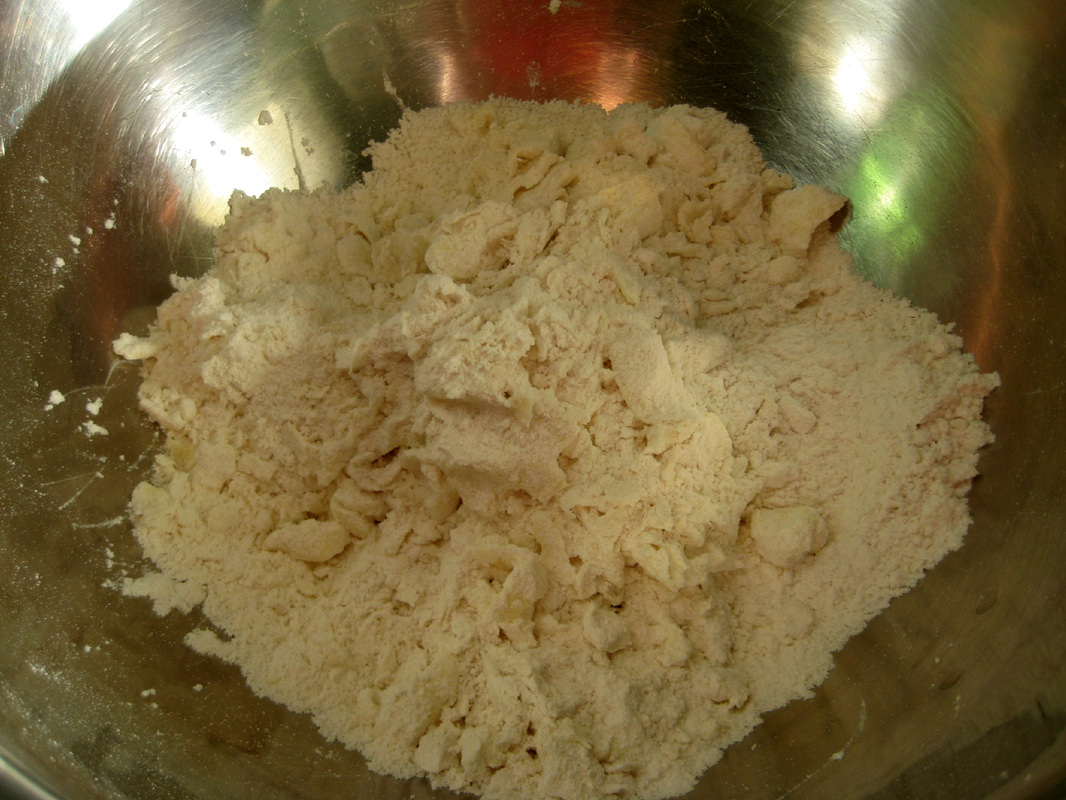
Add the butter to your dry ingredients, and mix it in using a fork or your fingers until it resembles coarse crumbs.
Picture
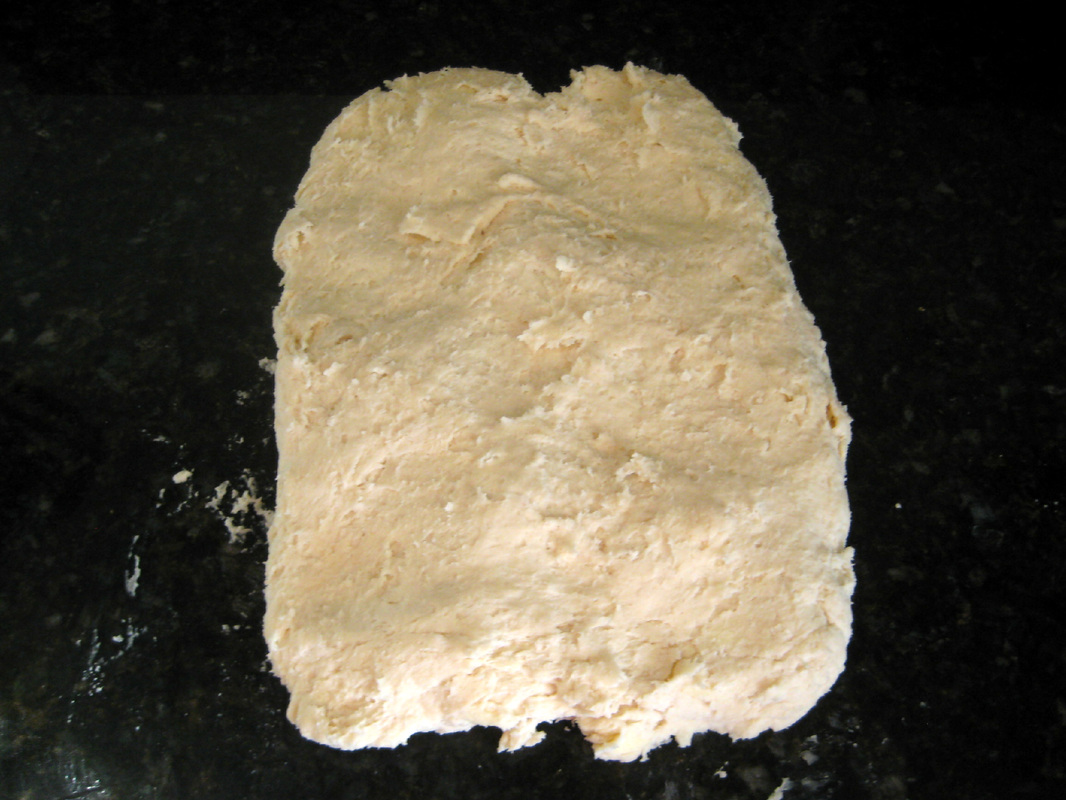
Add the cream and form in into a ball (not pictured, sorry). Then dump the dough onto your clean counter and pat it into a rectangle. You want the dough to be 1/2-3/4 inch thick, so don't make it too big.
Picture
You also can use a rolling pin, but since I want thick layers, I just pat it with my hands. Now we're going to do the folds, which is also what you do when making croissants. Take the top of the rectangle and fold it down 1/3 of the way (like a letter).
Picture
Then take the bottom of the rectangle and fold it up, on top of the first part (again, like you're folding a letter).
Picture
Pick up the dough and place the smooth edge on the left.
Picture
Now you'll pat this into a rectangle and start the folding process again. You'll do this four times. After the fourth fold, pat the dough into another rectangle and leave the dough about 3/4 of an inch thick. Using a pizza wheel, cut the dough into 12 or 15 pieces. You could cut it into circles, but you'll waste dough, so I opt for the square biscuits instead.
Picture
Because of the layers in the dough, you really can't combine all the scraps and shape them into another ball. This is another reason I go with the square biscuits.
Picture
Now you can separate these and bake all of them right away, put them in the fridge for the morning, or put them in the freezer for another day.
Picture
Delicious!
<<Previous
Forward>>

     Welcome!

    Cooking is fun and easy at high altitude, but baking can be frustrating. About 90% of my recipes work everywhere, but some are adjusted so us mountain dwellers can enjoy baked goods from scratch. I hope you find great recipes on here for your family, and I'll let you know if any are adjusted for high altitude. 

    Stay Updated!

    Add to your Reader:

    Get new posts delivered to your inbox:

    Enter your email address:

    Delivered by FeedBurner

    Categories

    All
    Appetizers
    Bars
    Beef
    Bread
    Breakfast
    Brownies
    Cake
    Cheese
    Chicken
    Chocolate
    Cinnamon
    Cookies
    Crackers
    Cupcakes
    Dessert
    Do It Yourself
    Drinks
    Fruit
    Ground Beef
    High Altitude
    How To
    Ice Cream
    Italian
    Main Courses
    Mexican
    Muffins
    Oatmeal
    Pasta
    Pastry
    Pie
    Pizza
    Pork
    Project Pastry Queen
    Pumpkin
    Salad
    Sauces
    Side Dishes
    Snacks
    Soup
    Sourdough
    Steak
    Vegetables

    My featured recipes on NoshOnIt

    Some Good Reads!

    Annie's Eats
    Bake at 350
    Climbing Grier Mountain
    Confections of a Foodie Bride
    How Sweet It Is
    I Am Baker
    Macaroni and Chesecake
    Pinch of Yum
    Pink Parsley
    Smells Like Home
    Smitten Kitchen
    Sunny Side Up
    The Curvy Carrot
    The Marvelous Misadventures of a Foodie
    The Pioneer Woman Cooks
All content copyright 2012-2013 She Makes and Bakes.