She Makes and Bakes
  • Home
  • About
  • Ramblings
  • Recipe Index
  • What We're Eating
  • High-Altitude Baking

Blueberry Muffins with Crunchy Cinnamon Sugar

3/7/2013

 
Picture
Show of hands...who else feels like there are not enough hours in the day? I know I'm not the only person. In fact, I'm sure there are people out there who think I have it easy. All I know is that I was never this busy when I had the 9-5 (er...7:30-3:30) desk job. But I also wasn't this happy, and that's what really counts. However, being busy equals boring photos because I don't have the time to pull in various props and pretty colors. So hopefully the food can speak for itself.

So today I took the afternoon off. It was 65 degrees and sunny today, and I sat out on my front porch and read a book. It was sublime. I didn't sit inside on the computer (although I had plenty of work to justify that). I sat outside and took a moment to smell the roses. Or the melting snow and the crocus. It was exactly what I needed. Refreshing.

Sidebar...did you guys know that there's a TV show on now that has both Charles in Charge and Hanging with Mr. Cooper? My head exploded when I saw this. I have no idea if it's any good because I spent time reliving Charles, Buddy, Mark Cooper, Vanessa, and my golden years. Back when I thought life was complicated and busy. Ha!

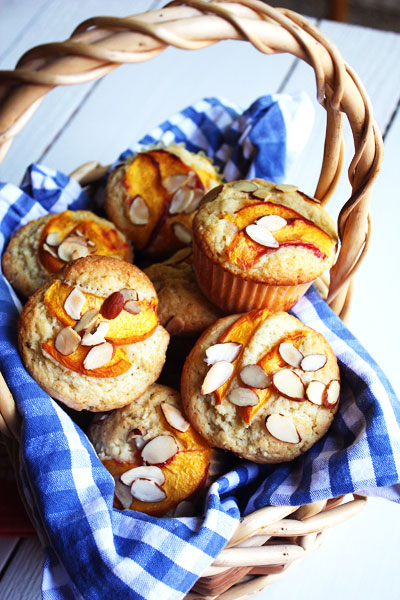
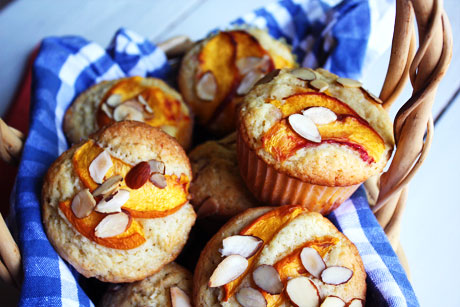
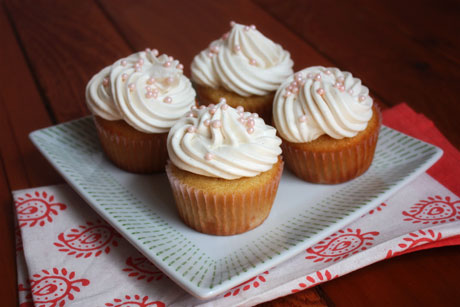
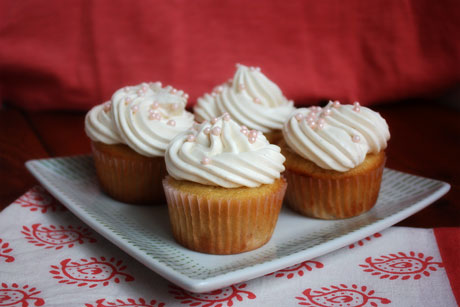
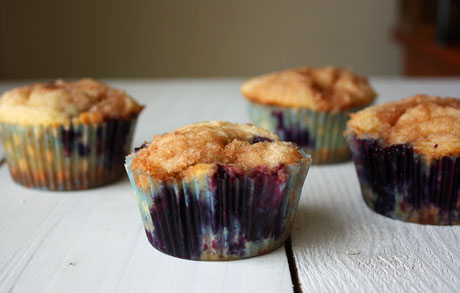
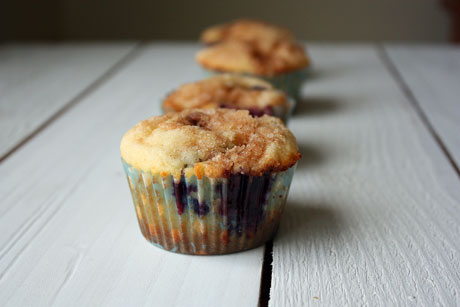
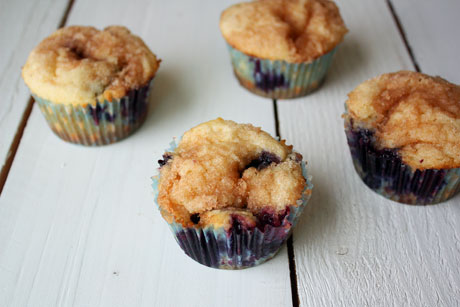
Oh...the muffins. They're incredible. They're juicy and full of blueberries. There's a crunchy topping of cinnamon sugar that somehow pulls everything together and makes it the perfect breakfast, lunch, snack, or dessert. I feel like I say a lot that things are perfect, but at least you guys know that I enjoy eating the recipes that are posted on here.
Picture
Blueberry Muffins with a Crunchy Cinnamon Sugar Topping
Makes 15-16
Print this recipe

Note: If you’re making these at high altitude, simply adjust the baking powder to use the * amount.

For the muffins:
1/4 cup butter, softened
3/4 cups + 2 tablespoons sugar
1 egg
1 teaspoon vanilla
2 teaspoons (*1 3/4 teaspoons*) baking powder
1/2 teaspoon salt
1 3/4 cup all purpose flour
3/4 cup milk
1 1/2 cup fresh or frozen blueberries

For the topping:
Heaping 1/4 cup sugar
1/4 teaspoon cinnamon
2 tablespoons cold butter

Preheat your oven to 375 degrees.

In the bowl of your mixer, cream together the butter and sugar using the paddle attachment until light and fluffy. Mix in the egg and scrape down the sides of the bowl. Add in the vanilla, baking powder, and salt and mix on low until combined. Mix in half of the flour with the mixer on low, pour in the milk and let it mix, and then add in the rest of the flour. Once combined, stop the mixer and fold in the blueberries by hand. If you're using frozen blueberries, do not thaw them first.

Separate the batter into muffin liners, placing about 1/4 cup batter in each cup. Make the topping by mixing together the sugar and cinnamon in a bowl. Cut in the cold butter using a fork until it resembles coarse crumbs. Sprinkle the topping over the muffins.

Bake for 15-17 minutes or until a toothpick comes out clean. Let cool in the pan for a few minutes and then remove from the pan to finish cooling.

Barely adapted from Taste of Home
Picture
You may also like:
Loading...

Red Velvet Cupcakes

2/7/2013

 
Picture
It's the time of year for every food blogger to post something red velvet, so I figured I had better jump on the wagon. The L-O-V-E holiday is coming up in less than a week, and if you haven't made one of these, it's about time! What's the deal with red velvet you ask? Well, it's a buttermilk cake with a hint of cocoa in it. It definitely doesn't taste like chocolate. It's a bit tangy, and when paired with cream cheese frosting, it's pretty incredible. Plus, it's pretty. And we all love that, right?

I have tried several red velvet cake recipes, and this is my favorite by far. They have great flavor, they're not dry, and they are bright red. Last year I made mini green velvet cupcakes for St. Patrick's Day, so know that you can substitute out the food coloring if you want to go with something different. It was a fun change! I almost always use gel food color, but with these you'll need the liquid. Do yourself a favor and buy the separate bottle of red food color that is one ounce. Perhaps if you don't have to measure anything, maybe you can do a better job of avoiding getting red dye everywhere. Including on your hands and under your nails. Or maybe that's just me who does that every.single.time!

Red Velvet Cupcakes Recipe
Makes about 20
Print this recipe

*If you're baking at high altitude, please follow the * adjustments!

For the cupcakes:
1 cup shortening
1 3/4 cup sugar
2 1/4 cup cake flour
1 1/4 teaspoon salt
2 eggs (*3 eggs*)
1 cup (*plus 2 tablespoons*) buttermilk
1 teaspoon vanilla
1 teaspoon (*3/4 teaspoon*) baking soda
1 1/2 teaspoon white vinegar
1 ounce red food color
1 1/2 teaspoons cocoa powder 

For the cream cheese frosting:
1 1/2 packages cream cheese (12 ounces)
3/4 cup butter
1 1/2 pounds powdered sugar
1/4 teaspoon salt
2 teaspoons vanilla

Preheat your oven to 350 degrees (*375 degrees for high altitude*).

In your mixing bowl fitted with the paddle attachment, cream together the shortening and sugar. In a large liquid measuring cup, combine the eggs, buttermilk, vanilla, baking soda, vinegar, and salt. Add the flour into the mixing bowl in three additions, alternating with the wet ingredients. Start and end with the flour. Once combined, stir together the red food color and cocoa powder in a small bowl. Add into the batter and mix just until incorporated.

Divide the batter into muffin tins with liners, filling each with about 1/4 cup of batter. Bake for 15-17 minutes (*12-15 minutes*) or until a toothpick comes out clean. Cool in the pan for a few minutes and then remove from the pan to cool completely.

While the cupcakes are cooling, make the cream cheese frosting. In your mixing bowl fitted with the paddle, cream together the butter and cream cheese until smooth. Add the vanilla and salt and mix until incorporated. Add the powdered sugar in three additions and mix until smooth. Pipe onto cooled cupcakes.

Source: The Pioneer Woman Cooks cookbook
Picture
You may also like:
Loading...

The Perfect Vanilla Cupcake

1/28/2013

 
Picture
So here's the thing. I've been searching for years for the perfect vanilla cupcake recipe. And while I cannot guarantee that this will be my favorite years from now, it is the best I've found. Hands down. It tastes like butter and vanilla, it has a slightly crunchy top, it's moist (sorry) and fluffy. It's perfection. Oh, and did I mention it's easy to make? There's no creaming of the butter and sugar, there's no sifting of the dry ingredients, and there's no softening of the butter. It's a different method, which makes it fun. To me at least. I might be one of the few who gets excited about things like this.

I've tried dozens upon dozens of different vanilla cupcake recipes. Seriously. When I did my most recent search, I printed out this recipe first and another one second. Of course I started with the other recipe first and tried five different variations of that one. Five. It was a recipe that had melted butter and oil in it so I tried it that way and then all oil and then all butter and then half apple sauce (which had great texture but tasted like apples not-so-surprisingly) and then with an extra egg (which made it taste like egg cupcakes-disgusting!). So I was about to give up and go with the half butter/half oil mixture but I told myself to try the other recipe. Just. In. Case.

And then I did a happy dance. In the middle of my kitchen with my dogs wondering what the heck I was doing. That was two weeks ago, and I've made this five times since then. It is by far the best recipe I've found. To clarify, I haven't eaten it five times since then, just made it. I have, however, wanted to eat it all five times.

A couple of notes: when you make this, you are going to question everything you've ever read on here because there's no way this recipe can be that good when there are really large chunks of butter in the batter. Trust me. It will work. That's how it's supposed to be. However, the amount of butter in these is slightly ridiculous (but worth it--don't skimp!), and you will probably pour some out of the cupcake tins after they bake. Just roll with it. Place the cupcakes on a paper towel while cooling to soak it up, too. Let the cupcakes cool completely before trying them. Also, these are the best the day they are made. I don't recommend making them a day before you're going to serve them.

I had to adapt this recipe for high altitude so I made a few changes, but it's nothing too complicated. Be sure to check those out if you're baking at high altitude (in bold below). Also, since it's the Superbowl on Sunday, I recommend tinting some frosting to celebrate the Ravens and 49ers.
Picture
The Perfect Vanilla Cupcake Recipe
Makes 24 cupcakes
Print this recipe

*Note: The high altitude adaptations are in bold.

For the cupcakes:
1 3/4 cups cake flour
1 1/4 cups all purpose flour
2 cups sugar
1 tablespoon (*2 1/2 teaspoons*) baking powder
3/4 teaspoon salt
1 cup cold butter cut into 1-inch cubes
4 eggs
1 cup (*+ 2 tablespoons*) whole milk
1 tablespoon vanilla extract

For the vanilla buttercream:
1/2 cup butter, softened
1 tablespoon milk
1/8 teaspoon salt
1 tablespoon vanilla (clear vanilla keeps it white)
1 pound powdered sugar (about 3.5-4 cups)
1 cup shortening

Preheat the oven to 325 degrees (*350 degrees for high altitude*) and line muffin tins with liners.

To make the cupcakes, add the dry ingredients to the bowl of your mixer and mix on low until combined. Add the cold butter into the dry ingredients and mix on low using the paddle attachment just until the butter is coated with flour.

In a large glass measuring cup or bowl (preferably with a spout), whisk together the eggs, milk, and vanilla. With the mixer on medium low speed, add the wet ingredients in three parts, scraping down the sides of the bowl as you go. Beat until all the ingredients are incorporated but don't overmix. Fill the cupcake liners 2/3 full or with about 1/4 cup of batter. Bake until a toothpick comes out clean, about 17-20 minutes (*high altitude about 16-18 minutes*). Place the cupcakes on a paper towel to cool completely.

To make the buttercream, place the butter, milk, salt, and vanilla in the bowl of an electric mixer. Mix on medium using the paddle attachment (or use a hand mixer) until everything is blended. Add in half the powdered sugar and mix on low until combined. Add in the shortening and mix on medium until smooth. Scrape down the sides of the bowl. Add in the rest of the powdered sugar and mix on medium high until smooth. Scrape down the sides of the bowl again and mix until smooth. If the frosting is too thick, you can add more milk one teaspoon at a time.

Once the cupcakes have cooled, use a spatula or a piping bag to frost the cupcakes and add whatever decoration you desire. Serve the same day.

Cupcakes adapted from Billy's Vanilla, Vanilla Cupcakes
Picture
You may also like:
Loading...

Salted Caramel Chocolate Cupcakes

1/20/2013

 
Picture
Have you ever wondered about or wanted the recipe for that beauty in my header? Well here you go. I love this cupcake. A rich chocolate cake, vanilla bean salted caramel filling, and chocolate ganache frosting topped with sea salt. They are the most perfect, most rich cupcake ever. These will knock you off your feet. If I could marry a cupcake, I would be Mrs. Salted Caramel Cupcake thank you very much. The only wedding present we'd need would be a treadmill. And I would happily hop on one every day.

And it's not just me who loves these cupcakes. It's everyone except for those people who hate chocolate (I don't understand those people by the way). I've seen people devour these proudly, and I've seen people hide in corners lost in their own experience. I know that sounds super strange, but when you try one you will understand. These certainly make other desserts pale in comparison.

Since there's three parts to these cupcakes, I recommend making the caramel sauce a day before (or you can use something store bought). Then you can make the cupcakes and frosting the day of and assemble. They are definitely worth any time spent. Oh, and don't forget the sea salt at the end. If you skip that, it definitely won't be the same. The salt helps to temper the sweetness and provides the perfect balance of salty and sweet. Ahhh...and I'm going to go have another one. I've just convinced myself again. 
Picture
Salted Caramel Chocolate Cupcakes Recipe
Makes 12 cupcakes
Print this recipe

*Note: If you're making these at high altitude, use 3 eggs instead of 2 and increase your oven temperature to 375 degrees. Bake for 16-18 minutes or until a toothpick comes out clean.

For the cupcakes:
3 ounces bittersweet chocolate, chopped
1/3 cup Dutch process cocoa powder
3/4 cup hot coffee
3/4 cup bread flour
3/4 cup sugar
1/2 teaspoon salt
1/2 teaspoon baking soda
6 tablespoons vegetable oil
2 eggs*
2 teaspoons white vinegar
1 teaspoon vanilla

About 1 cup caramel sauce, divided

For the frosting:
8 oz good semisweet chocolate
1/2 cup heavy cream
2 tablespoons sugar
2 tablespoons corn syrup
2 tablespoons butter

Sea salt for sprinkling

Preheat your oven to 350 degrees.
*High altitude: preheat to 375 degrees.*

For the cupcakes, in a medium bowl, combine the chopped chocolate, cocoa powder, and hot coffee. Let sit for one minute and then whisk until smooth. Set in the refrigerator to cool completely, about 15-20 minutes. Whisk in the oil, eggs, vinegar, and vanilla until blended. Add in the salt and baking soda and whisk until incorporated. Add in the sugar and bread flour and whisk until smooth. Divide the batter among 12 muffin cups in a muffin pan (about 1/4 cup of batter each). Bake until a toothpick comes out clean, about 17-19 minutes (*16-18 minutes for high altitude*). Cool cupcakes in the pan for about 10 minutes and then remove to the counter and let cool completely.

While the cupcakes are baking and cooling, make the frosting. In a small saucepan, mix together the cream, sugar, and corn syrup. Heat over medium until sugar has dissolved and mixture is very hot. Pour over chocolate and let sit for 2 minutes, giving the chocolate time to melt. Stir until chocolate has melted, add the butter, and stir until melted. If the chocolate won't fully melt, you can heat it in the microwave for 30 seconds. Let the frosting sit for about 10-20 minutes, stirring periodically. It will firm up as it cools. If it hardens too much, simply reheat for about 10 seconds until it's spreadable again.

Once the cupcakes have cooled, core out some of the middle using an apple corer or a knife. Fill the space with the caramel sauce. Pipe the cooled frosting on top of the cupcakes and sprinkle with sea salt.

Chocolate cupcake recipe from America's Test Kitchen.
Picture
You may also like:
Loading...

Chocolate Peppermint Cupcakes

11/27/2012

 
Picture
I have finally found the perfect chocolate cupcake recipe. I have been searching and trying recipes for years with no success. My favorite chocolate cake recipe is too crumbly for a cupcake and the other ones that I've tried have been too dry or not chocolatey enough. I *almost* gave up and went with box mixes. Almost. The funny thing is that I've had this recipe printed for at least a year but haven't tried it. I always kick myself when I do that. So, this recipe is moist (sorry) and very chocolatey. It can stand up on its own like a cupcake should, but it's not dry or gummy. The addition of the brewed coffee enhances the chocolate flavor without making it taste like coffee. Just a warning that you'll need bread flour to make this cupcake. This helps to make the cupcake sturdy because of those gluten bonds forming. I don't recommend using all purpose or cake flour instead. While I haven't tried it, I think you'll end up with a crumbly cupcake.

Oh, and did I mention that you can make these in one bowl with a whisk? That's right. No mixer required.   

The other bonus is that it's already meant for 12 cupcakes, so I didn't have to do any weird scaling down and I only had to make two small adjustments for high altitude. Score! All I did was add an egg and increase the baking temperature. So check out the note below for the high altitude adjustments.

If you want to know about the rest of this cupcake, here it is. I added Andes creme de menthe baking pieces to the cupcake batter, which gave it a slight mint flavor. Then I dunked the cupcakes in ganache to enhance the chocolate even more. It's topped with a peppermint buttercream, which has just a hint of peppermint so that it's pleasant and refreshing but doesn't taste like you just brushed your teeth. And to give it a little color, I sprinkled crushed candy cane pieces on top of the frosting. It is the perfect combination of chocolate and peppermint in my opinion.

Chocolate Peppermint Cupcakes Recipe
Makes 12
Print this recipe

*Note: If you're making these at high altitude, use 3 eggs instead of 2 and increase your oven temperature to 375 degrees. Bake for 16-18 minutes or until a toothpick comes out clean.

For the cupcakes:
3 ounces bittersweet chocolate, chopped
1/3 cup Dutch process cocoa powder
3/4 cup hot coffee
3/4 cup bread flour
3/4 cup sugar
1/2 teaspoon salt
1/2 teaspoon baking soda
6 tablespoons vegetable oil
2 eggs*
2 teaspoons white vinegar
1 teaspoon vanilla 
1/2 cup Andes creme de menthe baking pieces

For the ganache:
2 ounces bittersweet chocolate, chopped
1/4 cup heavy cream
1 tablespoon powdered sugar
1 teaspoon corn syrup

For the peppermint buttercream:
1/2 cup butter, softened
2 tablespoons milk
1/8 teaspoon salt
1 tablespoon vanilla
1/2 teaspoon peppermint extract
1 pound powdered sugar (about 3.5-4 cups)
1 cup shortening

For the topping:
2-3 candy canes, crushed

Preheat your oven to 350 degrees.
*High altitude: preheat to 375 degrees.*

For the cupcakes, in a medium bowl, combine the chopped chocolate, cocoa powder, and hot coffee. Let sit for one minute and then whisk until smooth. Set in the refrigerator to cool completely, about 15-20 minutes. Whisk in the oil, eggs, vinegar, and vanilla until blended. Add in the salt and baking soda and whisk until incorporated. Add in the sugar and bread flour and whisk until smooth. Fold in the Andes baking pieces. Divide the batter among 12 muffin cups in a muffin pan (about 1/4 cup of batter each). Bake until a toothpick comes out clean, about 17-19 minutes (*16-18 minutes for high altitude*). Cool cupcakes in the pan for about 10 minutes and then remove to the counter and let cool completely.

While the cupcakes are cooling, make the peppermint buttercream. Place the butter, milk, salt, vanilla, and peppermint extract in the bowl of an electric mixer. Mix on medium using the paddle attachment (or use a hand mixer) until everything is blended. Add in half the powdered sugar and mix on low until combined. Add in the shortening and mix on medium until smooth. Scrape down the sides of the bowl. Add in the rest of the powdered sugar and mix on medium high until smooth. Scrape down the sides of the bowl again and mix until smooth. If the frosting is too thick, you can add more milk one teaspoon at a time. Transfer the frosting to a piping bag and set aside. 

When the cupcakes are cool, make the ganache. Place the chocolate, heavy cream, powdered sugar, and corn syrup in a microwave safe bowl. Microwave for 30-second intervals, stirring in between, until smooth. Dunk the top of the cupcakes into the ganache and let harden, about 20 minutes. You can speed this process up by putting the cupcakes in the refrigerator. 

Once the ganache has set, pipe the frosting on the cupcakes and sprinkle with the crushed candy canes.  

Cupcake and ganache recipe from Cook's Illustrated. Frosting recipe from She Makes and Bakes
Picture
You may also like:
Loading...

Caramel Apple Cupcakes

9/18/2012

 
Picture
So while I'm not excited about fall temperatures and shorter days, I am excited for fall baking. It's one of my favorite times of the year to be in the kitchen. And last weekend was no exception. I got to make one of my favorite cupcakes: caramel apple cupcakes.

These have an apple spice cake, caramel buttercream, and caramel drizzled on top. I happen to think they're beautiful and tasty. The cake recipe below is for high altitude. If you don't live at high altitude, I recommend you use a spice cake recipe or your favorite vanilla cake recipe and then doctor it up. You also can use a boxed spice or vanilla cake mix. If you use vanilla cake, be sure to add the apples and spices. If you're using a spice cake, add in the apples. The caramel buttercream is perfect for all altitudes, as is the caramel drizzle. Also note that the recipe below is for 12 cupcakes. If you use a recipe or a box mix that makes 24 cupcakes, double the apples/spices that you add. It sounds kinda complicated, but I promise it's not. I usually make the cupcakes one day and make the frosting and decorate the next day to split it up a bit. These are well worth the effort and the time spent in your kitchen!  
Picture
Caramel Apple Cupcakes Recipe
Makes 12 cupcakes
Print this recipe

Note: This cake recipe is for high altitude. If you're at regular altitude, use your favorite vanilla cake recipe and add in the apples and spices or your favorite spice cake recipe and add in the apples. If the recipe or box mix makes 24 cupcakes, double the apple/spice amounts indicated below.

For the cupcakes (highaltitude):
1/2 cup butter
3/4 cup sugar
2 eggs
1 1/4 teaspoons baking powder
1/4 teaspoon salt
1 teaspoon cinnamon
1/8 teaspoon nutmeg
1/8 teaspoon allspice
3/4 cup milk
1 1/2 cup cake flour
1/2 green apple, peeled and diced

For the frosting (any altitude):
1/2 cup butter
8 ounces brown sugar (about 1 cup + 2 tablespoons packed)
1/4 cup milk
1/8 teaspoon baking soda
1/2 tablespoon light corn syrup
2 cups powdered sugar

For the caramel sauce (any altitude):
Caramel sauce for ice cream or
5 caramel candies
1-2 tablespoons cream

To make the cupcakes, preheat your oven to 375 degrees and line a muffin pan with 12 liners.

In a mixing bowl, cream together the butter and sugar until light and fluffy. Add in the eggs until incorporated. Mix in the baking powder, salt, cinnamon, nutmeg, and allspice. In two additions, add in the flour alternating with the milk. Mix until just incorporated and then fold in the diced apples.

Fill the cupcake liners with about 1/4 cup of batter or about 3/4 of the way full. Bake for 15 minutes or until a toothpick comes out clean. Let cool.

While the cupcakes are baking and cooling, make the frosting. In a medium saucepan, melt the butter over medium heat. Add in the brown sugar and bring to a boil while stirring. Stir in the milk, baking soda, and corn syrup and bring to a boil again. Remove from heat and cool completely (about an hour). Transfer to a mixing bowl, add the powdered sugar, and mix on medium speed until it's creamy and smooth.

Transfer the frosting to a piping bag and pipe onto the cupcakes. Drizzle on the premade caramel sauce or make your own by microwaving the caramel candies with cream until melted and smooth.

Frosting recipe from Big Book of Cupcakes
Picture
You may also like:
Loading...

Chocolate Sheet Cake

9/3/2012

 
Picture
In junior high, I had to take three electives: typing (boring but useful), wood shop (ha! I remember absolutely nothing about that class), and home economics (I remember this cake and sewing a pillow). So while I want to say that this cake was the best thing to come of that year, it probably was typing. Yawn. We'll say it was this cake to be more exciting though. I remember it fondly, and we made it a lot in my house. I remember that the original recipe called for oleo, which shows you how old school the recipe was.

I haven't had this cake for years, so when I made it this weekend, I was pleasantly surprised and impressed about exactly how good it is. It's super moist (sorry for those of you who hate that word) and it's really chocolatey, even though it doesn't call for a ton of chocolate. This is a cake that you can whip up in under an hour, and that includes making the frosting and frosting it. Plus, it doesn't require a hand or electric mixer. Although I'm a big fan of fancy pretty layer cakes, there's something to be said about a from-scratch sheet cake that can be made and eaten in an afternoon. We need more of those in our lives I think.

Chocolate Sheet Cake Recipe
Makes a 9x13 cake
Print this recipe

*Note: If you're making this at a higher altitude, your cake will sink in the middle unless you change the amount of baking soda to 2 1/4 teaspoons. I sprayed my cake pan with regular cooking spray, but I think that if you want to flip this cake out of the pan and decorate it, you probably should use baking spray or grease/flour.

For the cake:
2 cups sugar
2 cups flour
1 cup butter
1/4 cup unsweetened cocoa powder
1 cup water
1/2 cup buttermilk
2 eggs
1 tablespoon baking soda*
1 tablespoon vanilla
1/4 teaspoon salt

For the frosting:
1/2 cup butter
1/4 cup unsweetened cocoa powder
6 tablespoons milk
1 pound powdered sugar (about 4 cups)

Preheat your oven to 400 degrees.

To make the cake, mix flour and sugar together in a large bowl and set aside. In a medium saucepan, combine the butter, cocoa powder, and water. Heat until it comes to a boil and pour it over the flour mixture. Mix together. Add the rest of the cake ingredients and stir until incorporated. Pour it into a greased 9x13 pan.

Bake for 20 minutes or until a toothpick inserted into the cake comes out clean.

Five minutes before the cake is done, heat the butter, cocoa powder, and milk in a medium saucepan until it boils. Don't use a wooden spoon to stir this mixture or it will taste like wood. Remove from heat, add in the powdered sugar, and beat by hand until smooth. Pour over the hot cake. Let cool slightly before serving.

Source: My junior high home economics class.
Picture

Peach Almond Muffins

8/21/2012

 
Picture
A few weeks ago, I noticed that there were no muffin recipes on the blog. I'm not a big muffin person, but I wanted to have at least a couple! Then I got a great birthday present: the Best-Ever Book of Cupcakes & Muffins. It's a great cookbook with beautiful pictures of every recipe and great variety. I can't wait to work my way through the book. Another beauty of the book is that it's from the UK, so it has international measurements. Score for my international friends! Since I am loving peach season in Colorado right now, I decided to make the peach almond muffins.

These are great muffins. They rise nicely, they're moist (sorry if you hate that word), have a great crumb that's dense without being too dense, and they're just sweet enough. The pops of juicy peach throughout the muffin give great texture and flavor, as do the almonds. This truly is a muffin--not a cupcake without frosting that we'll call a muffin to make it legit to eat it at breakfast (but no one actually does that, right?). I was a little worried while I was making them because the batter was extremely thick, but they came out wonderfully. I'll definitely be adding these to the rotation. If you're at high altitude, see the note below. The only change is to decrease the baking powder.

By the way, the recipe says it makes 8 muffins. I got 11 out of it. I'm not sure if the baking cups in the UK are bigger than US muffin tins. If you're in the UK, you may only get 8 muffins.

Peach Almond Muffins Recipe
Makes 10-11 muffins
Print this recipe

*Note: If you live at high altitude, decrease the baking powder to 2 1/4 teaspoons and keep everything else the same.

2 large ripe peaches
2 cups (225 g) all purpose flour
1 tablespoon (15 ml) baking powder*
1/2 cup + 3 tablespoons (150 g) sugar
1/4 cup + 4 teaspoons (40 g) ground almonds
2 eggs
6 tablespoons (75 g) butter, melted and cooled
1/4 cup (50 ml) canola oil
4 teaspoons (20 ml) sour cream
1 tablespoon (15 ml) sliced almonds (for the garnish)

Preheat your oven to 350 degrees.

Cut one peach into small pieces for inside the muffins. Cut the other peach into crescent slices for the top and set aside.

In a large bowl, stir together the flour, baking powder, sugar, and ground almonds. In a separate bowl, mix together the eggs, melted and cooled butter, oil, and sour cream. Pour the wet ingredients into the bowl with the dry ingredients. Partly fold in, add the chopped peaches, and continue to fold in until just combined. 

Spoon the batter into a paper-lined muffin tin until the cups are 3/4 full (I put four tablespoons of batter into each cup). Arrange the peach slices on top of the muffins and sprinkle the sliced almonds on top. Bake for 27-29 minutes or until a toothpick comes out clean. Let stand in the pan for a few minutes and then remove to cool. 

Source: Best Ever Book of Cupcakes & Muffins by Carol Pastor 
Picture

Peaches and Cream Cupcakes

7/22/2012

 
Picture
Peaches and cream is a classic flavor combination, and when I can smell the peaches in the grocery store, it's one that calls to me. Since I love baking cupcakes, I decided to do a peaches and cream combo. I had the cake part of this down--sweet, moist, with great peach and vanilla flavor. However, the frosting took a little work because I over thought it. I hate it when I do that. First I tried to do a peach butter cream, but it was grainy and really sweet. Then I added in a little cream cheese for the tang, but it wasn't so good. So I benched it for a couple of weeks. And then it came to me...duh. How about a whipped cream because it's peaches and cream. Sometimes I just think too much. I love this cupcake, and I know I'll be making it again. Especially now that I have it all figured out!
Picture
Peaches and Cream Cupcakes Recipe
Makes about 30 cupcakes
Print this recipe

Notes: This cake recipe is for high altitude. If you're at a regular altitude, I suggest you use this recipe, add in 1 vanilla bean, and substitute chopped, peeled peaches for the strawberries. When I make half of this recipe, I use two full eggs instead of trying to split 3 eggs and one white. Use the frosting recipe below. If you like a lot of frosting (like what is pictured), double the frosting recipe. Personally, I think these would be perfect with less frosting.

For the peach cupcakes (high altitude):
2 1/4 cup all purpose flour
1/2 cup cake flour
2 1/4 teaspoons baking powder
1 teaspoon salt
1 cup butter, softened
2 cups + 2 tablespoons sugar
2 teaspoons vanilla extract
1 vanilla bean, split lengthwise
3 eggs + 1 white
1 cup milk
2 1/2 cups chopped peaches, skins removed

For the whipped cream frosting (any altitude):
1 cup heavy cream, chilled
2 tablespoons sugar
1 vanilla bean, split lengthwise
1 teaspoon vanilla extract

Preheat your oven to 375 degrees. Prepare two muffin pans with liners.

In a large mixing bowl, beat the butter and sugar on medium low speed until light and fluffy. Add in the eggs one at a time until incorporated. Scrape the seeds out of the vanilla bean pod and add to the bowl with the vanilla extract. Mix and scrape down the sides of the bowl. Combine the flours, baking powder, and salt in a separate bowl. In two additions, starting and ending with the flour mixture, add in the dry ingredients alternating with the milk. Once everything is mixed together, fold in your peeled, chopped peaches.

Fill each cupcake wrapper three-quarters full with batter. Bake in your preheated oven for 16-18 minutes or until a toothpick comes out clean.

To make the whipped cream frosting, whip together the cream, vanilla, sugar, and seeds scraped from the vanilla bean pod in a large bowl on medium speed until frothy. Increase the speed to high and beat until soft peaks form, about 1-3 minutes. While it’s whipping, taste it, and if you think it should be sweeter, add up to 1 tablespoon more sugar. Place it in a piping bag and keep in the refrigerator before piping onto cupcakes.

When the cupcakes have cooled completely, pipe the whipped cream frosting onto them. I think these are better with less frosting than what's pictured, so you may want to have a lighter touch when you're piping.

Cupcakes adapted from Annie's Eats
Whipped Cream Frosting barely adapted from Cook's Illustrated.
Picture

PPQ: Lemon Blueberry Cake

6/17/2012

 
Picture
This week's Project Pastry Queen is celebrating the upcoming birth of Emily of Ruf Love's baby boy. Emily from A Gilt Nutmeg is kind enough to host this sailing-themed baby shower, so I decided to bring a lemon blueberry sailing cake. I wish my pictures were a little better for this one, but oh well. It was made with love.

We actually ate this cake last weekend since we were celebrating Father's Day early because today I'm arriving in Ireland! The hubs and I are spending two glorious weeks here. By the way, happy Father's Day to all the dads out there. I know I love mine more than anything so I hope all of you feel very loved today. My parents loved this cake (I'm not a fan of lemon), and they were very happy to take the rest of it home. I made this one with some vanilla bean frosting I had on hand, but I think cream cheese frosting would be best, so that's what I put in the recipe below. Also, this cake is for high altitude, so if you're at a regular altitude, use your favorite lemon cake recipe or box mix and add in blueberries. It's a great combination. By the way, I made a 6-inch cake and cut each cake in half, so that's why mine looks like it does. The recipe below is for a 9-inch cake; if you want to do 6-inch cakes instead, just halve the recipe.

Happy Father's Day and Happy Baby Shower Day, Emily. I hope everyone feels very loved on this special day! I'll have a Guinness for ya!  

Lemon Blueberry Cake Recipe (High Altitude)
Print this recipe

For the cake:
3 cups cake flour
2 1/2 teaspoon baking powder
1/2 teaspoon salt
1 cup butter, salted
1 1/2 cup plus 2 tablespoons sugar
5 eggs + 1 egg white
1 1/2 cups buttermilk
1/2 cup lemon juice
1/2 cup instant vanilla pudding mix
1 teaspoon lemon zest
1 cup fresh or frozen blueberries

For the Cream Cheese Frosting (any altitude):
1 1/2 packages cream cheese (12 ounces)
12 tablespoons butter
1 1/2 pounds powdered sugar
1/4 teaspoon salt
2 teaspoons vanilla

For the Filling:
1 vanilla pudding snack pack (we are going easy here people)
1/2 cup blueberries

Preheat your oven to 375 degrees and spray 2 9-inch cake pans with Baker's Joy.

To make the high-altitude cake, in a stand mixer, cream together the butter and sugar until light and fluffy. Add the eggs one at a time until incorporated. Add in the baking powder, salt, and lemon zest and mix. Combine the buttermilk and lemon juice. In three additions, add the cake flour and vanilla pudding mix, alternating with the buttermilk/lemon juice mixture. Mix until just incorporated. Pour half the mixture into your greased 9 inch pan. Fold the blueberries into the remaining batter and pour into the second pan.

Bake for 20-25 minutes or until a toothpick inserted in the center comes out clean. Cool your cakes completely before frosting.  

To make the cream cheese frosting, in your mixing bowl fitted with the paddle, cream together the butter and cream cheese until smooth. Add the vanilla and salt and mix until incorporated. Add the powdered sugar one cup at a time and mix until smooth. It's best to weigh your powdered sugar because your amount in cups will depend on your humidity. Store leftover frosting in the fridge or freezer.
 
To assemble the cake, if the cakes are rounded on top, slice the tops off. Place the first cake on the plate, bottom side down. Put some frosting in a piping bag or a ziploc bag with the corner cut off and pipe a circle of frosting around the edge of the cake (this will hold the filling in). Spread the vanilla pudding on top of the cake inside the frosting circle and sprinkle the blueberries over it. Place the second cake layer, bottom side up, over the blueberries. Press down slightly. Frost the cake using the remaining frosting. If you want to make the ruffles or waves, tint your frosting blue, place the frosting in a piping bag fitting with a wide flat tip and move the bag back and forth sideways about one inch in width. Start from the bottom and work your way to the top and then move to the next one-inch section. Continue until there are ruffles around the cake. Man, I hope that makes sense!

Souce: Cake adapted from Annie's Eats; frosting from The Pioneer Woman Cookbook.
Picture
<<Previous

     Welcome!

    Cooking is fun and easy at high altitude, but baking can be frustrating. About 90% of my recipes work everywhere, but some are adjusted so us mountain dwellers can enjoy baked goods from scratch. I hope you find great recipes on here for your family, and I'll let you know if any are adjusted for high altitude. 

    Stay Updated!

    Add to your Reader:

    Get new posts delivered to your inbox:

    Enter your email address:

    Delivered by FeedBurner

    Categories

    All
    Appetizers
    Bars
    Beef
    Bread
    Breakfast
    Brownies
    Cake
    Cheese
    Chicken
    Chocolate
    Cinnamon
    Cookies
    Crackers
    Cupcakes
    Dessert
    Do It Yourself
    Drinks
    Fruit
    Ground Beef
    High Altitude
    How To
    Ice Cream
    Italian
    Main Courses
    Mexican
    Muffins
    Oatmeal
    Pasta
    Pastry
    Pie
    Pizza
    Pork
    Project Pastry Queen
    Pumpkin
    Salad
    Sauces
    Side Dishes
    Snacks
    Soup
    Sourdough
    Steak
    Vegetables

    My featured recipes on NoshOnIt

    Some Good Reads!

    Annie's Eats
    Bake at 350
    Climbing Grier Mountain
    Confections of a Foodie Bride
    How Sweet It Is
    I Am Baker
    Macaroni and Chesecake
    Pinch of Yum
    Pink Parsley
    Smells Like Home
    Smitten Kitchen
    Sunny Side Up
    The Curvy Carrot
    The Marvelous Misadventures of a Foodie
    The Pioneer Woman Cooks
All content copyright 2012-2013 She Makes and Bakes.