She Makes and Bakes
  • Home
  • About
  • Ramblings
  • Recipe Index
  • What We're Eating
  • High-Altitude Baking

Sugar Cookies and Royal Icing Tutorial

12/6/2012

 
Picture
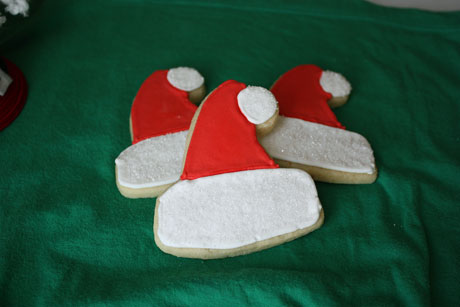
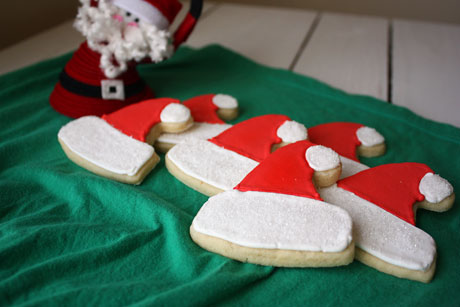
I'm a fairly firm believer that there are bakers in the world and decorators. Most people prefer one or the other. While I love to bake, I'm not a huge fan of decorating cakes and cookies. I can do it (although I don't have crazy good skills like some people), but I don't really enjoy it as much as when I bake. So I try and keep things fairly simple. These Santa Hat cookies that are decorated with royal icing fit the bill. There's only two colors. There's no extra piping detail, and it's fairly easy decorating because I used sanding sugar to add the extra pop.

It's not difficult to use royal icing, so let me show you the way. One thing before we start is that royal icing will dry out, so you must always keep it closed and covered (I use a wet paper towel).

First of all, this is my go-to sugar cookie recipe now when I want to do cut outs (even if I'm not going to go all out and use royal icing). The one that I used growing up is awesome, but it never held its shape. So I use this one now, and I also love it because it's really soft. The one thing I moved over from my family recipe is the nutmeg. If you've never had nutmeg in your sugar cookies, I insist you try it. It's pretty much the best thing ever. Just saying. People love my sugar cookies.

Here's what you'll need to decorate these cookies:
-Two airtight containers for your icing
-Gel red food coloring
-Two piping bags
-Number 2 or 3 piping tips
-Two squeeze bottles (optional but recommended)
-Toothpicks

First you make your icing using a stand mixer and the paddle attachment. I'm sure that it would work with a hand mixer, but I've never tried it. You have to whip the frosting until it's fluffy.

While the frosting is whipping, place the cookies on a cookie sheet.

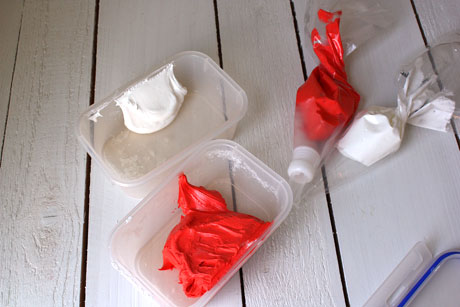
Next you divide your frosting between containers and tint it. Place some of it into piping bags--you only need to put as much in as what you'll need for piping.
Picture
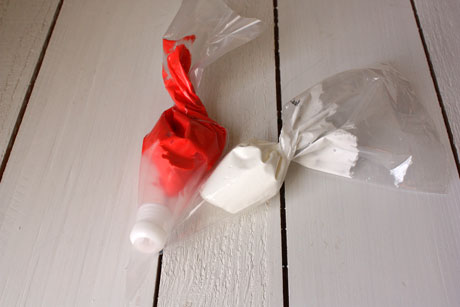
I got a little ahead of myself and forgot to put a coupler on one of the bags. Don't be like me. Close up the bags nice and tight so they don't dry out.I wait to cut off the tip of the plastic bag and put the icing tip on until I'm ready to do the outline.
Picture
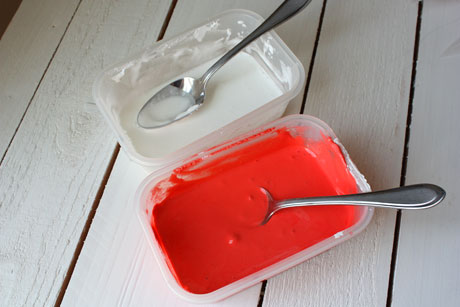
Then take what's left of the frosting and add a little bit of water (1/2 teaspoon at a time) to thin it out so you can coat the cookie with it. Stir until the water is completely mixed in.
Picture
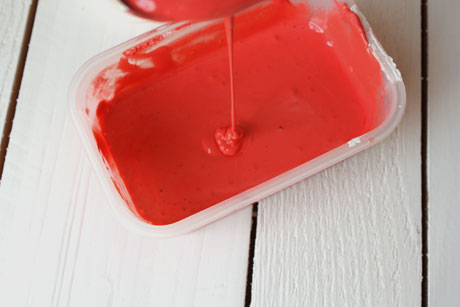
You'll know that your icing is thin enough when it runs off the back of a spoon and disappears into the bowl in 5-10 seconds. Note that you can always add more water but you can't take it away (although you can add the thicker icing from your piping bag into it if needed to thicken it up). Cover up the thinned icing. 
Picture
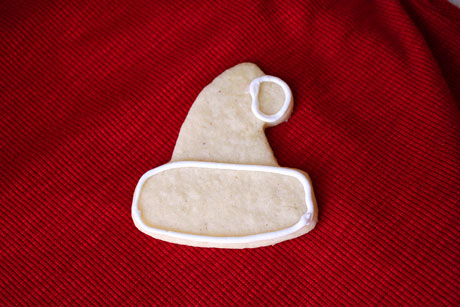
Now you can start decorating the cookies. Attach a number 2 or 3 tip to the coupler on your piping bag and pipe the outline of the cookies. Since the red outline for these depends on where the white outline is, I started with the white outline. Pipe the outline on all the cookies in the one color. Then start with the first cookie you did, and pipe on the second outline. I find that by the time I've finished piping all the cookies, the first cookie is dry enough for me to work with again (I was decorating 20 cookies). When you're not working with an open bag of frosting, cover the tip with a wet paper towel.
Picture
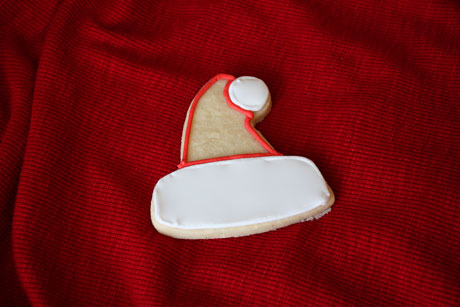
Then you'll pipe on the red outline. By the time you've finished all of the cookies, the first cookie should be dry enough for you to start the flooding process. You'll know if it's dry enough if you can lightly touch the outline and it's firm.
Picture
To flood the cookies, you'll first want to gently stir the frosting near the surface to get rid of any air bubbles that developed while it sat. You can transfer the icing into squeeze bottles or you can use a spoon to drop the icing onto the cookie. I use a spoon because my squeeze bottles are in my crawl space and I'm too lazy to get them (but squeeze bottles definitely make it easier). Carefully drop a good amount of the thinned icing in the center of the area and then use a toothpick to move it to the edges (sorry, didn't get a picture of the icing in the center). Do this on all the cookies.
Picture
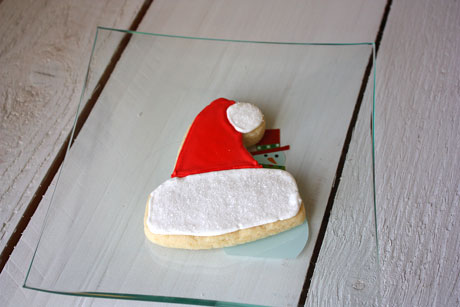
Once the cookies all are flooded with the white icing, start with the first cookie you flooded and repeat with the thinned red icing. If you see any air bubbles, you can pop them with the toothpick.
Picture
Once you cookies are frosted, you want to let them sit for at least a few hours or overnight (uncovered is fine) to let the icing set. The icing will be hard and have a matte sheen.
Picture
The next day I wet a small paintbrush and lightly and gently brushed it on top of the white icing. Then I sprinkled white sanding sugar on top and shook off the excess. And I forgot to take a picture. Sorry.
Picture
Sugar Cookie Recipe
Makes about 40 cookies, depending on your shape
Print this recipe

1 cup butter
1 cup powdered sugar
1 egg
2 teaspoons vanilla
3/4 teaspoon salt
1/2 teaspoon nutmeg
2 1/2 cups all purpose flour

In the bowl of an electric mixer, cream together the butter and powdered sugar until combined. Add in the egg and mix, scraping down the sides of the bowl. Add the vanilla, salt, and nutmeg and mix until incorporated. Add in the flour and mix until combined. Place the dough in plastic wrap and chill until firm.

Preheat your oven to 375 degrees.

Roll the dough out to 1/4 inch thickness on a floured counter. Cut with cookie cutters and place on a greased cookie sheet. Bake for 8-10 minutes; the cookies will not brown. Remove from the pan and let cool completely before decorating.

Royal Icing Recipe

4 tablespoons meringue powder
Scant 1/2 cup water
1 pound powdered sugar, sifted
1/2-1 tablespoon corn syrup
Few drops of clear extract (I use clear vanilla)

Place the meringue powder and water in the bowl of your stand mixer. Use the paddle attachment to beat it until it's combined and foamy. Add in the sifted powdered sugar and beat on low until combined. Add in the corn syrup and extract and beat on high until the icing is thick and glossy. It should have stiff peaks. Divide the icing into bowls to tint, and make sure to keep it covered.

Cookies adapted from Annie's Eats
Icing recipe from Bake at 350

For a great decorating tutorial, check this out. For some FAQs on royal icing, check this out.  
Picture

Butterscotch Spice Cookies

11/26/2012

 
Picture
I am doing a happy dance tonight because we just ordered a new refrigerator! I am super stoked. It's so much bigger than the one we have now, and the freezer is on the bottom. It'll be nice to not have to squat to get things out of the fridge. Plus, since we are getting this new one, we will have a refrigerator in the garage now. No more having to borrow space in other people's fridges and freezers. Things are looking up for this holiday baking season!

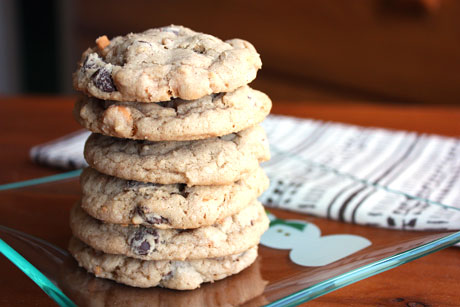
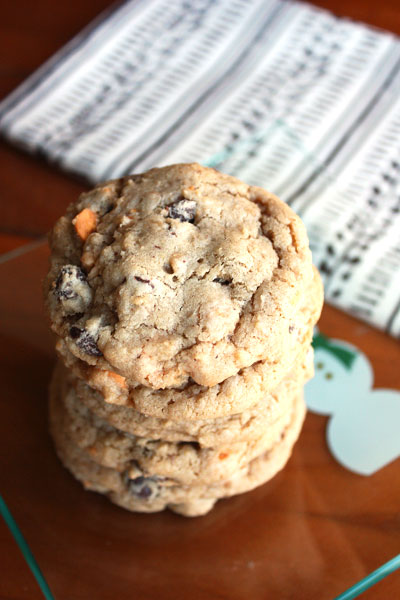
Anyway, these cookies. People love these. It's a spiced cookie that has chocolate chips, butterscotch chips, and toffee pieces in it. They're soft, chewy, and have a great blend of flavors. While these aren't my personal favorites (because I'm not a big butterscotch fan), I know a lot of people who absolutely love them. I always make a huge batch of them over the holidays. Cookies are one of my favorite things to bake, so I'm looking forward to sharing a lot of cookie recipes with you guys in the coming weeks. Stay tuned!

Butterscotch Spice Cookies Recipe
Makes about 5 dozen
Print this recipe

1 cup butter, softened
1 cup sugar
1 cup brown sugar, packed
3 eggs
1 tablespoon vanilla
2 teaspoons cinnamon
1 teaspoon baking soda
1/2 teaspoon salt
Pinch ginger
Pinch nutmeg
Pinch cloves
3 3/4 cups all purpose flour
1 1/2 cups semisweet chocolate chips
1 cup butterscotch chips
1 cup chopped walnuts (optional)
1/2 cup English toffee bits

Preheat your oven to 350 degrees.

In a mixing bowl, cream together the butter and sugars until fluffy. Add in the eggs one at a time until blended. Scrape down the bowl as needed. Add in the vanilla, cinnamon, baking soda, salt, ginger, nutmeg, and cloves and mix until combined. Add in flour and mix on low until incorporated. Fold in the chocolate chips, butterscotch chips, toffee bits, and walnuts (if using).
 
Form the dough into one-inch balls and place on an ungreased baking sheet two inches apart from each other. Bake for 12-14 minutes or until lightly browned. Let cool on the pan for one minute and then remove to a wire rack or a flat surface to cool.

Source: Taste of Home Fall Baking Cookbook 2010
Picture

Cinnamon Chip Snickerdoodles

11/25/2012

 
Picture
I have been searching for cinnamon chips everywhere. I love cinnamon, so I knew that cinnamon chips would be right up my alley. I had almost given up and was going to order them online until I was browsing Walmart. And guess what...there they were on one of their baking endcaps! So, I did what any normal person would do--a happy dance and then I bought four bags. And then I busted them open as soon as I got home. Hey...at least I made it home first. I have been known to tear into a loaf of bread in the mile from the grocery store to my house because it was too tempting.

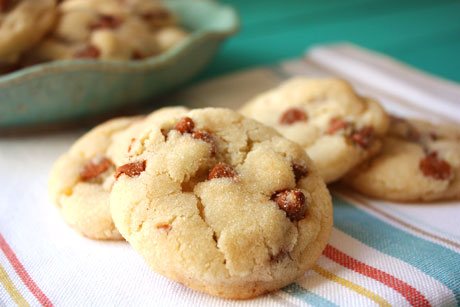
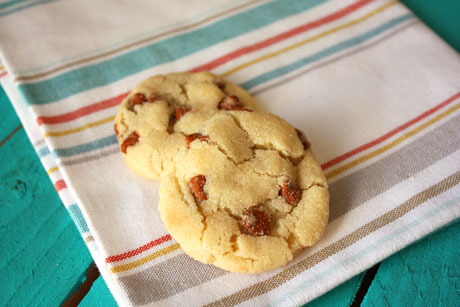
I debated about what to do with these four bags of amazing goodness and I settled on snickerdoodles for my first experience. And they were a huge success. I love my snickerdoodle recipe. They're soft and they stay soft, which is a very important quality for cookies in my opinion. Studded with these cinnamon chips, they are incredible. If you don't have or can't find cinnamon chips (but check out Walmart!), they are just as good without them. I served these to a group of guys who were watching an Ohio State football game, and there was one left at the end of it. Considering there were only three guys eating them, I'd say that's a very successful cookie recipe.

Cinnamon Chip Snickerdoodle Recipe
Makes about 2 dozen
Print this recipe

1/2 cup butter
1 cup sugar
1 egg
1 teaspoon cream of tartar
1/4 teaspoon baking soda
1/2 teaspoon vanilla
1 1/2 cups all purpose flour
3/4 cup cinnamon chips

1 cup cinnamon sugar

Preheat your oven to 375 degrees.

In the bowl of a mixer, cream together the butter and sugar until light and fluffy. Add in the egg and beat on low until combined. Add in the cream of tartar, baking soda, and vanilla and mix until combined. Mix in the flour until incorporated. Fold in the cinnamon chips.
 
Form the dough into one-inch balls and roll in the cinnamon sugar. Cover a cookie sheet with parchment paper and place the balls about two inches apart from each other. Bake for 12 minutes until the edges are set and let cool on the sheet for one minute. Remove to a flat surface to cool.

Source: Adapted from somewhere, but I don't remember...it's been years since I got this recipe. If it's yours, please let me know!
Picture

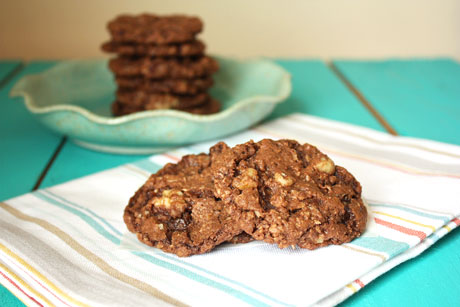
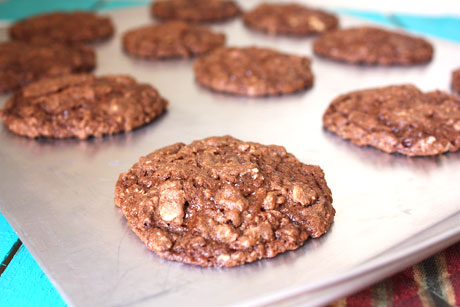
Chocolate Oatmeal Cookies

11/7/2012

 
Picture
Years and years ago, I dated this boy. This boy loved to bake, and chocolate oatmeal cookies were his specialty. In fact, he baked way more than I ever did. We eventually went our separate ways, and I found myself wishing I had that recipe. I loved those cookies, and I'd eat them for breakfast, lunch, dessert, and midnight snacks. They were chewy and crunchy, and I loved the chocolate/brown sugar flavor. I searched and searched for a recipe that was similar, and one day I found one in my friend's Hershey's cookbook. 

Funny this is, I reconnected with him on Facebook and got his recipe. I made his cookies last year (which include a packet of chocolate pudding mix) and I liked my new version much better! His cookies were a little too cake-like, and I liked my chewy texture better. One of my favorite things about having oatmeal in my cookies is that it helps me to be good and not eat cookie dough. I love cookie dough...perhaps a little too much. But I do not enjoy eating uncooked oatmeal. I've used both quick cooking oats and old-fashioned oats in this recipe, and they both work great in the final cookie. I know this is a recipe I'll be making for years and years. I'm thankful to the boy for leading the way. 

Chocolate Oatmeal Cookies Recipe
Makes about 4 dozen cookies
Print this recipe

1 cup butter, softened
1 cup brown sugar, packed
1 1/2 cups sugar
2 eggs
2 teaspoons vanilla
1 teaspoon baking soda
1/2 teaspoon salt
1/2 cup cocoa powder
1 1/2 cup all purpose flour
3 cups oats
1/2 cup chopped walnuts
1/2 cup semisweet chocolate chips

In the bowl of an electric mixer fitted with the paddle attachment (or using a hand mixer), cream together the butter and sugars until soft and mixed. Add in the eggs one at a time, scraping down the sides of the bowl as needed. Add in the vanilla, baking soda, and salt, and mix on low until combined. Incorporate the cocoa powder and flour and mix on low. Once combined, add in the oats and mix. Mix in the walnuts and chocolate chips and mix until just incorporated.

Form the dough into one-inch balls and place on an ungreased cookie sheet about 1-2 inches apart. Bake for 11-12 minutes until set, but don't overbake. Let them cool for one minute on the sheet and then remove them to a flat surface to cool. Store in an airtight container or bag.

Source: Barely adapted from Hershey's
Picture

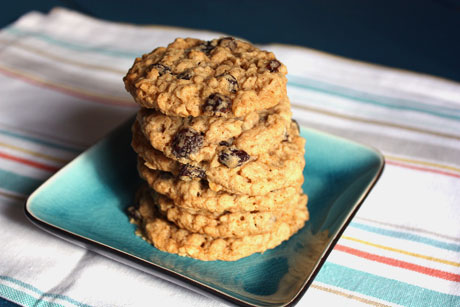
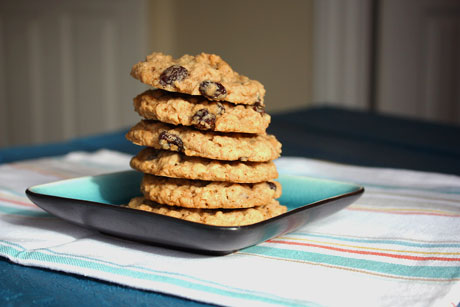
Oatmeal Raisin Cookies

10/31/2012

 
Picture
It may surprise some of the people who know me, but I haven't always been a baking and cooking enthusiast. Through high school, I regularly ate parmesan noodles and grilled cheese sandwiches. When I was a single girl, I was all about pasta, pasta, and more pasta. I bought treats from the grocery store. (I know, right? I couldn't even splurge for bakery treats.) If I made chocolate chip cookies, it was purely so I could store the dough in fridge and chow down on it over a couple of days. (I wanted to say a week there to make myself look a little better but we're all friends here, right?) And then when I got too lazy to do that, I bought the packaged cookie dough (again from the store) and kept that in my fridge. I'm not saying that I never baked...every year before Christmas, my mom and I made a large assortment of cookies from her 1974 red Betty Crocker cookbook that she got from her mom at her bridal shower, I made boxed brownies, and cakes from mixes.

My first cookbooks were ones on how to doctor up cake mixes, recipes for your bread machine, Cooking for One (yikes! Singledom!), and Weight Watchers for when I thought I weighed more than I should, which is extremely ironic because now I wish that I weighed what I weighed back then and I don't have that cookbook anymore. In fact, I don't think I ever made a recipe from it either. 

So when did I make the turn you ask? I think it was mainly when I started dating my now-husband, Shamus. I knew that I couldn't get away with serving pasta for every meal (although I tried and now he has a serious aversion to it). Cooking for two is so much more fun and interesting than cooking for yourself. I started baking more regularly, too. He loves chocolate chip cookies, so I set out to find the perfect recipe since I actually had to start baking my cookies. I took a community college cake decorating class before I met him and learned some good tricks and slowly started to bake more often. Getting a Kitchen Aid mixer certainly helped me want to bake more often. 

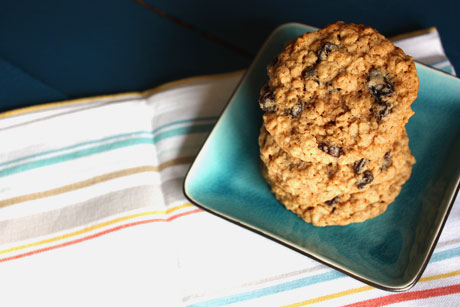
One day I was baking with a friend, and we were going to make sugar cookies and oatmeal raisin cookies. I was making my family recipe for the sugar cookies, but I wanted to find a great recipe for soft and flavorful oatmeal raisin cookies. I did some internet hunting and found this one. I'm in love with these. They're soft and stay soft (because that's what makes a good cookie in my opinion), and they have wonderful spices. They're perfect at any time of the year, but they're especially great during fall with lots of cinnamon and cloves. If you have raisins that have been sitting in your pantry for awhile (guilty!), letting them soak in hot water for about 10 minutes really plumps them up and softens them. I highly recommend it.
Picture
Oatmeal Raisin Cookies Recipe
Makes about 40 cookies
Print this recipe

1 cup butter, softened
1 cup brown sugar, packed
1/2 cup sugar
2 eggs
1 teaspoon vanilla
1 1/2 cups all purpose flour
1 teaspoon baking soda
1 teaspoon cinnamon
1/2 teaspoon ground cloves
1/2 teaspoon salt
3 cups oats
1 cup raisins

Preheat your oven to 350 degrees and spray baking sheets with non-stick spray.

In a large mixing bowl, cream together the butter and sugars with an electric mixer until fluffy. Add in the eggs one at a time, scraping down the bowl as needed. Add in the vanilla, baking soda, cinnamon, cloves, and salt and mix until combined. Mix in the flour and then add the oats. Once the oats are fully incorporated, mix in the raisins.

Form the cookie dough into one-inch balls and place 2 inches apart from each other on the greased cookie sheets. Bake for 10-12 minutes or until the edges are lightly brown. Cool for two minutes on the sheet before removing to a flat surface to cool completely. Store in an airtight container or bag.

Source: I don't remember where I got it...maybe Allrecipes? If you know, please tell me!
Picture

Soft Frosted Sugar (Lofthouse) Cookies

10/28/2012

 
Picture
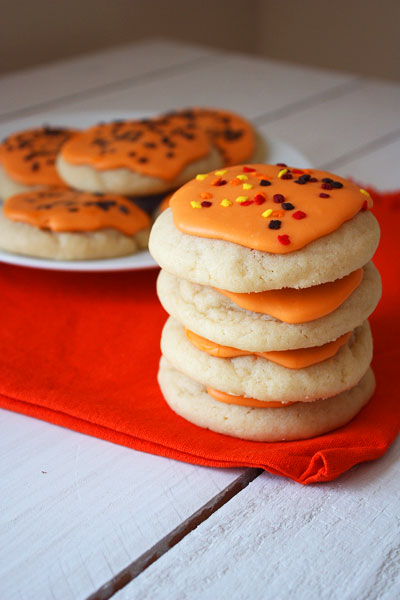
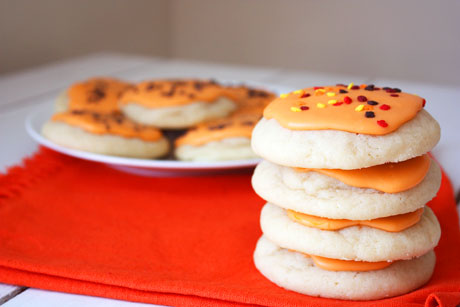
You know those soft sugar cookies in grocery stores with the bright frosting and lots of sprinkles? They come in the plastic containers, and they always look so appetizing. They are very deceitful in my opinion. I always want to like them. They look like they should be amazing, and they taste like nothing. Seriously, every time I bite into one (and I have tried them many times), I am bitterly disappointed. Well, friends, we have found the solution. These cookies are just as large and soft, but they taste like real butter and vanilla. They have a great texture, and the frosting is so much more than just a typical powdered sugar glaze because there's more butter in it. 

I made my frosting a little thinner than it should have been, so there's not as much frosting on my cookies as the store-bought kind. I was okay with that because there is a lot of butter in these cookies. Since there was less frosting, I had double the amount and threw away half of it. Next time I'll cut the frosting recipe in half, but I'm leaving it as is below in case you want to make thicker frosting to slather on the cookies. 

The best thing about these is that, just like the store-bought ones, you can make them for any holiday or party. You can color the frosting how you want and use seasonal sprinkles. I guarantee that when you bring them to a party, people will devour them and be thrilled with how good they are. No bitter disappointment here!  

Soft Frosted Sugar (Lofthouse) Cookies Recipe
Makes 24 large cookies
Print this recipe

For the cookies: 
4 1/2 cups all purpose flour
4 1/2 teaspoons baking powder
3/4 teaspoon salt
1 1/2 cups butter, room temperature
1 1/2 cups sugar
3 eggs
2 tablespoons vanilla
 
For the frosting:
5 cups powdered sugar, sifted
1/3 cup (5 1/3 tablespoons) butter, melted
1 tablespoon vanilla
7-8 tablespoons milk
Food coloring and sprinkles (optional)

To make the cookies, in the bowl of an electric mixer, beat together the butter and sugar on medium-high speed until soft and fluffy. Add the eggs, one at a time, scraping down the sides of the bowl as needed. Add in the vanilla extract, salt, and baking powder until combined. Add in the flour, one cup at a time, until incorporated. When everything is mixed together, cover the dough and chill for one hour. 

Preheat your oven to 350 degrees. Line baking sheets with parchment paper or a silicone baking mat. Take a scant 1/4 cup of cookie dough and roll into a ball. Place the ball on the prepared sheet and press down slightly. Place the balls about 2-3 inches apart from each other. Bake for 10-12 minutes or until set. Do not overbake or they won't stay soft. You want the edges to be barely brown if at all. Let rest on the baking sheets for three minutes and then remove to a flat surface to cool.

To make the frosting, combine the powdered sugar, melted butter, and vanilla. Add the milk one tablespoon at a time until the frosting is the consistency you like. Frost the cookies using the back of a spoon or an offset spatula and add the sprinkles if using. Store in an airtight container.

Source: Annie's Eats, who adapted it from Hostess with the Mostess
Picture
You may also like:
Loading...

Peanut Butter Cookies

9/10/2012

 
Picture
I usually like to post on Sunday nights so you guys have something on Monday morning, but that just wasn't happening this weekend. I had a bakery order to make over 500 mini desserts for a wedding. It was a lot of fun and a lot of work. I finally dropped it off Sunday afternoon and then ran home to get to the Broncos football game. After excitedly watching them beat the Steelers, I didn't get home until 10:45pm. So I went to bed. It was a great but exhausting weekend with no time for blogging.

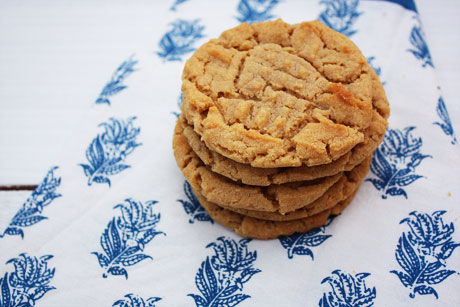
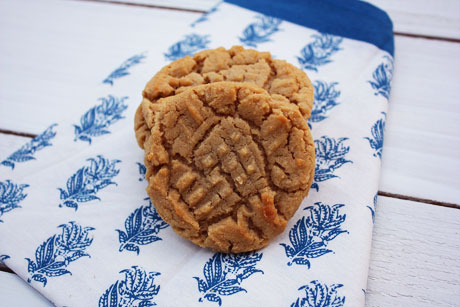
And what does this have to do with peanut butter cookies? Absolutely nothing. Except that I want some. Now. Try to stifle your yawn about another basic cookie recipe because these aren't just any other peanut butter cookie. They're soft, they stay soft, and they have a delicious surprise. My friend says the secret ingredient is love. It's true...but it's also almond extract. If you've never tried this before (which I'm fairly certain you haven't because I've never seen this anywhere), you absolutely have to as soon as possible. They're incredible. They are a great cookie, and people will swoon. That is if you have enough will power to not eat all of them standing over the sink reading a magazine. Wait, no one else does that? 

Peanut Butter Cookies Recipe
Yield: About 20 cookies
Print this recipe

*Note: The original recipe calls for 1 1/4 cups flour. I found that this leads to cookies that won't spread at all. If you want cookies that spread a lot, use just one cup of flour. If you want cookies that spread a little, I suggest using one cup plus 2 tablespoons.

1/2 cup sugar
1/2 cup brown sugar
1/2 cup peanut butter
1/2 cup butter-flavored shortening
1 egg
1 cup all purpose flour*
3/4 teaspoon baking soda
1/2 teaspoon baking powder
1/4 teaspoon salt
1 teaspoon vanilla extract
1 teaspoon almond extract

Preheat your oven to 375 degrees.  

In a mixing bowl, cream together the butter-flavored shortening, peanut butter, and sugars. Add in the egg and mix until combined. Stir in the baking soda, baking powder, salt, vanilla extract, and almond extract. Mix in the flour until combined. Form the dough into one inch balls, place on an ungreased cookie sheet about two inches apart, and press down slightly with a fork. Bake for 8 minutes, let the cookies rest on the tray for 3 minutes, and then remove to a flat surface to cool completely.

Adapted from Betty Crocker
Picture

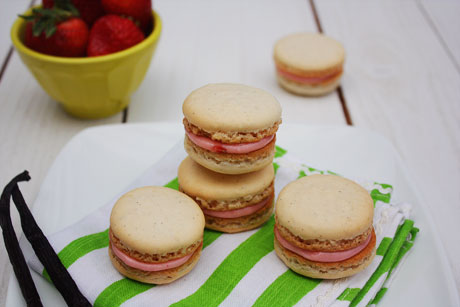
Vanilla Bean Strawberry Macarons

9/5/2012

 
Picture
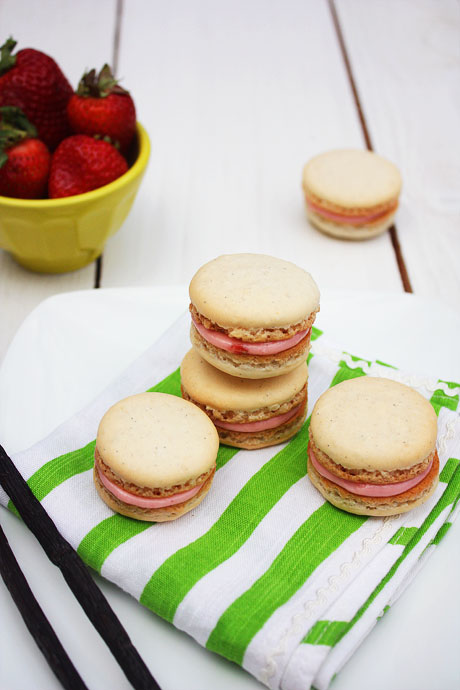
Macarons, the lovely little French cookie. Honestly, I had never even heard of these until a few years ago. And, I had never had one until I made chocolate macarons myself. In fact, I wasn't even sure that I made them correctly until I went to New Orleans a few months later and tried a variety of flavors there. Turns out, I made them correctly. Phew. Macarons are crisp, light, delicate cookies that lend themselves to so many colors and flavors. The combinations are endless. 

A lot of people are going to scare you and tell you how hard they are to make. Or they're going to assume they're hard to make. Well, they're not. Just because bakeries charge $3 per cookie does not mean you can't make them at home. In fact, you should make them at home because they charge so much! You do have to have a scale though because the measurements must be precise (hence the reason that the recipe is all by weight below instead of volume). So, I beg of you...try to make these yourself. They're not as daunting as they seem, and even if they may not look the prettiest on your first try, they'll still taste good. Practice makes perfect, which gives you a great excuse to make and eat more cookies! 

To help you with your journey, I took a few pictures of the process. If you read this and are still scratching your head (hopefully that's not many of you), I found this post helpful, too.  

Vanilla Bean Strawberry Macarons Recipe
Makes about two dozen sandwiches
Print this recipe

*Note: If you're like me and don't always plan ahead, you can microwave your egg whites to age them. Just place them in a microwave safe bowl and microwave on high for 10 seconds.

For the macarons:
110 grams almonds (blanched or slivered)
200 grams powdered sugar
100 grams egg whites (about 3 egg whites), aged at room temperature for 12-24 hours*
1 vanilla bean, split lengthwise
1/4 teaspoon vanilla extract (optional)
50 grams granulated sugar

For the strawberry filling:
2 tablespoons butter
1/2 teaspoon vanilla
Pinch salt
3 strawberries, hulled
1 cup powdered sugar

To make the macarons, line two large sheet trays with parchment paper or a silicone baking pad.

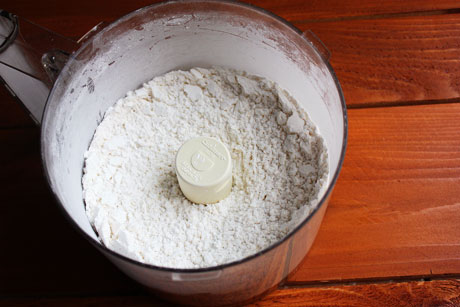
Next, combine the almonds and powdered sugar in a food processor and pulse until finely ground and blended.
Picture
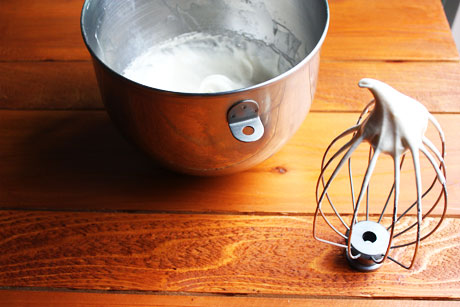
In the bowl of a stand mixer, add the egg whites and whisk on medium high speed until foamy (this incorporates air into the egg whites). Scrape the seeds out of the vanilla bean pod and add them to the egg whites along with the vanilla extract if using. Increase the mixer to high and slowly add the granulated sugar while mixing until the whites are smooth and shiny and stiff peaks form.  
Picture
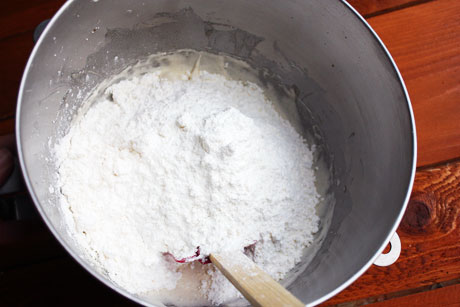
Gently add the ground almond mixture into the mixing bowl with the whites.
Picture
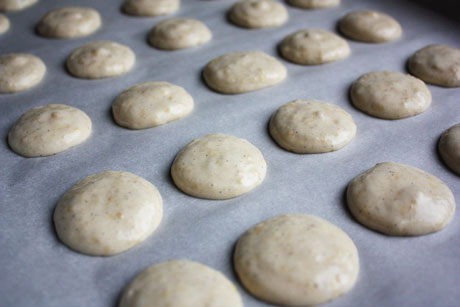
Using a wide rubber spatula, gently but quickly fold the almond mixture into the egg whites. You want to be gentle so that you don't deflate the egg whites. There should be no streaks in the batter, and it should be thick and flow from the spatula when you lift it. Transfer the batter to a piping bag fitted with a coupler and a plain round tip (like a Wilton #12). Carefully pipe the batter into small circles on the prepared sheet pans. You want them to be about 1 to 1.5 inches in diameter and spaced an inch apart from each other. The more you practice this piping, the easier it'll get and the better the rounds will look. Let them sit at room temperature for one hour until a hard shell forms (don't skip this step).
Picture
Preheat your oven to 300 degrees. After the macarons have sat for an hour, bake them for 12-18 minutes. You'll know that they're done when they develop the "feet" on the bottom and you can easily pick them up off the tray. If they stick to the tray, crack on the tray, or do not remain intact, put them back in the oven for another couple of minutes. Once you can lift one off the tray, transfer the entire tray to a wire rack to cool before removing the rest of the cookies. 

To make the filling, add the butter, vanilla, salt, and strawberries in a food processor. Pulse until everything is combined. Add in the powdered sugar and pulse until mixed and thick enough to pipe onto cookies. If needed, add more powdered sugar.  

To assemble the cookies, match the cookie shells together based on shape and size. Place the frosting in a piping bag fitted with a round tip. Pipe a dollop of the strawberry filling on the flat side of one cookie and press the other cookie on top until the filling shows on the edges. 

Store cookies in a covered container.  

Cookie recipe from Annie's Eats
Filling a She Makes and Bakes recipe 
Picture

Double Chocolate Chip Cookies

8/14/2012

 
Picture
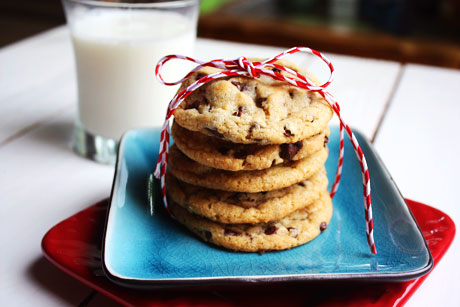
I think every blogger has to post a chocolate chip cookie recipe, and this is mine. I spent years trying to find the perfect recipe, and turns out I had to look no further than my boss. She makes the perfect cookies, and now I do, too. This is a soft, chewy cookie that stays that way for days. There is a strong vanilla flavor, which pairs really well with the chocolate and brown sugar. I've had many people tell me repeatedly they are the best cookies they've ever had. I happen to agree. Even my husband, who doesn't really eat desserts will eat a *batch* of these cookies. I'm happy to know that whenever I have kids, I have this recipe in my back pocket. Already I make them so often that I have the recipe memorized. 

There are a couple of things worth mentioning about these cookies. First, don't substitute butter for the butter-flavored shortening. I realize that butter is best, but not in this case. The shortening really lends itself to soft cookies, and you still get to have that butter flavor. Secondly, you want to underbake these cookies (and all cookies) to keep them soft. Therefore, take them out when they're barely turning brown and then let them rest on the pan for one minute to firm up a bit. Don't let them sit on the pan for more than a minute or they'll get really flat. After the one minute is up, you'll remove them to a flat surface. Before I had granite countertops, I placed them on foil on top of my counter. Now I just put them directly on my counter. If you put them on a wire rack, they'll fall through so don't do that.

By the way, if you have a hard time baking cookies (eg, the bottoms or edges are brown or uneven), I suggest using Airbake pans. You don't have to grease them, use parchment, or a SilPat, and the cookies bake beautifully every time because there are no edges to trap the heat (and other fancy reasons I'm not aware of). I bake all my cookies on these, and I love them...I have two sets. PS, I'm not getting paid to say that, I just love them and think everyone should use them.    
Picture
Double Chocolate Chip Cookies Recipe
Makes about 36 cookies
Print this recipe

3/4 cup brown sugar, packed
3/4 cup sugar
1 cup butter-flavored shortening
2 eggs
1 teaspoons baking soda
1 teaspoons salt
1 tablespoon vanilla extract
2 cups flour
1 cup regular size chocolate chips
1 cup mini chocolate chips

Preheat your oven to 375 degrees.

In a bowl of a mixer, cream the shortening and sugars until fluffy. Add in the eggs one at a time. Mix in the baking soda, salt, and vanilla, and add in the flour until just incorporated. Stir in the chocolate chips.

Form two tablespoons worth of dough into a ball and place on an ungreased baking sheet about two inches apart from each other. Bake for 9 minutes until barely golden brown. Remove from oven, let rest for one minute on the pan, and then remove to a flat surface (I place them on my clean counter or aluminum foil on my counter). Let them cool.

Source: My boss, Sharon, adapted from Nestle Tollhouse
Picture

Cookie Dough Ice Cream Sandwiches

6/19/2012

 
Picture
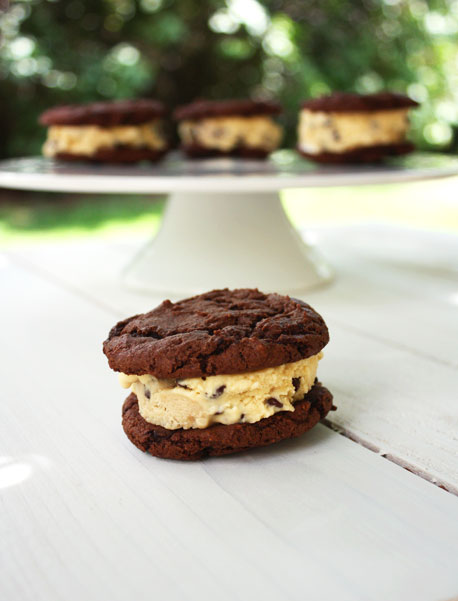
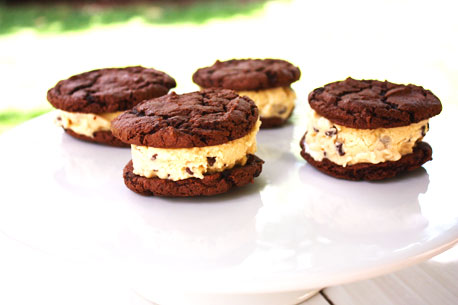
After I made my chocolate chip cookie dough ice cream, I needed to do something with the rest of it. Since the hubs is lactose intolerant, he doesn't partake in ice cream too frequently. This means that I have a lot of leftovers when I make a batch of ice cream. I have a lot of other sweets usually sitting on the counter and I forget about the lonely ice cream in the freezer. I won't be forgetting about these sandwiches though.

These are pretty incredible, and they're really not difficult to make. Also, you don't have to make your own ice cream. You could use any store bought ice cream you like. And, truth be told, you don't really have to make cookies. You could buy your favorite kind. But for now, let's stick with these cookies. They are a very rich and indulgent chocolate cookie; when paired with the ice cream, they take you back to summer days when you were a kid and the ice cream truck rolled around. These are about a million times better than that though, and I just found out they're way cheaper. Apparently the ice cream truck charges $4 or $5 for an ice cream sandwich. Whaaa? Try these out. They're perfect on a hot summer day.
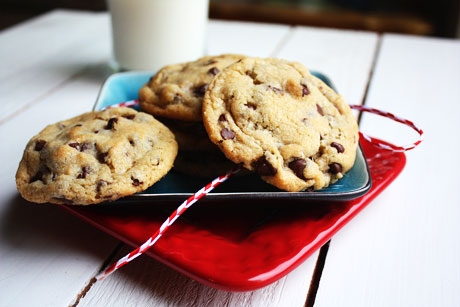
Cookie Dough Ice Cream Sandwiches Recipe
Makes 8 sandwiches
Print this recipe

1 recipe chocolate chip cookie dough ice cream
For the cookies:
1 1/4 cup all purpose flour
1/4 teaspoon baking soda
1/4 teaspoon salt
5 tablespoons butter
7 tablespoons unsweetened cocoa
2/3 cup sugar
1/3 cup brown sugar
1/3 cup sour cream or plain yogurt
1 teaspoon vanilla

Preheat oven to 350 degrees.

Whisk together flour, baking soda, and salt. Melt butter in a saucepan and remove from heat. Whisk in the cocoa until fully incorporated and stir in the sugars until it looks like coarse sand. Add in the sour cream or yogurt (use what you have; I've used both at different times and they both work great) and vanilla. Add in the flour mixture and stir until combined. Drop dough by rounded teaspoon-fulls onto a greased baking sheet. Bake for 10-12 minutes until set. Let cool completely.

Meanwhile, let your ice cream thaw for about 10 minutes or until scoopable. Scoop it into a 9x13 pan and press it down into a single layer using plastic wrap. Place in the freezer until solid.

Once your ice cream is solid and your cookies have cooled, use a round cookie cutter to cut circles of ice cream that are slightly smaller than your cookies. Pair up your cookies according to size, place the ice cream round in between, and place in the freezer. Once solid, you can serve or place in a freezer bag for later.

Cookies barely adapted from Two Peas & Their Pod
Idea was all mine
Picture
<<Previous
Forward>>

     Welcome!

    Cooking is fun and easy at high altitude, but baking can be frustrating. About 90% of my recipes work everywhere, but some are adjusted so us mountain dwellers can enjoy baked goods from scratch. I hope you find great recipes on here for your family, and I'll let you know if any are adjusted for high altitude. 

    Stay Updated!

    Add to your Reader:

    Get new posts delivered to your inbox:

    Enter your email address:

    Delivered by FeedBurner

    Categories

    All
    Appetizers
    Bars
    Beef
    Bread
    Breakfast
    Brownies
    Cake
    Cheese
    Chicken
    Chocolate
    Cinnamon
    Cookies
    Crackers
    Cupcakes
    Dessert
    Do It Yourself
    Drinks
    Fruit
    Ground Beef
    High Altitude
    How To
    Ice Cream
    Italian
    Main Courses
    Mexican
    Muffins
    Oatmeal
    Pasta
    Pastry
    Pie
    Pizza
    Pork
    Project Pastry Queen
    Pumpkin
    Salad
    Sauces
    Side Dishes
    Snacks
    Soup
    Sourdough
    Steak
    Vegetables

    My featured recipes on NoshOnIt

    Some Good Reads!

    Annie's Eats
    Bake at 350
    Climbing Grier Mountain
    Confections of a Foodie Bride
    How Sweet It Is
    I Am Baker
    Macaroni and Chesecake
    Pinch of Yum
    Pink Parsley
    Smells Like Home
    Smitten Kitchen
    Sunny Side Up
    The Curvy Carrot
    The Marvelous Misadventures of a Foodie
    The Pioneer Woman Cooks
All content copyright 2012-2013 She Makes and Bakes.