She Makes and Bakes
  • Home
  • About
  • Ramblings
  • Recipe Index
  • What We're Eating
  • High-Altitude Baking

Pumpkin Spice Bread & Muffins

10/16/2012

 
Picture
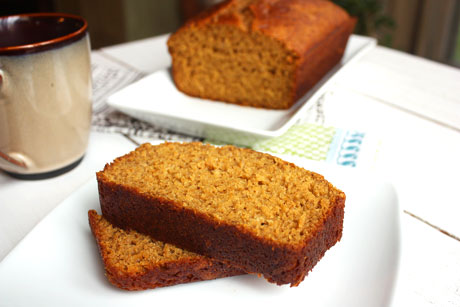
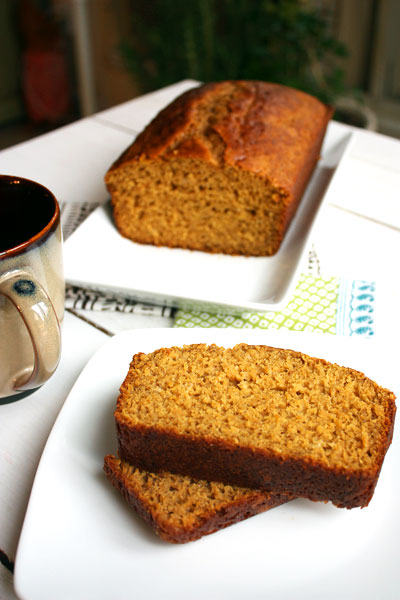
I love pumpkin, but I never really started using it for more than pumpkin pie until a few years ago. In fact, I never really knew the amazing-ness that is pumpkin bread until I went to a work meeting in Chicago about five years ago in the month of October. There was a Starbucks in the hotel, and I needed some breakfast. I had never really gone to Starbucks before because I am not a lover of coffee, so I checked out their pastry case and chose a piece of pumpkin bread. And then I fell in love. In a big way. When I got home from my meeting, I researched recipes for pumpkin spice bread and haven't turned back since. Let's face it, I cannot pay $4 for a piece of the bread. So now I can get my fix whenever I want it.

Another beauty of this recipe is that it's a one bowl, mix by hand recipe. It's so easy...maybe a little too easy.

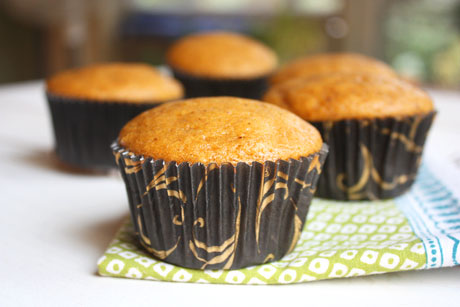
This is a recipe that I do not adjust for high altitude. It works great as is. This recipe makes two loaves so you can make two and eat both or freeze one (they do freeze well), or you could make a loaf and muffins or cupcakes. I'll show you the cupcake variation next week. Because really, what could go wrong when you add some frosting?
Picture
Pumpkin Spice Bread and Muffins Recipe
Makes two loaves or 36 muffins or a combination
Print this recipe

2 1/4 cups sugar
2 cups all purpose flour
1 1/3 cups cake flour
2 teaspoons baking soda
2 teaspoons cinnamon
1 teaspoon salt
1 teaspoon baking powder
3/4 teaspoon ground cloves
1/2 teaspoon nutmeg
4 eggs
15 ounce can of pumpkin
1 cup buttermilk
1/2 cup unsweetened applesauce
1/3 cup canola oil

Preheat your oven to 350 degrees.

In a large bowl, mix together the first nine ingredients. Form a well in the dry ingredients, and add the eggs, pumpkin, buttermilk, applesauce, and oil into the middle. Mix those ingredients together, and then stir everything together until just incorporated. If you're making loaves of bread, divide the batter between two greased 9-inch loaf pans. Bake for 45-55 minutes or until a toothpick comes out clean. Let cool for 10 minutes before removing from pans.

If you're making muffins, line 36 muffin tins with liners. Spoon about 1/4 cup of batter into the liners or until they're about 2/3 of the way full. Bake for 15-17 minutes or until a toothpick comes out clean. Let cool before eating.
 
Source: Taste of Home 
Picture

My Favorite Cornbread

10/9/2012

 
Picture
Bonjour! After what feels like 35 hours of traveling, I've made it to Lyon, France. I'm exhausted...there's something about flying halfway across the world to a country whose language you don't even recognize that will take it out of you. That and having a French menu read to you by a very nice server when you're jet lagged and confused. Boy do I feel like a stupid American...oh well I guess. Thank you...er...merci. Maybe I'll be a little better with the language when I leave in two weeks.  

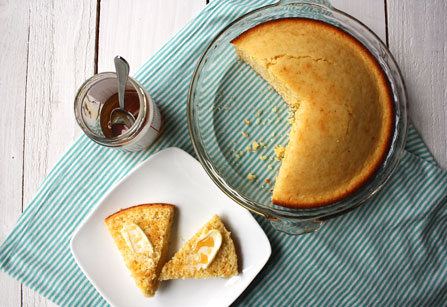
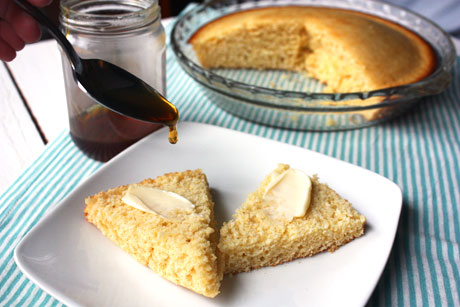
Anyway, back to the bread. I think I've heard somewhere that there's a debate on cornbread between the North and the South. One prefers it sweeter and the other prefers....I'm not sure. Clearly, I'm not the person to ask about this. Great story, right? It's ok...roll your eyes. I'm definitely used to that. We'll chalk it up to me living in the West. This is my all-time favorite recipe. I've been making this since I was kid, and I love every aspect of it. I love the batter and the finished project. Yes, it's sweet but it's simple, too. You should have all the ingredients on hand, and it takes less than 30 minutes to make and bake it. My absolute favorite way to eat it is warm with a slab of butter and a lot of honey, and it's great leftover, too. Since the hubs doesn't like cornbread (wha??), I essentially eat an entire pan by myself. Not at one sitting mind you, but it's breakfast, lunch, and dinner for me! I've never made it into muffins, but I know people who have. I would recommend about 12-15 minutes if you do muffins (or until a toothpick comes out clean). 

My Favorite Cornbread Recipe
Print this recipe

1/2 cup cornmeal
1 1/2 cups all purpose flour
1/2 cup sugar
1/2 teaspoon salt
1 tablespoon baking powder
1 egg
1 cup milk
1/4 cup vegetable oil

Preheat your oven to 425 degrees.

In a bowl, combine together the cornmeal, flour, sugar, salt, and baking powder. Add in the egg, milk, and vegetable oil and whisk by hand to combine. 

Pour into a greased 9-inch pie plate and bake for 20 minutes or until a toothpick comes out clean. Serve warm with butter and honey. 

A She Makes and Bakes family recipe  
Picture

Apple Pie Cinnamon Rolls

10/7/2012

 
Picture
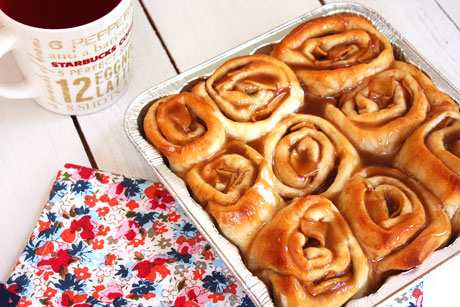
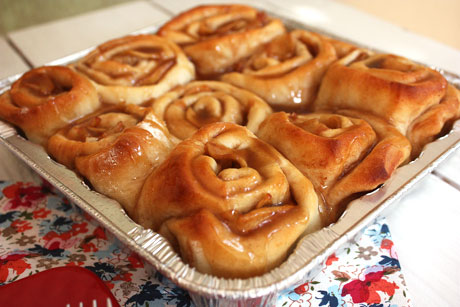
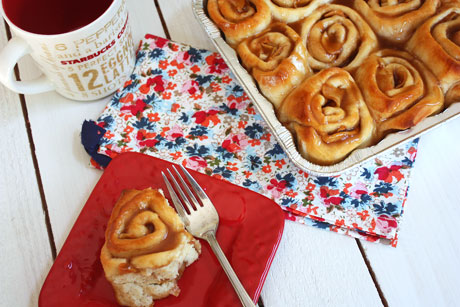
Hello best breakfast ever. I was trying to think of creative ways to use apples, and I came up with apple pie plus cinnamon roll. And then I wanted to use the sauce that I fell in love with because, well, because I want to put that sauce on everything. Even my mashed potatoes...well, maybe I wouldn't go that far. Maybe. So, you have apple pie cinnamon rolls with a brown butter cinnamon rum glaze. And I should stop talking there because if that hasn't convinced you, I don't know what will. Seriously people. You need these in your life.
Picture
I'm not going to lie, they do take a little bit of time to make. But, you can split things up. You could make the bread dough, the apples, and the glaze on one day and then you could assemble and bake the second day. If I wanted to devour these on a Sunday morning, I would make the bread dough on Saturday and stick it in the fridge to rise. On Saturday, I also would make the apples and then place them in the fridge to cool and stay put until I needed them. You could make the glaze on Saturday or while the rolls are baking on Sunday. So, there is some work, but it's manageable and soo worth the effort!
Picture
Because really, aren't you worth the work of apple pie + cinnamon rolls + brown butter + cinnamon rum? I think everyone is. By the way, if you don't drink or you have kids, it's not really rum. It's rum extract. It lends a warmth to the glaze without the buzz. So please, go make these. Like now.
Picture
Apple Pie Cinnamon Rolls Recipe
Makes about 24 cinnamon rolls
Print this recipe

For the dough:
6 1/4 cups all purpose flour (794 g/28 ounces)
2 teaspoons salt
6 tablespoons sugar
5 teaspoons instant yeast
2 cups + 2 tablespoons lukewarm milk
1/2 cup vegetable oil

For the apple filling:
4 Granny Smith apples, peeled, cored, and sliced
3/4 cup sugar
3 tablespoons cinnamon
1 tablespoon cornstarch
1 tablespoon lemon juice

For the brown butter glaze:
1/4 cup butter
1/2 cup sugar
1 tablespoon flour
Pinch of salt
1/4 cup water
1 teaspoon vanilla
1/4 teaspoon rum extract
1/8 teaspoon cinnamon

To make the dough, mix the yeast with the sugar and warm milk and let sit for about 5 minutes. Measure the flour into the bowl of your mixer, add in the yeast mixture and oil, and mix with the paddle until everything is incorporated. Add in the salt, switch to the dough hook, and mix on low speed until a smooth, tacky ball of dough forms. Transfer the dough to a greased bowl, cover it, and let it rise until doubled, about 1-2 hours.   

When the dough is almost done rising, make the filling. In a large saucepan, stir together the sugar, cinnamon, and cornstarch. Add in the sliced apples and lemon juice. Cook on medium heat for about 15 minutes until thickened and bubbly. Remove from heat and let cool for about 5 minutes.

Preheat your oven to 350 degrees.

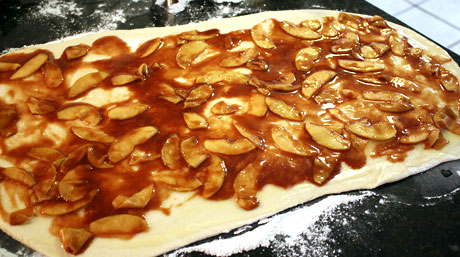
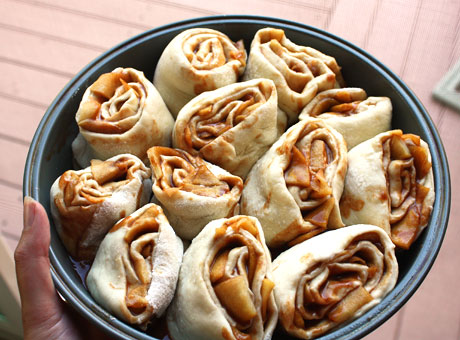
To assemble the rolls, divide the dough in half. Roll it out on a floured surface into a long rectangle, about 15x25 inches or so. The dough will be thin. Spread half of the apple filling onto each rectangle. The apples won't cover the entire rectangle, but you want to make sure they're evenly spaced and that the juice covers the rectangle. Roll the dough up from the long side and then cut it into 2-inch pieces. Place the slices into greased cake pans, cut side down. Let sit for about 15 minutes to rise. Bake for 25-30 minutes until browned on top and cooked through.

To make the glaze, in a medium saucepan melt the butter. Stir and watch as it gets foamy and then starts to turn brown. When it turns into a dark honey color and smells nutty, quickly stir in the sugar, flour, and salt. Gradually add the water. Bring to a boil and cook and stir for 2 minutes. Remove from heat and add in the extracts and cinnamon. Pour on top of the warm cinnamon rolls.

Dough recipe from Peter Reinhart's Artisan Breads Every Day
Glaze recipe adapted from Taste of Home Fall Baking Cookbook
Picture

Egg in the Hole

10/2/2012

 
Picture
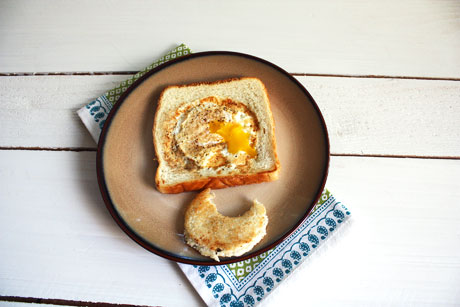
For some people growing up, this was a classic breakfast. Those people are lucky. I had never heard of it until I saw it on The Pioneer Woman's Food Network show. My husband looked at me like I was crazy. Apparently it has many different names, too, but this is the easiest for me to remember. The real selling point of this for me is the buttery toasted bread and the egg whites.

I'm pretty sure I'm sinning against the food blog community, but I'm really not a fan of runny egg yolks. I can eat about one or part of one and that's enough. Sometimes I can't even choke down one. I much prefer the whites to the yolk any day. In fact, I went to breakfast once and ordered scrambled egg whites. They charged me an extra dollar for that. Um, excuse me, but shouldn't it be less money because you're not giving me the entire egg?? So confusing. Anyway, I can do cooked yolk a little more than runny but I still much prefer the white. I haven't tried this minus the yolk yet, but I think that's next. I can imagine that this would be a really fun breakfast to make with or for your kids if you have them. It's something different, that's for sure. 

Egg in the Hole Recipe
Makes one (multiply for how many you need)
Print this recipe

1 piece of white bread
1 tablespoon butter
1 egg
Salt and pepper to taste

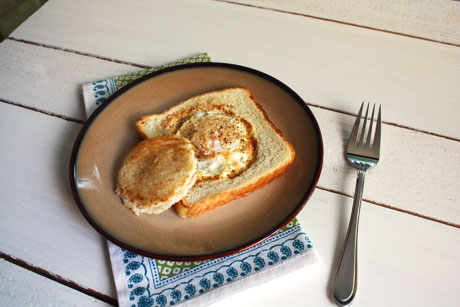
Use a round cookie cutter or the rim of a glass to cut a circle in your piece of bread. Melt the butter in a skillet over medium high heat and place the bread in the skillet. Crack the egg into the hole, sprinkle with salt and pepper, and let it cook for about a minute until it's set and you can flip it. Flip it, let it cook for about 30 seconds and then move the bread around to soak up the remaining butter. Once your yolk is how you like it, remove the bread to a plate. Place the circle of bread in the skillet, and move it around to butter it and brown it on both sides.

Source: The Pioneer Woman   
Picture

Tomato Cobbler with Gruyere Biscuits

9/17/2012

 
Picture
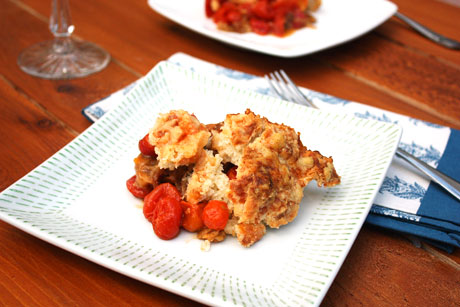
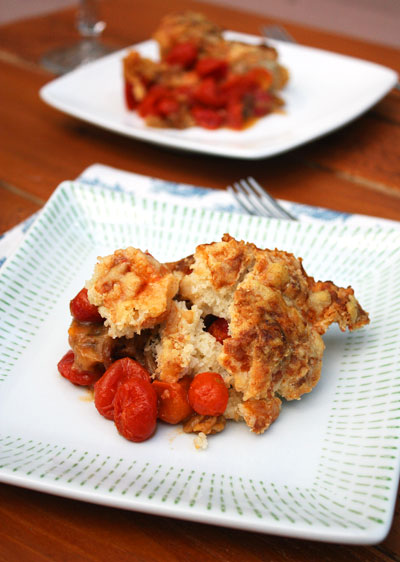
I'm not going to lie...the first time I saw this on Pink Parsley's blog, I definitely turned my nose up at it. Tomato cobbler? Weird and gross. The second time I saw it on Annie's Eats, I turned my nose up again, but maybe it wasn't quite as high. It kind of stuck in the back of my mind. Well maybe, I thought. My biggest hang up was (is) the fact that I'm not a total tomato lover, as I've previously mentioned. I especially don't like fresh tomatoes. And I don't like tomato skin in my cooked tomatoes. So I stored it in my mind for another year.

This summer I've really come around to eating more and more tomatoes. So I thought about the tomato cobbler yet again and decided to make it. Oh my. For one, your house will smell absolutely incredible while you bake it. That alone makes this dish worth the effort. There's something about the caramelized onions mixed with the garlic mixed with the butter from the biscuits that is to die for. It's not a pool of tomato juice with soggy biscuits on top. Not at all. The biscuits are light, fluffy, and crispy on top with plenty of amazing gruyere in and on them. I even liked the roasted tomatoes in the cobbler. It gave each bite a bit of freshness. The whole dish is quite wonderful, although the hubs turned his nose up and said it was weird. Maybe he just needs a couple of years to adjust to the idea like I did.

Tomato Cobbler with Gruyere Biscuits Recipe
Makes a 9x13 dish
Print this recipe

Note: I cut this recipe in half and baked it in a 1.5 quart baking dish for about 50 minutes. This takes a bit of time to prep and bake, so you could caramelize the onions the day before and keep them in the fridge. Then just put everything together and bake. Also, if you love caramelized onions, you definitely should double that part of the recipe!

For the filling:
2 tablespoons extra virgin olive oil
2 tablespoons butter
2 medium onions, thinly sliced
4 garlic cloves, minced
1 teaspoon fresh thyme, chopped
3 pounds cherry or grape tomatoes
3 tablespoons all purpose flour
1/4 teaspoon red pepper flakes
Salt and pepper

For the biscuits:
2 cups all purpose flour
2 teaspoons baking powder
Kosher salt
1/2 cup butter, cold and chopped into pieces
1 cup grated gruyere cheese, plus 2 tablespoons for sprinkling
1 1/2 cups cold heavy cream

To make the cobbler filling, heat olive oil and butter over medium heat in a large pan and add onions. Cook, stirring occasionally, until caramelized (about 25-30 minutes). Add the garlic and thyme and cook until fragrant, about 1-2 minutes. Let cool.

Preheat your oven to 375 degrees.

In a large bowl, toss tomatoes, flour, red pepper flakes, and onion mixture. Pour into a greased 2 quart baking dish or a 9x13 pan.

To make the biscuits, in a large bowl, combine the flour, baking powder, and salt. Add in the butter and incorporate it using two knives, a fork, or a pastry blender until it resembles coarse crumbs. Mix in the cheese, and add in the cream. Stir with a fork until the dough forms into a large clump (it will be sticky). Using an ice cream scoop, 1/4 measuring cup, or a large spoon, drop clumps of the biscuit dough on top of the cobbler filling. Sprinkle the top with the remaining 2 tablespoons of cheese.

Bake for one hour to one hour and ten minutes or until the filling is bubbling and the biscuits are golden brown. Transfer to a wire rack and let cool 20 minutes before serving. 

Source: Annie's Eats and Pink Parsley, originally from Martha Stewart Living
Picture

Garlic Cheese Bread

8/22/2012

 
Picture
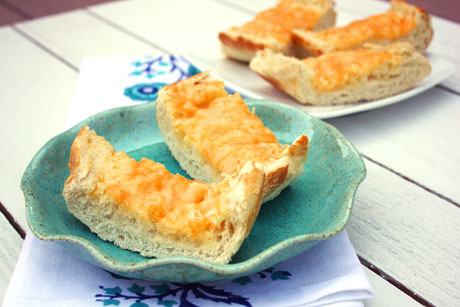
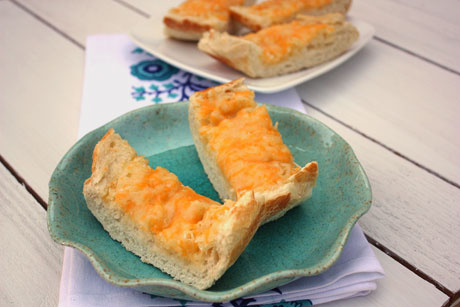
When I was younger, I took piano lessons. I was not good, and my favorite part of them was my teacher, Candi, who also was my friend. When I turned 16, my mom told me that she wasn't going to pay for me to take lessons anymore because I wasn't practicing. She wasn't going to pay for me to hang out with Candi. Looking back, I don't blame her. So, ever since I turned 16 I've been going to dinner at Candi's, Angie's, and Danielle's house on Monday nights. Which means that I've been eating this garlic cheese bread for the past 13 years. Yikes. 

Monday nights are special nights for me. We don't get together every Monday anymore, but Monday nights will always hold special memories for me. We make dinner, watch some TV, talk, and laugh. One of my favorite meals over there is spaghetti. We make a box of pasta, a jar of sauce, and this garlic cheese bread. It's simple and so comforting, and truthfully it hits the spot in a way that homemade sauce just can't. I'm a foodie, but I love some childhood comfort food! While I'm usually a proponent of grating your own cheese, this bread works best with packaged cheese. It also works great with fake butter if you like that kind of thing! I normally just spread and sprinkle on until it looks good, but I measured this time if you're a recipe follower. Over time, you'll learn what works best for you. We've found that this bread works best if you bake it instead of broiling. This way, all of it gets nice and warm and melty instead of just the top. Also, we think that the prepackaged Mexican four cheese blend (cheddar, monterey jack, asadero, and queso blanco) works best. It's melty and stringy without being rubbery.

Garlic Cheese Bread Recipe
Print this recipe

1 loaf French bread
1/2 cup butter, softened
1 teaspoon garlic powder
2 cups Mexican four cheese blend

Preheat your oven to 350 degrees.

Split the loaf of French bread lengthwise. Spread the butter on both halves. Sprinkle the garlic powder on top (if you don't like a lot of garlic, use less than one teaspoon). Sprinkle the cheese on top until covered everywhere. 

Bake for 8-10 minutes until the cheese is thoroughly melted. 

To cut it without burning your hands, use a fork to hold the bread still while you cut with a serrated knife.  
Picture

Peach Almond Muffins

8/21/2012

 
Picture
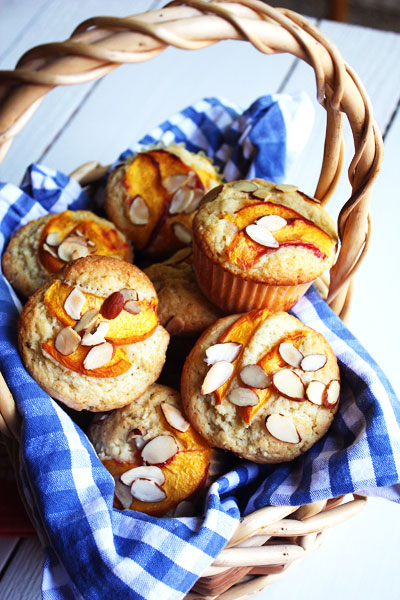
A few weeks ago, I noticed that there were no muffin recipes on the blog. I'm not a big muffin person, but I wanted to have at least a couple! Then I got a great birthday present: the Best-Ever Book of Cupcakes & Muffins. It's a great cookbook with beautiful pictures of every recipe and great variety. I can't wait to work my way through the book. Another beauty of the book is that it's from the UK, so it has international measurements. Score for my international friends! Since I am loving peach season in Colorado right now, I decided to make the peach almond muffins.

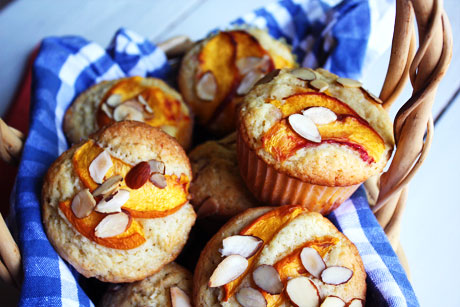
These are great muffins. They rise nicely, they're moist (sorry if you hate that word), have a great crumb that's dense without being too dense, and they're just sweet enough. The pops of juicy peach throughout the muffin give great texture and flavor, as do the almonds. This truly is a muffin--not a cupcake without frosting that we'll call a muffin to make it legit to eat it at breakfast (but no one actually does that, right?). I was a little worried while I was making them because the batter was extremely thick, but they came out wonderfully. I'll definitely be adding these to the rotation. If you're at high altitude, see the note below. The only change is to decrease the baking powder.

By the way, the recipe says it makes 8 muffins. I got 11 out of it. I'm not sure if the baking cups in the UK are bigger than US muffin tins. If you're in the UK, you may only get 8 muffins.

Peach Almond Muffins Recipe
Makes 10-11 muffins
Print this recipe

*Note: If you live at high altitude, decrease the baking powder to 2 1/4 teaspoons and keep everything else the same.

2 large ripe peaches
2 cups (225 g) all purpose flour
1 tablespoon (15 ml) baking powder*
1/2 cup + 3 tablespoons (150 g) sugar
1/4 cup + 4 teaspoons (40 g) ground almonds
2 eggs
6 tablespoons (75 g) butter, melted and cooled
1/4 cup (50 ml) canola oil
4 teaspoons (20 ml) sour cream
1 tablespoon (15 ml) sliced almonds (for the garnish)

Preheat your oven to 350 degrees.

Cut one peach into small pieces for inside the muffins. Cut the other peach into crescent slices for the top and set aside.

In a large bowl, stir together the flour, baking powder, sugar, and ground almonds. In a separate bowl, mix together the eggs, melted and cooled butter, oil, and sour cream. Pour the wet ingredients into the bowl with the dry ingredients. Partly fold in, add the chopped peaches, and continue to fold in until just combined. 

Spoon the batter into a paper-lined muffin tin until the cups are 3/4 full (I put four tablespoons of batter into each cup). Arrange the peach slices on top of the muffins and sprinkle the sliced almonds on top. Bake for 27-29 minutes or until a toothpick comes out clean. Let stand in the pan for a few minutes and then remove to cool. 

Source: Best Ever Book of Cupcakes & Muffins by Carol Pastor 
Picture

PPQ: Cheddar Jalapeno Beer Bread

8/19/2012

 
Picture
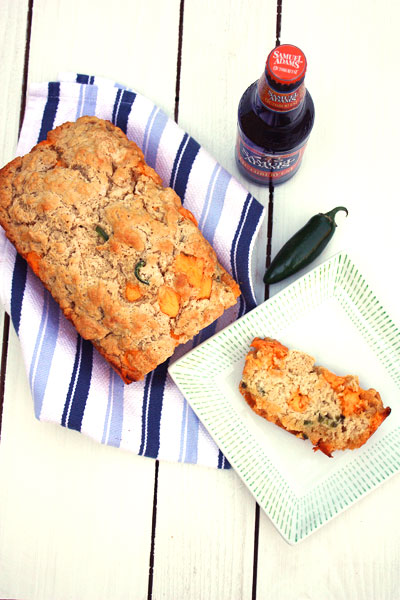
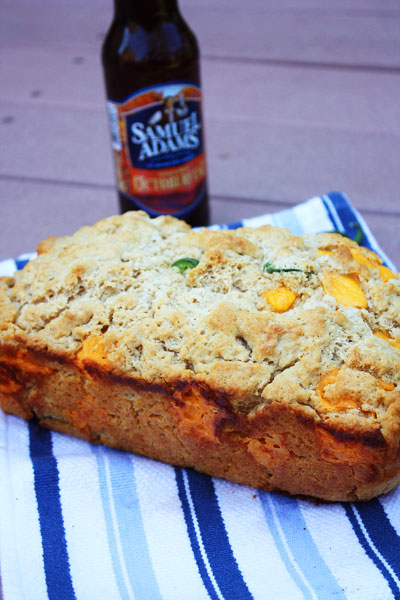
This is the second to last week of Project Pastry Queen, and I chose to make something savory. I've been eyeing this beer bread for awhile, and it seemed like the perfect time to make it. If you've never had beer bread, you should. For one, it's incredibly easy to make. There's no dealing with yeast and waiting for dough to rise. It's a simple mixture of ingredients, pour the batter into a pan, and bake it. Also, you can adapt it how you like by using different beers, spices, veggies, cheese, etc. I decided to add some chunks of cheddar and jalapeno to the bread to spice it up a bit, which pairs nicely with the Sam Adams Octoberfest I used. The Pastry Queen recipe calls for a stick of butter to be added on the bottom and top of the pan, and let me tell you...it is an amazing addition. The edges get crispy and buttery. There's a hint of sweetness from the sugar, and the beer flavor really shines. The next time you're looking for a quick bread, look no further than here.  

Cheddar Jalapeno Beer Bread Recipe
Makes one 9-inch loaf
Print this recipe

3 cups all purpose flour
1 tablespoon baking powder
1 teaspoon salt
3 tablespoons sugar
1 1/2 cups cheddar, cubed
1 jalapeno, sliced and seeds removed
12 ounces good quality beer (I used Sam Adams Octoberfest)
1/2 cup butter, melted

Preheat your oven to 350 degrees.

In a large bowl, mix together the flour, baking powder, salt, and sugar. Add in the cubed cheese and sliced jalapeno. Pour in the beer and stir until combined.

Spray a 9-inch loaf pan with cooking spray. Pour half of the melted butter in the pan. Spoon the batter in the pan and pour the remaining butter on top. Place in the oven and bake for 50-60 minutes until the bumpy crust is golden brown.

Remove from the pan and serve immediately.

Source: The Pastry Queen
Picture

PPQ: Peach Kolache

8/11/2012

 
Picture
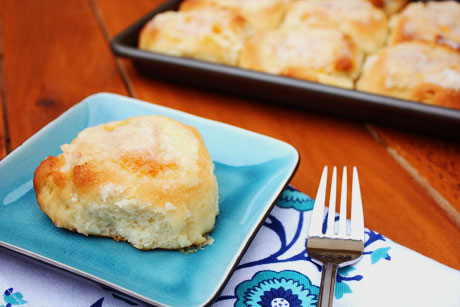
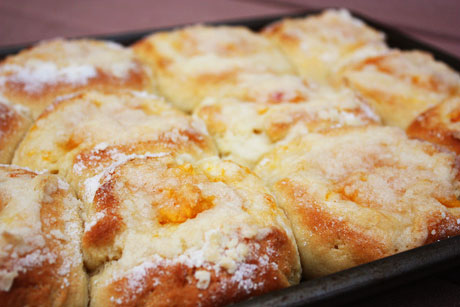
It's my turn to host Project Pastry Queen this week, and I chose to make peach kolache. Kolache was the kick-off project back in 2010 and something I've always wanted to make. From what I can tell, kolache are sweet, soft Czech or Danish pastries. They're very popular in Texas; I had never heard of them. I knew something was wrong when I made them because the dough is supposed to be sticky and wet. Mine was not. Not even close. My dough was tough and tacky, so I knew something was off. I figured it was a humidity/altitude thing until I was typing this recipe out and saw that I definitely did not add in the warm water. Well, that'll explain the tough dough part. When you make this, make sure you add in all the ingredients. Generally that helps make the recipe good. Other than being a little tough/dry, they were great. They have a really great flavor. I'll definitely be making these again, and this time I'll be sure to add in everything.

Another great thing about this recipe is how versatile it is. You can have sweet or savory variations. I'm looking forward to a peach/strawberry combo as well as a sausage/egg combo. I can tell this is going to be a great recipe!

Peach Kolache Recipe
Yield: 16-18 buns
Print this recipe

For the dough:
2 cups milk
2 1/4 teaspoons active dry yeast
1/2 cup lukewarm water
1/2 cup butter
2 eggs
1 1/4 cups sugar
2 teaspoons salt
8 1/2 cups all purpose flour

For the peach filling:
2 cups pitted and chopped peaches
1 cup peach jam

For the streusel topping:
1/2 cup all purpose flour
1/2 cup sugar
3 tablespoons butter, cut into small pieces and chilled

To make the dough, warm the milk in a medium saucepan set over medium heat until the milk starts to steam and forms a skin. Don't let it boil. Cool for 10-15 minutes until it's 110 to 115 degrees or warm to the touch. Dissolve the yeast in the warm water and let it sit until foamy (5 minutes). Melt the butter and let cool for about 5 minutes.

In a large bowl, combine the eggs, sugar, salt, and butter. Add in the cooled milk and the warm water/yeast. Add in the flour, two cups at a time, mixing in between. Use a wooden spoon or your hands to mix the dough until all the flour is fully incorporated. Don't overwork the dough or it'll be tough. It's going to be a sticky, light dough. Grease a large bowl lightly, and place the dough in the bowl. Cover with plastic, and let it rise until doubled in size (about 1-2 hours). Deflate the dough by pressing on it a couple of times, recover it with plastic wrap, and refrigerate at least four hours or overnight.

To make the filling, combine the chopped peaches with the peach jam.

Grease a 12x17 baking sheet with cooking spray or butter. Shape the dough into 2 1/2 inch diameter balls (they'll be the size of small limes). Arrange the balls on the baking sheet, three across and six down. Using your thumb, press down in the middle of each ball to form a well for the peach filling. Mound one tablespoons or so of the peaches in the middle of the ball. Cover them loosely with plastic wrap and let them rise in a warm place for about 1 hour until doubled.

Preheat your oven to 375 degrees.

To make the streusel topping, mix the flour, sugar, and butter together until crumbly. You can use your hands, two knives, or a pastry cutter to mix the butter. Scatter this over the kolaches before baking.

Bake them for 25-30 minutes until lightly browned on top. Cool for 20 minutes before serving.

Source: The Pastry Queen
Picture

Garlic Naan

8/9/2012

 
Picture
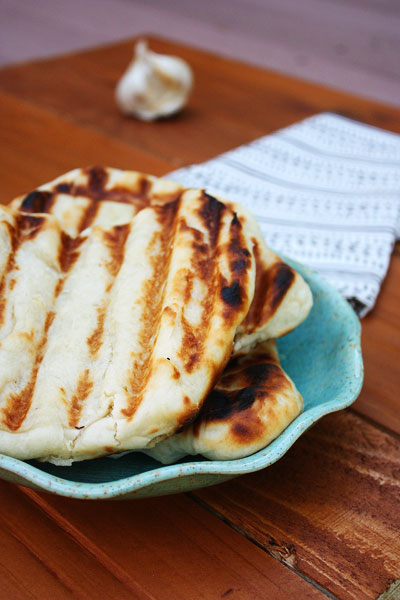
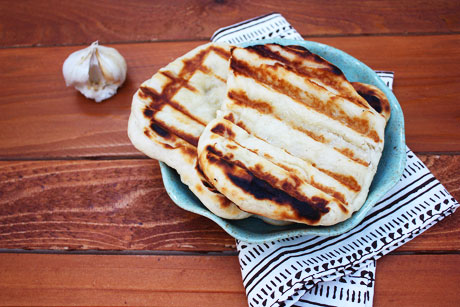
When I took a bread class last fall, I admit that when I saw naan on the course list, my first thought was what is that? I don't eat Indian food, so I had never heard of it, and to be honest, I wasn't sure if there was a fancy way to pronounce it either (there isn't). So imagine my pleasant surprise when I tasted it, and it was incredible. This bread is a garlic lover's dream. It starts with a full head of roasted garlic that gets incorporated into the dough, then you brush the final product with more garlic mixed with clarified butter. Oh yeah...you'll keep people away, but it's so worth it.

I love to use this bread for meatball sandwiches, and it would be awesome with pizza toppings. That's my next use. I cooked this on the grill outside, but you can cook it on a grill pan inside or (though I've never tried it) on a skillet like a tortilla. No oven use for this one, which makes it great when my house is 88 degrees inside!

Garlic Naan Recipe
Yield: 4-6 breads
Print this recipe

Notes: You can use either yogurt or sour cream in this recipe. I've used both with success. To "bake" the naan, you can use an outdoor grill, a grill pan on the stove, or a skillet on the stove. Avoid brushing the finished naan with melted butter as it gets greasy. Use ghee or clarified butter since it doesn't have the fat in it. This dough is supposed to be really sticky, so make sure you have plenty of flour on hand.

2 teaspoons active dry yeast
1 teaspoon sugar
1/2 cup warm water
1/2 cup plain yogurt or sour cream
1 head of garlic
2 tablespoons vegetable oil
2 cup all purpose flour
1 1/2 teaspoons salt
1 cup all purpose flour for dusting
1/2 teaspoon garlic powder
1/4 cup clarified butter or ghee

To roast the garlic, preheat your oven to 400 degrees. Peel the outer layers off of the garlic head, and cut the top off so you can see the cloves. Place the head in a square of foil, and drizzle about one teaspoon of olive oil on the top of the garlic. Loosely wrap the foil around the garlic so the oil won't spill out, but you want there to be space around the garlic so it can steam. Bake for 30-35 minutes or until the cloves are soft. Let cool.
 
In a bowl, combine the yeast, sugar, and warm water, and let the mixture sit for about 5 minutes until foamy. Mix in the yogurt and oil. Squeeze the head of garlic so that the cloves pop out. You want to get as many of the garlic cloves out, but you don't want the paper/skin. Add all the cloves to the yeast mixture. 

Combine the flour and salt in a food processor. While the motor is running, pour the liquids into the bowl in a thin stream and process until the flour gathers into a ball. The dough will be sticky. Once it's mixed, dump it onto your counter that is dusted with more flour.

Gather it into a ball and place it in a greased bowl. Cover it with plastic and let it sit in a warm place until doubled, about an hour or two.

Divide the dough into 4-6 pieces. Press each piece down to three-quarters of an inch thick. Heat up your grill/grill pan/skillet to medium heat and grease. Grill until the dough is set on one side with grill marks (about 2-3 minutes). Flip it and grill the other side for another 2-3 minutes until there are grill marks. Transfer it to a plate, combine the clarified butter or ghee and garlic powder, and brush it onto the hot naan on both sides.

Source: Cook Street Cooking School 
Picture
<<Previous
Forward>>

     Welcome!

    Cooking is fun and easy at high altitude, but baking can be frustrating. About 90% of my recipes work everywhere, but some are adjusted so us mountain dwellers can enjoy baked goods from scratch. I hope you find great recipes on here for your family, and I'll let you know if any are adjusted for high altitude. 

    Stay Updated!

    Add to your Reader:

    Get new posts delivered to your inbox:

    Enter your email address:

    Delivered by FeedBurner

    Categories

    All
    Appetizers
    Bars
    Beef
    Bread
    Breakfast
    Brownies
    Cake
    Cheese
    Chicken
    Chocolate
    Cinnamon
    Cookies
    Crackers
    Cupcakes
    Dessert
    Do It Yourself
    Drinks
    Fruit
    Ground Beef
    High Altitude
    How To
    Ice Cream
    Italian
    Main Courses
    Mexican
    Muffins
    Oatmeal
    Pasta
    Pastry
    Pie
    Pizza
    Pork
    Project Pastry Queen
    Pumpkin
    Salad
    Sauces
    Side Dishes
    Snacks
    Soup
    Sourdough
    Steak
    Vegetables

    My featured recipes on NoshOnIt

    Some Good Reads!

    Annie's Eats
    Bake at 350
    Climbing Grier Mountain
    Confections of a Foodie Bride
    How Sweet It Is
    I Am Baker
    Macaroni and Chesecake
    Pinch of Yum
    Pink Parsley
    Smells Like Home
    Smitten Kitchen
    Sunny Side Up
    The Curvy Carrot
    The Marvelous Misadventures of a Foodie
    The Pioneer Woman Cooks
All content copyright 2012-2013 She Makes and Bakes.