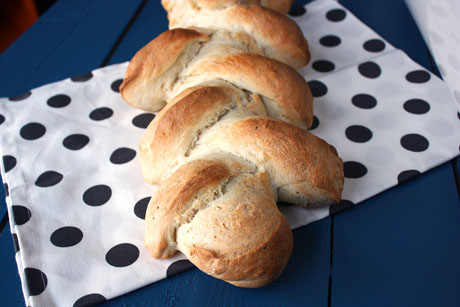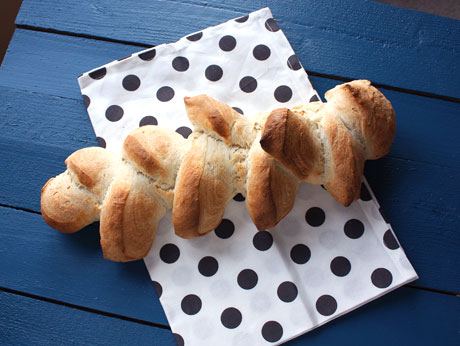
I had never heard of an epi until I bought a bread book. I thought that it looked cool and then flipped past the page it was on and promptly forgot about it. Then I took a bread making class and learned how easy it is to make one. All it is is a loaf of French bread that is shaped, cut, and baked. I love making it for special occasions because people can rip off a hunk of it. It makes for a pretty neat centerpiece, too. Though I haven't tried it, I think you could do this method with a loaf of frozen and thawed dough, too. So before you think that it's too hard to make, just check out the pictures below. It's surprisingly easy, and since I'm not cool enough to know how to make a triptych in Photoshop, I really hope you like a lot of pictures!
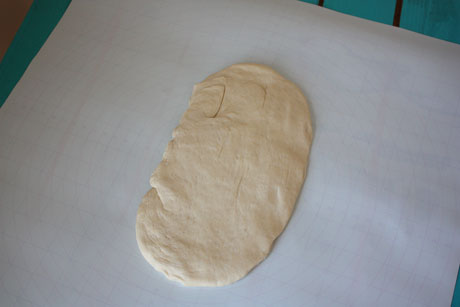
After your dough has risen, shape it into a rectange.

Start from a short end and roll it up tightly.
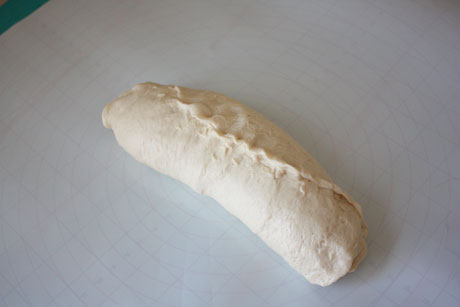
Pinch the edges together and then place the seam side down and rock/roll it out using your hands to make it longer. Be sure that it will still fit in your pan though! Move it to a parchment paper lined sheet pan.
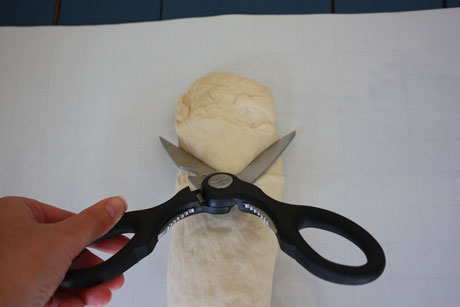
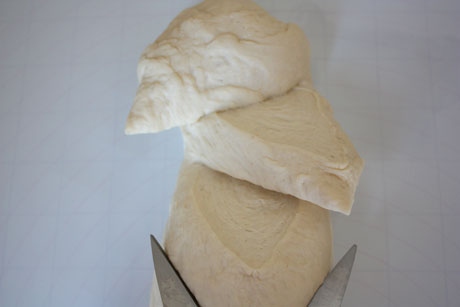
Take a pair of kitchen scissors and place them to cut the bread.
You want to cut close to the bottom of the bread, but not all the way through.

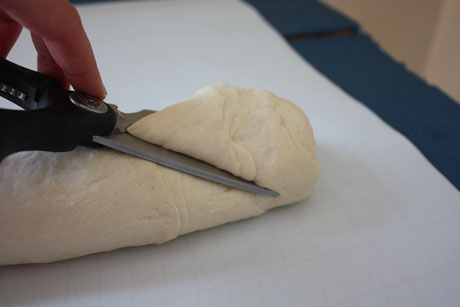
That's what it looks like after you finish your cut. Riveting.
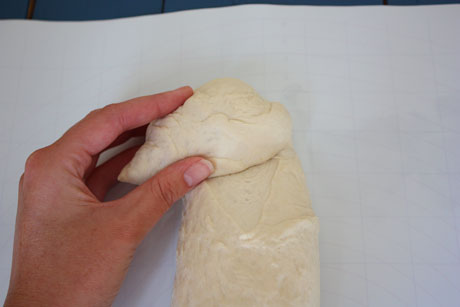
Take the cut piece and move it to the left of the loaf.
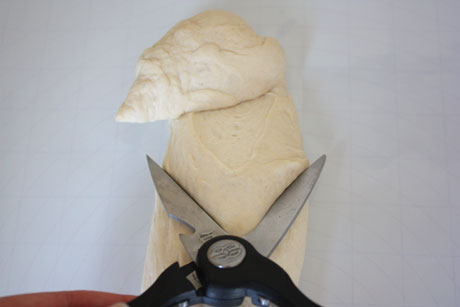
Make a second cut.
Move the second piece to the right and make a third cut. Continue to do this, alternating the cut pieces.
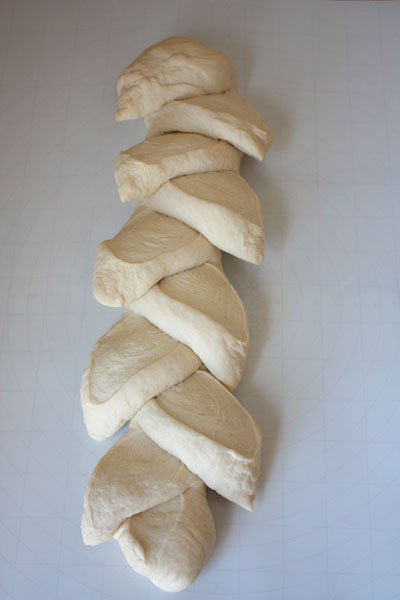
This is what it will look like at the end of the cutting, and then you can bake it.
Epi
Makes two loaves
Print this recipe
2 pounds bread flour (6 1/2 cups)
1 pound, 6 ounces warm water (2 1/2 cups)
1 tablespoon active dry yeast
1 tablespoon + 1 teaspoon salt
Dissolve the yeast in the water in the bowl of your mixer. Add in the flour and mix on low using the paddle until combined. Wait five minutes and then add the salt. Switch to the dough hook and mix on low until the dough is smooth and tacky (about 5-8 minutes). It should not stick to the sides of the bowl. If your dough is at all sticky, it won't hold it's shape when you cut and move it. Remove to a clean bowl that is sprayed with cooking spray. Cover and let rise for an hour or until doubled in size.
Once the dough has risen, divide it into two. Preheat your oven to 500 degrees. Working one at a time, shape it into a rectangle. Start with the small side and tightly roll it up. Pinch the edges together and use your hands to rock or roll it out to make it longer. Place the loaf on a baking sheet lined with parchment paper. About two inches from the top, make an angled cut with kitchen scissors, ensuring that you don't cut all the way through the loaf. Move the cut piece to the left and then make another cut below it. Move that piece to the right and continue making cuts and moving pieces until you reach the end of the loaf. Repeat with the second loaf.
Bake at 500 degrees with plenty of steam in the first 10 minutes. I use a spray bottle filled with water to spray the oven walls and loaves to create steam. Be careful to not spray your oven window or it could shatter. Bake for about 20-25 minutes until the loaves are golden brown and sound hollow when tapped. Let them cool for about 30 minutes before you tear into them.
Source: Cook Street School of Culinary Arts